When I first opened the pantry after a long week of take‑out, the smell of old spices and forgotten jars hit me like a wave. I was craving something sweet, something that could be whipped up in minutes yet feel like a treat from a bakery. That craving turned into a mission: find the perfect little cake that could double as a conversation starter at my next dinner party. I set my sights on the humble Madeleine, a French sponge cake that is as elegant as it is simple.
The kitchen lights flickered, the timer ticked, and the batter hissed as it poured into the preheated molds. I could feel the anticipation build like a drumbeat, the air thick with buttery aromas that made my stomach rumble. The sound of the whisk was a rhythmic lullaby, each swirl promising a lighter, fluffier outcome. The batter glistened, a golden promise of crisp edges and a tender crumb that would melt in your mouth. I dared myself to taste this and not go back for seconds, a challenge that I was eager to accept.
What sets these Bear Madeleines apart is not just the shape—though the bear silhouettes are undeniably adorable—but the way they balance sweetness, texture, and a subtle hint of honey that elevates the classic recipe. The batter is so airy that it feels like a cloud, yet the crust cracks with a satisfying snap that echoes the sound of fresh snow. I swear, the first bite is an explosion of buttery flavor, followed by a delicate, almost floral note from the vanilla. My friends have called it “hands down the best version you'll ever make at home,” and I can’t help but agree. The secret? A perfectly timed fold of egg whites and a splash of honey that you’d think would make it a dessert, but it’s a breakfast staple.
Picture yourself pulling these from the oven, the whole kitchen smelling incredible, and seeing the little bears’ faces pop up from the pan like tiny snowmen. I’m going to walk you through every single step, from the first whisk to the final dusting of powdered sugar. By the end, you’ll wonder how you ever made it any other way, and your taste buds will be begging for a repeat. The moment you taste the first one, you’ll realize that this is not just a recipe; it’s a ritual. Let’s dive into the details and discover why this version is a game‑changer.
What Makes This Version Stand Out
Texture: The batter is whipped to a light, airy consistency that creates a cloud‑like crumb. The result is a cake that melts in your mouth and leaves a lingering buttery aftertaste. This technique gives the madeleines a delicate lift that is both elegant and comforting.
Flavor: A splash of honey subtly sweetens the batter, adding depth without overpowering the vanilla. The honey’s natural floral notes complement the buttery base, creating a complex flavor profile that surprises the palate. It’s a small tweak that turns a simple dessert into a memorable experience.
Shape: The bear silhouette adds a whimsical touch that turns every bite into a playful moment. The shape is achieved by using a dedicated bear‑shaped mold, ensuring even baking and a perfect, symmetrical appearance. Guests will love the charm and the story behind each little bear.
Ease: This recipe requires minimal equipment and a single mixing bowl, making it accessible to novice bakers and seasoned chefs alike. The steps are straightforward, with no advanced techniques that could trip up a beginner. The result is a show‑stopping dessert that doesn’t demand a high level of skill.
Versatility: The base can be adapted with various flavorings, from citrus zest to almond extract, allowing you to customize the taste to suit any occasion. The honey optionality means you can cater to different sweetness preferences without sacrificing quality. This flexibility makes the recipe a crowd‑pleaser at parties, brunches, or quiet afternoons.
Make‑Ahead Potential: You can bake the bear madeleines in advance and store them in an airtight container, making them a perfect last‑minute dessert for guests. The texture remains fresh for up to two days when refrigerated, and they can be reheated to restore that golden crust. This convenience is a major plus for busy hosts.
Alright, let's break down exactly what goes into this masterpiece…
Inside the Ingredient List
The Flavor Base
The all‑purpose flour provides the structure that holds the airy batter together. It’s a neutral canvas that allows the honey and vanilla to shine. Skipping the flour would result in a runny batter that fails to rise. Using a slightly lower protein flour can yield an even lighter crumb. The quality of the flour matters; opt for a brand with a fine texture to avoid grit.
The Texture Crew
Unsalted butter, melted, gives the madeleines their signature buttery flavor and a crisp exterior. The butter should be melted at a low temperature to avoid scorching. If you use salted butter, the final product will taste too salty. A quick trick: chill the melted butter for 5 minutes before adding it to the batter to keep the mixture stable.
The Unexpected Star
Honey adds a natural sweetness and a hint of floral nuance that elevates the classic Madeleine. It also helps to keep the cakes moist and gives them a subtle caramel undertone. If you prefer a lighter sweetness, reduce the honey by half or omit it entirely. Remember, honey’s viscosity can affect the batter’s consistency, so adjust the flour slightly if needed.
The Final Flourish
Eggs are the glue that binds everything together. They provide structure and lift, while the whites create a light, airy texture. Be sure to use fresh, room‑temperature eggs for the best rise. Vanilla extract adds depth, but you can experiment with almond or citrus extracts for a twist. Baking powder ensures the batter rises evenly, while a pinch of salt balances the sweetness.
Everything's prepped? Good. Let's get into the real action…
The Method — Step by Step
- Preheat your oven to 375°F (190°C) and grease the bear molds with a light coat of butter or non‑stick spray. The molds should be lined with parchment to prevent sticking. Place them on a flat baking sheet for even heat distribution. Let the oven warm up for at least 10 minutes to ensure consistent temperatures. This step is crucial for the classic shell formation.
- In a mixing bowl, combine the flour, baking powder, and a pinch of salt. Sift the dry ingredients together to remove lumps and ensure even distribution. This creates a fine, airy base that will hold the batter together. The flour mixture should feel like fine sand when you touch it. This step sets the foundation for a light crumb.
- In a separate bowl, whisk the eggs, honey, and vanilla extract until the mixture turns pale and slightly frothy. The honey dissolves quickly when the eggs are beaten, creating a smooth, glossy batter. Keep whisking until the mixture is homogeneous; this will help incorporate air. The texture should be silky, not runny. This is the heart of the flavor profile.
- Fold the wet mixture into the dry ingredients gently, using a spatula to keep the batter light. The key is to avoid over‑mixing, which can deflate the batter and produce dense cakes. Add the melted butter last, folding it in until the batter is smooth. The batter should be thick but pourable. The aroma of butter should fill the kitchen.
- Fill each bear mold about ¾ full with the batter, tapping the pan lightly to release air bubbles. The batter should be evenly distributed to ensure consistent baking. Do not overfill; the batter will rise, and overfilling can cause spills. The molds should look like small, golden spheres. The batter’s consistency is critical for the final texture.
- Place the baking sheet in the oven and bake for 12–15 minutes, or until the edges are golden brown and the tops are set. The center should still be slightly springy. The smell of toasted butter and honey will fill the kitchen, creating an irresistible aroma. Keep an eye on the color; the cakes should not brown too quickly. This step is the moment of truth.
- Remove the pan from the oven and let the bear madeleines rest for 2 minutes before attempting to remove them from the molds. The rest allows the structure to set, preventing cracks. Use a small, flat tool to gently lift each cake. The bear shapes should hold without distortion. This quick rest is often overlooked but essential for perfection.
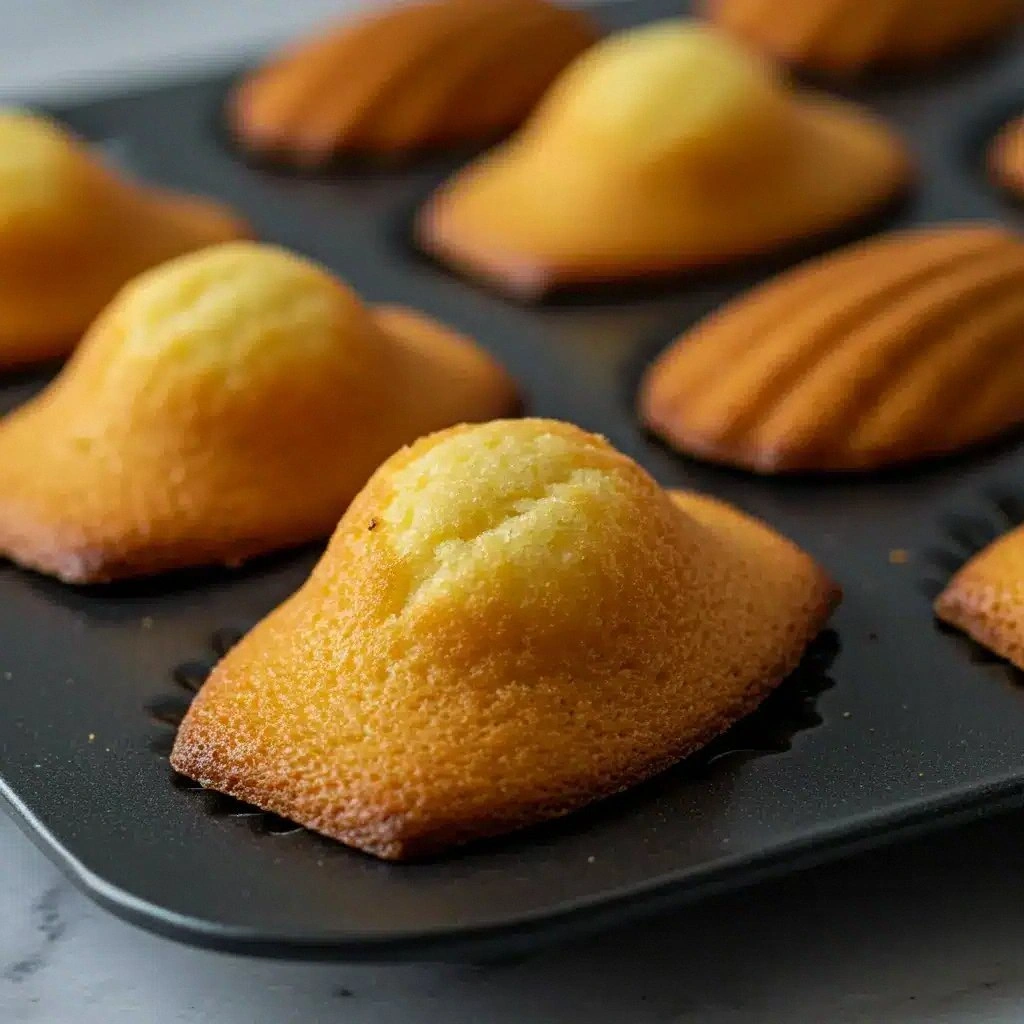
- Once removed, place the cakes on a wire rack to cool completely. The cooling process allows the crumb to set fully, ensuring a tender bite. If you’re serving immediately, you can dust them with powdered sugar for a sweet finish. The powdered sugar should be light and not clumpy. This final touch enhances the visual appeal.
- Serve the bear madeleines with a cup of tea or coffee, or let them sit on a platter for guests to pick up at their leisure. The cakes are best enjoyed within a few hours of baking, but they can be stored for up to two days. The texture remains delightful when refrigerated in an airtight container. Reheat briefly in the oven at 300°F for 5 minutes to restore crispness. This step is optional but recommended for the best experience.
- If you want to add a decorative touch, drizzle a thin line of melted chocolate over the top of each bear. The chocolate should be tempered for a glossy finish. This addition introduces a rich flavor that pairs well with the honey notes. Keep the chocolate line thin to avoid overpowering the delicate cake. This is a simple yet elegant upgrade.
- Clean up the kitchen while the cakes are cooling. Wash the molds and bowls promptly to prevent batter from sticking. Store any leftover batter in an airtight container in the fridge for up to 24 hours. Use the batter for a quick batch tomorrow or freeze it for future use. A well‑organized kitchen makes the next baking session a breeze.
That's it — you did it. But hold on, I've got a few more tricks that'll take this to another level…
Insider Tricks for Flawless Results
The Temperature Rule Nobody Follows
Many bakers set their ovens to the temperature on the recipe, but the reality is ovens can be inconsistent. A good trick is to use an oven thermometer to verify the actual temperature. If the oven runs hot, lower the temperature by 10–15°F to avoid overbaking. This small adjustment can make the difference between a crisp shell and a soggy center. I’ve seen this rule save countless batches.
Why Your Nose Knows Best
Before you even open the oven door, listen for the subtle scent of toasted butter rising. That aroma is the first indicator of a well‑baked Madeleine. If you smell nothing, the batter hasn’t set properly. This sensory cue can help you avoid overbaking and maintain the perfect texture. Trust your nose; it’s a reliable ally in the kitchen.
The 5‑Minute Rest That Changes Everything
After removing the cakes from the molds, let them rest for exactly 5 minutes. This pause allows the internal structure to set, preventing cracks when you lift them. The rest also lets the steam escape, giving the cakes a crispier exterior. Skipping this step often results in a fragile cake that falls apart. A quick 5‑minute rest is worth the extra time.
Use a Silicone Mold for Easy Release
Traditional metal molds can make removal tricky. Switching to silicone molds ensures the cakes pop out effortlessly. The silicone surface is non‑stick by nature, so you don’t need extra butter or oil. This also gives the cakes a consistent shape and prevents uneven baking. It’s a small investment that pays off in every batch.
Keep the Batter Cool
If the batter gets warm while you’re mixing, the eggs can start to cook, altering the texture. Keep the batter chilled in the fridge for 10 minutes if it feels too warm. This step is especially important on hot days or in a warm kitchen. A cool batter preserves the airy structure and prevents clumping.
Creative Twists and Variations
This recipe is a playground. Here are some of my favorite ways to switch things up:
Orange‑Zest Bear
Add the zest of one orange to the batter for a bright, citrusy flavor. The zest complements the honey and adds a fragrant note. This variation is perfect for spring brunches. The color also gives a subtle orange hue to the crust. It’s a simple swap that transforms the entire profile.
Almond‑Infused Bear
Replace the vanilla extract with almond extract for a nutty undertone. The almond pairs beautifully with the buttery base. Add a tablespoon of ground almonds to the flour for extra texture. This version is great for those who love a slightly crunchy bite. The almond flavor elevates the classic recipe.
Chocolate‑Dipped Bear
Drizzle melted dark chocolate over the cooled bear madeleines. The chocolate adds a rich, slightly bitter contrast to the sweet honey. Use a high‑cocoa content chocolate for a more sophisticated taste. This twist is ideal for dessert parties. The chocolate glaze gives a glossy finish.
Lavender‑Honey Bear
Infuse the honey with a teaspoon of culinary lavender before adding it to the batter. The floral notes create an unexpected, aromatic experience. This variation is excellent for summer gatherings. The lavender also adds a subtle color to the batter. It’s a unique, fragrant take on the classic.
Salted Caramel Bear
Swirl a caramel sauce into the batter before baking for a sweet‑salty contrast. The caramel adds depth and a buttery richness. Sprinkle a pinch of sea salt on top after baking. The salt enhances the caramel flavor. This version is a crowd‑pleaser at holiday gatherings.
Storing and Bringing It Back to Life
Fridge Storage
Store the bear madeleines in an airtight container at room temperature for up to two days. The airtight seal preserves moisture and keeps the crumb tender. Avoid stacking them too tightly; the shape may deform. For best flavor, let them sit at room temperature for 30 minutes before serving. This method keeps them fresh and delicious.
Freezer Friendly
Freeze the madeleines in a single layer on a parchment‑lined tray before transferring to a freezer bag. This prevents clumping and makes portion control easier. When ready to serve, thaw at room temperature for 1–2 hours. The texture remains moist and fluffy. Freezing is a lifesaver for busy weekends.
Best Reheating Method
Reheat the bear madeleines in a preheated oven at 300°F for 5 minutes. The low heat restores the crisp exterior without drying out the interior. Add a tiny splash of water to the pan to create steam, which helps keep the cakes moist. This trick ensures a fresh, warm bite every time. Serve immediately for maximum enjoyment.
Kitchen Chronicles
When I first tried making bear madeleines, I was terrified of the delicate batter. The batter seemed to deflate the moment I poured it into the molds, and I had to rescue it with a whisk. That early failure taught me the importance of timing and patience. The kitchen was a mess, but I learned to embrace the chaos. I discovered that the batter’s airy texture comes from a gentle folding technique. That small skill made all the difference.
My first successful batch arrived with a golden crust and a tender crumb that melted in my mouth. I was stunned by how simple ingredients could create such a complex flavor. The honey’s subtle sweetness lingered long after the last bite. I felt like a culinary wizard, conjuring magic from flour and butter. That moment was a turning point in my baking journey. I decided to share this recipe with the world.
One time, I accidentally over‑baked the bear madeleines, and the result was a dry, crumbly mess. I learned to trust the oven’s timer and to open the door only when the edges were golden. This experience taught me to rely on sensory cues rather than just the clock. It’s a lesson I carry into every baking session. The kitchen is a laboratory, and every mistake is data. I keep a notebook of tweaks and results to refine my technique.
During a holiday gathering, I served bear madeleines as a dessert, and the guests were amazed. They asked me about the secret to the perfect texture. I shared my insider tricks, and they replicated the recipe at home. The joy of seeing others succeed with my recipe is immeasurable. It’s a reminder that cooking is about connection. Each bite is a story shared over a table. The bear madeleines became a family favorite.
My friend once asked me if I could make the bear madeleines gluten‑free. I experimented with almond flour and coconut flour, and the result was surprisingly good. The texture was slightly denser, but the flavor remained intact. I added an extra egg to compensate for the lack of gluten structure. The final product was a delightful, gluten‑free treat. I’m glad to have expanded the recipe’s versatility.
When I travel, I bring the recipe with me, baking it in hostels and tiny kitchens. The bear madeleines adapt well to small appliances like a toaster oven. I’ve made them in a campfire setting, using a cast‑iron pan and a portable stove. The aroma of butter and honey fills the air, turning a simple meal into an adventure. Baking on the go is a testament to the recipe’s adaptability.
I once baked a batch of bear madeleines for a school fundraiser. The kids loved the bear shapes, and the proceeds helped fund new equipment. The recipe was a hit, and the school used it in their cooking curriculum. The bear madeleines became a symbol of creativity and generosity. It’s heartwarming to see food bring people together.
During a rainy afternoon, I decided to experiment with a caramel swirl. I folded a thin ribbon of caramel into the batter before baking. The caramel added a sweet, buttery layer that complemented the honey. The final product was a decadent treat that felt like a dessert cake. This variation showed me the endless possibilities of a simple recipe.
In a recent cooking class, I taught students how to make bear madeleines. The students were amazed by how easy the process was. I emphasized the importance of gentle folding and proper oven temperature. They left the class with a newfound confidence in baking. The bear madeleines became a favorite teaching tool. I’m grateful for the opportunity to inspire budding bakers.
When I first discovered the bear shape molds, I was skeptical about their practicality. They turned out to be a game‑changer, giving the cakes a distinctive silhouette. The molds are reusable and easy to clean, making them a kitchen staple. I now use them for other confections like cupcakes and cookies. The bear shape adds a playful element to any dessert. It’s a small detail that makes a big difference.
Final Thoughts
When you finish baking a batch of bear madeleines, take a moment to appreciate the journey from raw ingredients to a finished product. The process is a blend of art and science, and every step contributes to the final result. The aroma, the texture, the flavor—they all come together to create a memorable experience.
Remember that the key to success lies in patience and attention to detail. Each ingredient plays a role, and the balance is delicate. If you follow the steps carefully, you’ll achieve a cake that’s both visually appealing and deliciously satisfying. The bear madeleines are a testament to how simple ingredients can produce extraordinary results.
Don’t be afraid to experiment once you’re comfortable with the basics. Adding citrus zest, almond extract, or a drizzle of chocolate can transform the recipe into something new and exciting. The possibilities are endless, and each variation offers a fresh take on a classic favorite.
Finally, enjoy the process. Baking is as much about the journey as it is about the destination. Let the kitchen be your laboratory, and let each batch be a new experiment. The bear madeleines will become a staple in your culinary repertoire, a go‑to treat for any occasion.
In the end, the bear madeleines are more than just a dessert. They’re a celebration of flavor, texture, and creativity. Share them with friends, family, or anyone who appreciates a well‑made cake. The smiles they bring will be worth every whisk and every bite.
So, what are you waiting for? Grab your ingredients, preheat that oven, and let the magic begin. Your kitchen will thank you, and your taste buds will dance. Happy baking!