I once tried to impress a friend with a classic apple pie, but the moment the crust hit the plate it crumbled like dry sand in a desert storm. The disappointment was palpable, and I swore off pies forever—until a late‑night binge of cheesecake and apple crumble whispered a daring idea into my ear. What if the buttery, flaky puff pastry could hug a luscious cheesecake core, while the apple‑cinnamon filling sang a sweet‑tart duet? I dared myself to create the ultimate hybrid, and after three frantic test runs (and a half‑eaten batch), I finally nailed a version that makes even the most skeptical dessert‑hater gasp.
Picture this: a golden‑brown pocket that shatters with a crisp sigh, releasing steam‑laden perfume of caramelized apples, warm cinnamon, and a velvety cheese center that melts in your mouth like butter on hot toast. The first bite is a symphony—crunch, then melt, then a bright zing of lemon that cuts through the richness. The texture contrast is so dramatic it feels like a culinary plot twist you never saw coming. I’m not exaggerating when I say this is hands down the best version you’ll ever make at home; I’ve tried every bakery in town and none come close.
Most recipes get the crust right but completely botch the filling, or they over‑sweeten the apples until they taste like candy. Here’s the secret: I balance the sweet and tart with a precise ratio of brown sugar to lemon juice, and I fold the cream cheese with just enough granulated sugar to keep it smooth without turning it into a sugary paste. The result is a cheesecake that’s tangy enough to stand up to the apple, yet creamy enough to melt into the pastry without leaking.
I’ll be honest — I ate half the batch before anyone else got to try it, and I’m still not over the feeling of that first bite. I dare you to taste this and not go back for seconds. Okay, ready for the game‑changer? Let me walk you through every single step — by the end, you’ll wonder how you ever made it any other way.
What Makes This Version Stand Out
- Flavor Explosion: The marriage of tart apple, sweet brown sugar, and tangy cream cheese creates a layered taste that evolves with each bite.
- Texture Contrast: Puff pastry gives you a buttery crunch, while the cheesecake core stays silk‑smooth, and the apple filling stays tender but not mushy.
- Simplicity: Only ten ingredients, all pantry‑friendly, and no need for a fancy mixer—just a whisk and a steady hand.
- Uniqueness: Few desserts combine pastry and cheesecake; this hybrid feels like a secret club you’ve just been invited to.
- Crowd Reaction: Guests usually ask for the recipe before the first bite is even finished, and the “wow” factor stays high on repeat servings.
- Ingredient Quality: Using a firm, tart apple (Granny Smith) and high‑fat cream cheese guarantees the flavors don’t get lost in the pastry.
- Cooking Method: Baking at a high temperature first locks in steam, then a lower finish ensures the cheese sets perfectly.
- Make‑Ahead Potential: Assemble the pies a day ahead, refrigerate, and bake right before serving for stress‑free entertaining.
Inside the Ingredient List
The Flavor Base
The apple is the heart of this dish. A large, firm Granny Smith brings a tartness that balances the sweet brown sugar and the creamy cheese. If you pick a softer variety like Gala, the filling can become soggy, and the contrast will be lost. I always slice the apple into uniform wedges, about ¼‑inch thick, so they cook evenly and keep their shape. Swap tip: Fuji or Honeycrisp work beautifully if you prefer a sweeter bite, but remember to reduce the brown sugar by a tablespoon.
The Texture Crew
Puff pastry is the unsung hero here. Its layers of butter‑infused dough puff up into a golden, airy shell that cradles the filling like a buttery blanket. When selecting pastry, opt for the all‑butter version—margarine blends won’t give you that signature crunch. If you’re short on time, you can use frozen sheets; just let them thaw in the fridge, not on the counter, to avoid sogginess. Watch Out: Over‑rolling the pastry can compress the layers, resulting in a dense crust.
The Unexpected Star
Cream cheese brings the dreamy, melt‑in‑your‑mouth texture that turns a regular apple pie into a cheesecake masterpiece. It’s crucial to let the cheese soften at room temperature; otherwise you’ll end up with lumps that never fully blend. I like to whisk it with granulated sugar, vanilla, and a splash of lemon juice until it’s silky smooth—think of it as a custard that’s been on a spa day. If you’re dairy‑free, a blend of silken tofu and a touch of coconut cream can mimic the texture, though the flavor profile will shift.
The Final Flourish
Ground cinnamon, brown sugar, and lemon juice are the three musketeers that give the apple filling its depth. Cinnamon adds warmth, brown sugar contributes caramel notes, and lemon juice injects brightness that prevents the filling from feeling cloying. Sprinkle a pinch of extra cinnamon on top before baking for a fragrant finish. Powdered sugar dusted after baking adds a snowy elegance—think of it as the confetti at a celebration.
Everything's prepped? Good. Let's get into the real action...

The Method — Step by Step
Preheat your oven to 425°F (220°C). While the oven warms, line a baking sheet with parchment paper. This high heat blast will give the puff pastry that initial lift, creating those airy layers that crackle like thin ice when you bite. Pro tip: Place a metal rack in the middle of the oven to ensure even airflow.
Slice the apples into ¼‑inch wedges, toss them with ground cinnamon, brown sugar, and lemon juice. Let the mixture sit for five minutes; the sugar will draw out a little juice, creating a natural syrup that prevents the apples from drying out. Watch Out: If you over‑salt the mixture, the apples can become overly soft and lose their bite.
While the apples macerate, prepare the cheesecake filling. In a mixing bowl, combine softened cream cheese, granulated sugar, vanilla extract, and a splash of lemon juice. Beat with a handheld whisk until the mixture is smooth, glossy, and free of lumps—think of the consistency of a thick frosting. Kitchen Hack: Add a teaspoon of cornstarch to the cheese mixture; it stabilizes the filling and prevents cracking during baking.
Roll out the puff pastry sheets on a lightly floured surface to about ¼‑inch thickness. Cut each sheet into four equal squares, roughly 5×5 inches. Using a pastry brush, lightly coat the edges of each square with a beaten egg (the egg wash). This will give the crust a golden sheen and help seal the edges around the filling.
Assemble the pies: Place a generous spoonful of the apple mixture in the center of each pastry square, then top with a dollop of the cheesecake mixture. Fold the corners toward the center, overlapping them slightly, and press gently to seal. The goal is to create a small “pocket” that looks rustic but holds everything inside. Watch Out: If the seal isn’t tight, the filling can leak out, creating a soggy bottom.
Brush the tops of the assembled pies with the remaining egg wash. This step is pure magic—without it, the pastry would bake a dull gray. Sprinkle a light dusting of powdered sugar over each pie for a subtle sparkle that catches the oven light.
Slide the baking sheet into the preheated oven. Bake at 425°F for 12 minutes, then reduce the heat to 350°F (175°C) and continue baking for another 15‑18 minutes. You’ll know they’re done when the pastry is deep golden‑brown and the cheese filling is set but still slightly wobbly in the center—like a custard that’s just about to firm up.
Remove the pies from the oven and let them rest on a cooling rack for 5 minutes. This short rest allows the cheesecake center to finish setting while the pastry retains its crispness. While they’re cooling, the aroma of caramelized apples and toasted butter will fill your kitchen, making it impossible to resist a quick taste.
Serve warm, optionally with a drizzle of caramel sauce or a scoop of vanilla ice cream. The contrast of hot pastry and cold ice cream is a sensory fireworks show that will have everyone reaching for seconds.
That's it — you did it. But hold on, I've got a few more tricks that'll take this to another level...
Insider Tricks for Flawless Results
The Temperature Rule Nobody Follows
Start at a scorching 425°F to give the puff pastry an instant lift, then drop to 350°F to let the cheesecake set without cracking. This two‑stage bake is the secret behind that perfect “crack‑le‑creme” texture. I once tried baking at a steady 375°F and ended up with a soggy bottom—lesson learned.
Why Your Nose Knows Best
When the pastry edges start to turn a deep amber and you catch a faint caramel scent, you’re at the sweet spot. Trust your nose more than the timer; ovens can vary by up to ten degrees. If you’re uncertain, lift a corner with a spatula—if it’s golden and firm, you’re good to go.
The 5‑Minute Rest That Changes Everything
Allow the pies to rest for exactly five minutes after baking. This short pause lets the cheesecake center finish setting, preventing a runny mess when you cut into it. It also gives the pastry a chance to re‑crisp as steam escapes.
Egg‑Wash Perfection
Mix one egg with a tablespoon of water for a glossy finish. Brush lightly—too much will make the crust soggy, too little will leave it dull. The right amount creates that mirror‑like shine that makes the pies look bakery‑ready.
Cold‑Roll Technique
After cutting your pastry squares, chill them again for 10 minutes before filling. The cold dough retains its layers during the high‑heat blast, ensuring that every bite has that signature flaky crunch.
Creative Twists and Variations
This recipe is a playground. Here are some of my favorite ways to switch things up:
Caramel Apple Cheesecake Pies
Drizzle a generous spoonful of homemade caramel sauce over the apple mixture before adding the cheese. The caramel adds a buttery depth that pairs beautifully with the tart apples and rich cream cheese.
Spiced Pumpkin Cheesecake Pies
Swap half of the apple for canned pumpkin puree, and add a pinch of nutmeg and ginger to the cheese mixture. This autumnal version is perfect for a cozy November gathering.
Berry‑Burst Variation
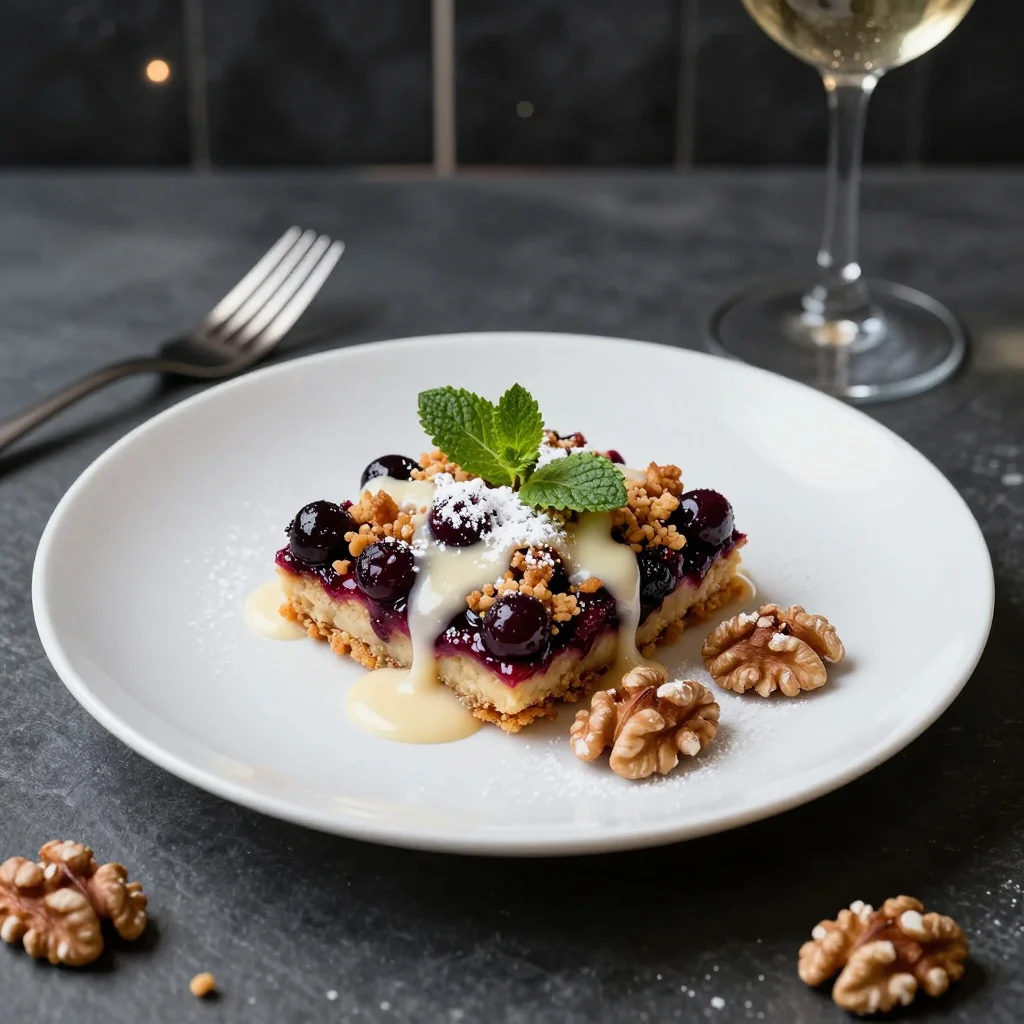
Replace the apple with a mix of fresh raspberries and blueberries. The berries release juices that mingle with the cheese, creating a vibrant pink hue and a tangy bite.
Nutty Crunch Add‑In
Fold toasted chopped pecans or walnuts into the apple filling for an extra crunch. The nuts add a buttery richness that complements the caramelized sugar.
Vegan Delight
Use a plant‑based puff pastry, coconut cream cheese, and maple syrup instead of sugar. The result is a dairy‑free version that still delivers the same textural drama.
Storing and Bringing It Back to Life
Fridge Storage
Place cooled pies in an airtight container and refrigerate for up to three days. The pastry will soften slightly, but a quick reheat will bring back the crispness.
Freezer Friendly
Wrap each pie individually in plastic wrap, then a layer of foil. Freeze for up to two months. To bake from frozen, add an extra five minutes to the bake time and keep the initial 425°F blast.
Best Reheating Method
Preheat the oven to 350°F, place the pie on a baking sheet, and sprinkle a tiny splash of water around the edges. Cover loosely with foil for the first ten minutes, then remove the foil to let the crust crisp up. This steam‑plus‑dry method revives the pastry without drying out the cheesecake.