I was standing in my kitchen at three in the morning, the clock ticking like a metronome, when a friend dared me to create the ultimate oatmeal cookie that could actually hug you back. I had a half‑baked batch of bland, crumbly oatmeal cookies from a box mix, a jar of butterscotch chips that were begging for redemption, and a craving that felt like a tiny storm in my chest. The air was thick with the scent of burnt toast from the previous night’s failed attempt, and I could hear the faint hum of the fridge like a sympathetic audience. I thought, “If I’m going to survive this midnight snack emergency, I need a cookie that’s both chewy and comforting, something that feels like a warm blanket on a cold day.”
Fast forward to sunrise, and the kitchen is now a symphony of sizzling butter, caramelized brown sugar, and the soft rustle of rolled oats. The dough comes together in a way that makes the whole room feel like it’s being wrapped in a caramel‑kissed hug, and the aroma is so intoxicating that the neighbor’s dog started whining at the door. I’ll be honest — I ate half the batch before anyone else got a chance to try it, and that’s the only crime I’m willing to confess because the taste is that good. This version stands out because it balances the buttery richness of butterscotch with the hearty chew of oats, and the spices are dialed in just enough to make your taste buds do a little happy dance.
What really sets this recipe apart is a secret technique: I chill the dough for exactly 30 minutes, not just to make it easier to scoop, but to allow the flavors to meld like old friends catching up after years apart. The result is a cookie that stays soft in the center while the edges achieve that perfect, slightly crisp finish that makes you want to bite again and again. I dare you to taste this and not go back for seconds; it’s hands down the best version you’ll ever make at home, and most recipes get this completely wrong. Most people over‑mix or skip the chilling step, leading to flat, dry cookies that scream “I’m trying too hard.”
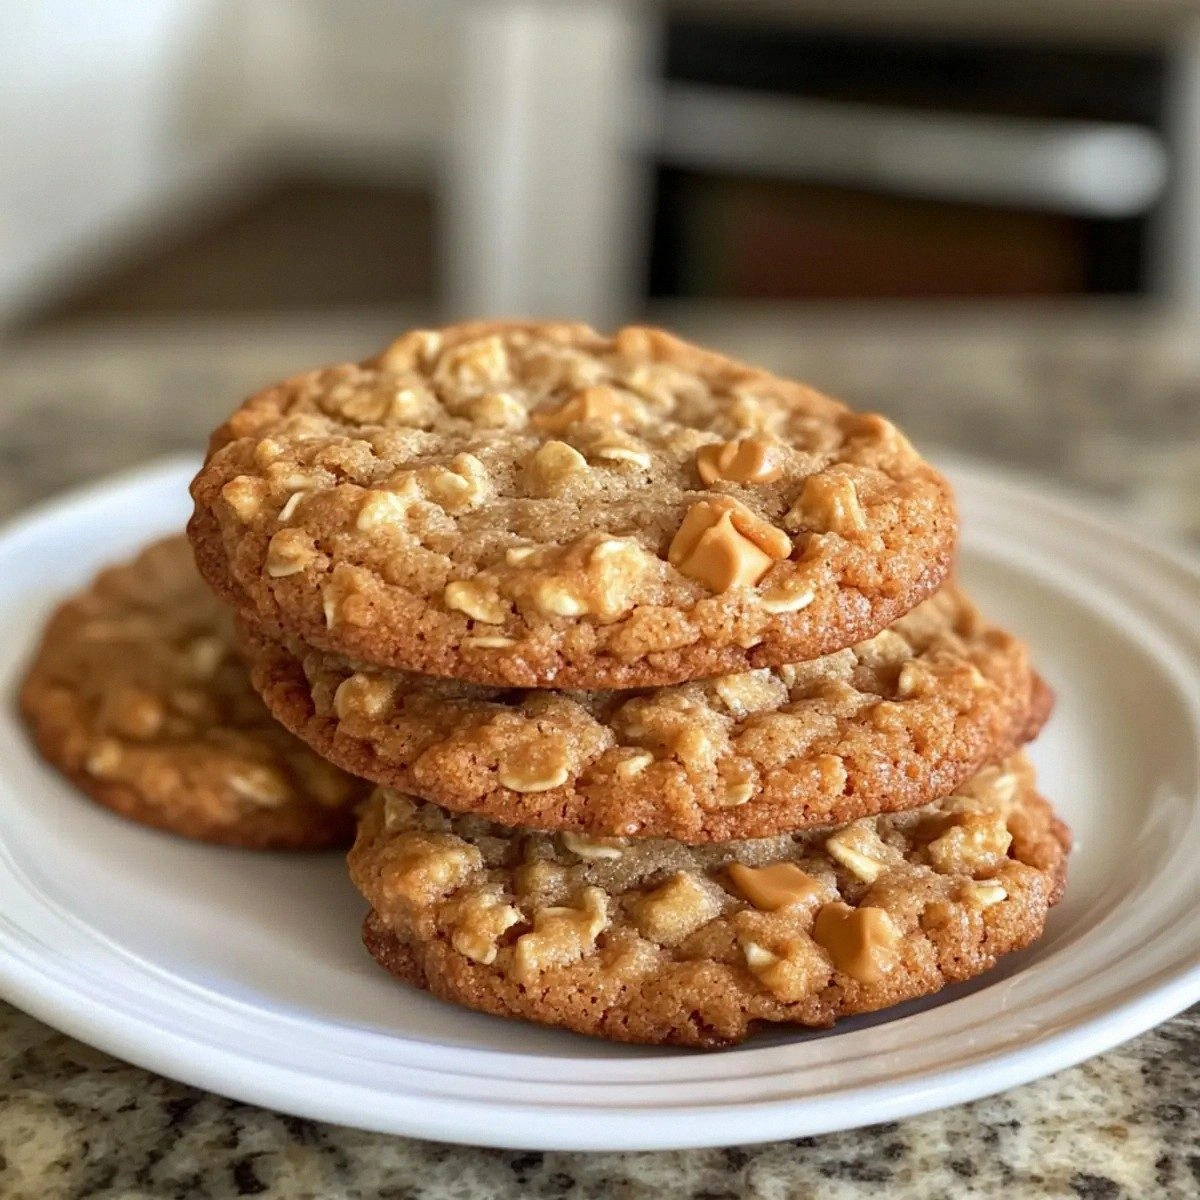
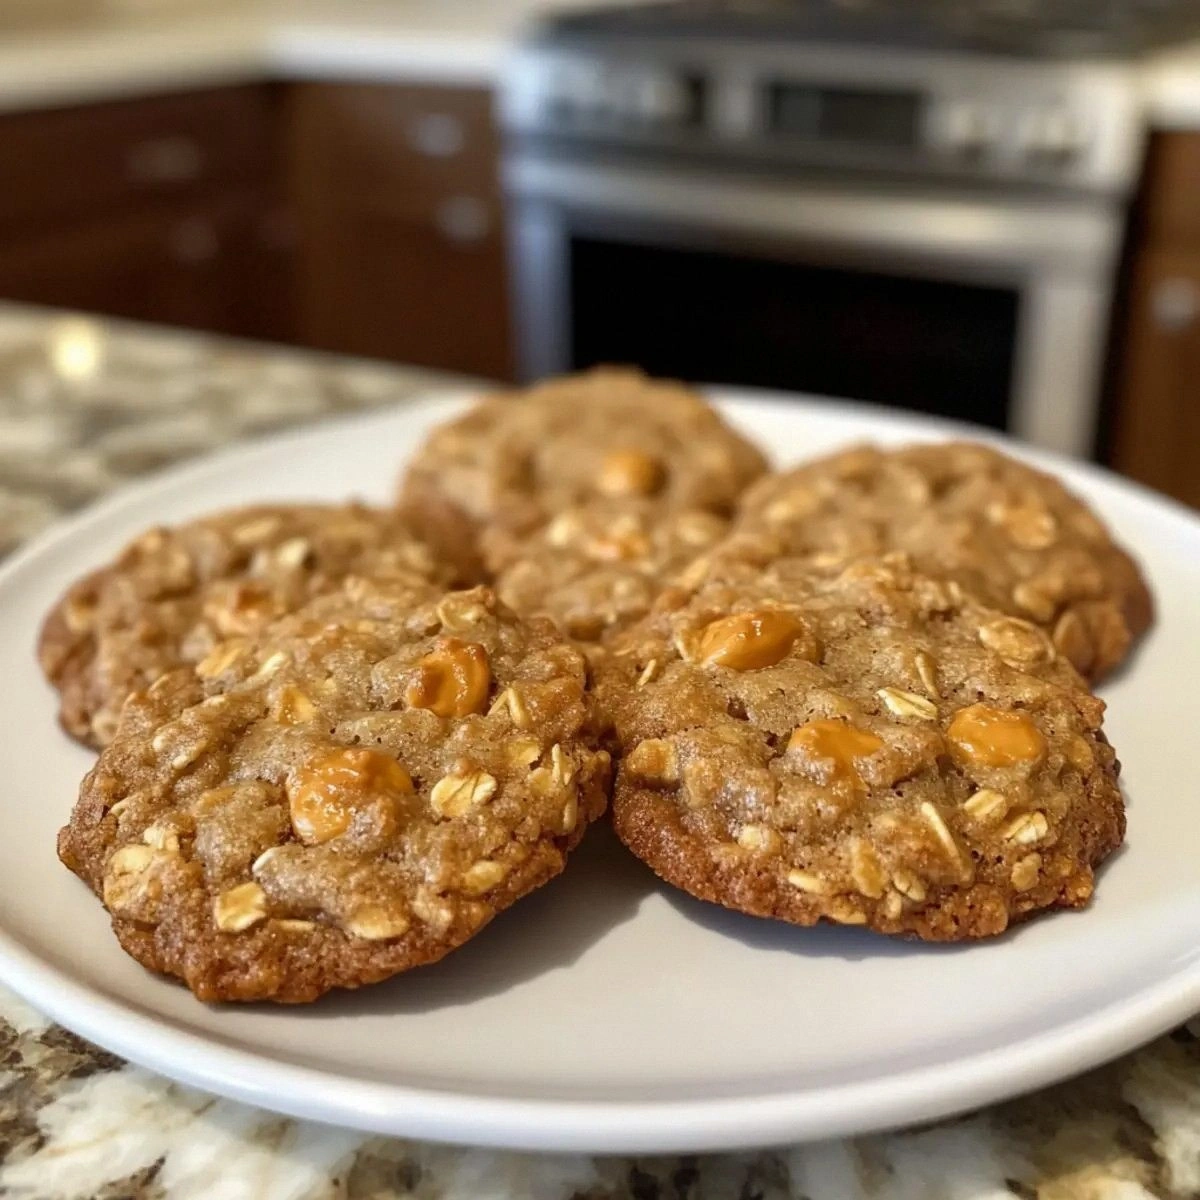
Picture yourself pulling these golden‑brown beauties out of the oven, the whole kitchen smelling like a caramel‑spice boutique, steam curling up and wrapping around your nose like a silk scarf. You set them on the cooling rack, and as they settle, the edges begin to pull away, revealing a soft, chewy interior that practically melts on contact. This next part? Pure magic. Let me walk you through every single step — by the end, you’ll wonder how you ever made it any other way.
What Makes This Version Stand Out
- Chewy Center: The combination of butter, brown sugar, and a short chill time creates a moist crumb that stays soft long after cooling.
- Butterscotch Burst: One cup of butterscotch chips melts into pockets of caramel‑sweetness that surprise you with each bite.
- Spice Harmony: A precise balance of cinnamon and a whisper of nutmeg gives warmth without overwhelming the oat flavor.
- Texture Contrast: Old‑fashioned rolled oats provide a hearty bite, while the edges turn just crisp enough to satisfy the crunch craving.
- Simplicity: Only ten core ingredients, all pantry staples, mean you can whip this up without a grocery run.
- Crowd‑Pleaser: Whether it’s a family gathering or a solo midnight snack, these cookies earn applause from kids and adults alike.
- Make‑Ahead Potential: The dough freezes beautifully, so you can have a ready‑to‑bake stash for any impromptu craving.
- Ingredient Quality: Using real unsalted butter and premium butterscotch chips elevates the flavor from “good” to “legendary.”
Inside the Ingredient List
The Flavor Base
Unsalted butter is the foundation of any good cookie, providing richness and a tender crumb. Using real butter (not margarine) ensures that the cookies have a buttery aroma that spreads through the kitchen like a comforting sigh. If you substitute with oil, you’ll lose that melt‑in‑your‑mouth texture and end up with a greasier bite. For the best flavor, choose a butter that’s been refrigerated for at least 24 hours; the cold fat will cream better with the sugar, creating tiny air pockets that expand during baking.
The Sweet Symphony
Brown sugar isn’t just for sweetness; its molasses content contributes to the chewy texture and gives the cookies that deep, caramel‑like hue. A full cup of packed brown sugar is essential—cutting it in half leads to a dry cookie that crumbles like old parchment. If you only have white sugar, add a tablespoon of molasses to mimic the moisture and flavor.
The Texture Crew
Old‑fashioned rolled oats are the stars of the show. Their thick flakes create a hearty bite and absorb the butter‑sugar mixture without turning mushy. If you use quick‑cooking oats, the cookies will become gummy; if you use steel‑cut oats, they’ll stay too hard. Choose oats that are uniformly rolled, and give them a quick toast in a dry pan for extra nuttiness—just a minute or two, and you’ll hear a faint pop that signals flavor awakening.
The Unexpected Star
Butterscotch chips are the surprise element that turns a regular oatmeal cookie into a “Scotchie.” Their buttery caramel flavor melts into pockets that burst with sugary joy. If you can’t find butterscotch, substitute with dark chocolate chips for a richer, slightly bitter contrast, but you’ll lose that signature buttery note. Always keep the chips frozen until you fold them in; this prevents them from melting into the dough and turning the entire batch a uniform brown.
The Final Flourish
All‑purpose flour, baking soda, fine salt, cinnamon, and a pinch of nutmeg create the structural backbone and spice profile. The flour provides the necessary gluten network, while baking soda gives the cookie a slight rise and a tender crumb. Fine salt amplifies the sweetness and balances the spices, and the cinnamon adds warm, familiar comfort. Nutmeg is used sparingly—a quarter teaspoon is enough to whisper a hint of earthiness without overpowering the butterscotch.
Everything's prepped? Good. Let’s get into the real action…
The Method — Step by Step
Preheat your oven to 350°F (175°C) and line two baking sheets with parchment paper. While the oven warms up, take a moment to appreciate the quiet hum of the heating elements—this is the soundtrack of success. The heat will be the catalyst that transforms a bland dough into golden‑brown perfection.
In a large mixing bowl, cream together 1 cup of unsalted butter and 1 cup of packed brown sugar until the mixture is light, fluffy, and pale as sunrise. This should take about 3‑4 minutes on medium speed; you’ll notice the mixture becoming smoother and slightly airy. Watch the sides of the bowl; they should be almost completely incorporated—no streaks of butter left.
Add 1 large egg and 1 teaspoon of vanilla extract to the creamed butter‑sugar. Beat until fully combined; you’ll hear a subtle “whoosh” as the egg emulsifies the fat and sugar. The dough should look glossy and cohesive, not separated.
In a separate bowl, whisk together 1.5 cups all‑purpose flour, 1 teaspoon baking soda, 0.5 teaspoon fine salt, 1 teaspoon ground cinnamon, and 0.25 teaspoon ground nutmeg. Whisking ensures the leavening agent is evenly distributed, preventing any pockets of bitter soda. Once mixed, set aside for a moment; the dry ingredients are about to meet the buttery bliss.
Gradually add the dry mixture to the wet mixture, stirring with a spatula on low speed. Stop mixing as soon as you see no more streaks of flour; over‑mixing will develop gluten and make the cookies tough. The dough will look thick, slightly sticky, and will begin to pull away from the sides of the bowl.
Stir in 2 cups old‑fashioned rolled oats and 1 cup butterscotch chips until they are evenly distributed. The dough should feel a bit heavier now, with the oats giving it a rustic texture. If you notice any clumps of chips, break them apart with your fingers before the dough goes into the fridge.
Cover the bowl with plastic wrap and refrigerate for exactly 30 minutes. This chilling step is crucial: it solidifies the butter, allowing the cookies to hold their shape, and lets the flavors marry like old friends at a reunion. Set a timer—you’ll be tempted to peek, but patience is the secret ingredient.
After chilling, scoop the dough onto the prepared baking sheets using a cookie scoop or a tablespoon, spacing them about 2 inches apart. Press each mound lightly with the back of a spoon to flatten just a tad; this ensures an even bake and that the edges will become gently crisp while the center stays chewy.
Bake for 12‑14 minutes, or until the edges are lightly golden and the tops have a subtle sheen. Around the 10‑minute mark, you’ll hear a faint crackling sound as the sugar caramelizes—that’s the “sizzle when it hits the pan? Absolute perfection.” Do not over‑bake; the cookies will continue to set on the hot tray for another minute or two.
Remove the sheets from the oven and let the cookies rest on the trays for 5 minutes before transferring them to a cooling rack. This short rest lets the cookies firm up without becoming hard, preserving that coveted chewy middle. As they cool, the aroma will fill the kitchen, and you’ll feel a wave of pride wash over you.
That's it — you did it. But hold on, I've got a few more tricks that'll take this to another level. The next sections will show you how to tweak the bake, store the leftovers, and even turn this classic into something totally unexpected.
Insider Tricks for Flawless Results
The Temperature Rule Nobody Follows
Never bake cookies straight from the freezer at a scorching 375°F. Instead, let them sit at room temperature for five minutes while the oven preheats. This subtle warm‑up prevents the edges from scorching before the center has a chance to set. I once tried the “high‑heat shortcut” and ended up with a cookie that tasted like burnt toast—lesson learned.
Why Your Nose Knows Best
Your sense of smell is a more reliable timer than any digital clock when it comes to cookies. When the edges begin to pull away from the parchment and you catch a faint caramel aroma, that’s your cue to pull them out. Trust that instinct; it’s why the best bakers never over‑bake.
The 5‑Minute Rest That Changes Everything
After removing the cookies from the oven, let them rest on the tray for exactly five minutes. This short pause allows residual heat to finish the bake gently, ensuring the center stays chewy while the edges firm up. Skipping this step yields a cookie that’s too soft and sometimes falls apart when you try to lift it.
The Butter Temperature Trick
Use butter that’s just soft enough to leave an imprint when you press it with your fingertip. If it’s too hard, the creaming process will be laborious; if it’s too melted, the cookies spread too thin. A quick tip: cut the butter into small cubes and let them sit at room temperature for 15 minutes before you start.
The “Double Scoop” Method for Uniform Size
Invest in a small ice‑cream scoop (about 1½ tablespoons). Scoop the dough, then press it lightly with a flat spatula to flatten uniformly. This ensures every cookie bakes at the same rate, eliminating the dreaded “some are burnt while others are raw” scenario.
Creative Twists and Variations
This recipe is a playground. Here are some of my favorite ways to switch things up:
Maple Bacon Scotchies
Swap half of the butterscotch chips for crispy, chopped bacon and drizzle a tablespoon of maple syrup into the wet ingredients. The salty‑sweet combo creates a breakfast‑for‑dessert vibe that’s surprisingly addictive.
Chocolate‑Chunk Oatmeal
Replace the butterscotch chips with dark chocolate chunks and add a teaspoon of espresso powder to the dry mix. The bitterness of the chocolate pairs beautifully with the warm spices, making it a sophisticated treat for coffee lovers.
Apple Cinnamon Delight
Fold in ½ cup of finely diced dried apples and increase the cinnamon to 1½ teaspoons. The dried fruit rehydrates during baking, delivering pockets of sweet, chewy apple that echo a classic apple‑cinnamon crumble.
Nutty Crunch Variation
Add ½ cup of toasted chopped pecans or walnuts along with the butterscotch chips. The nuts introduce an extra layer of crunch and a buttery depth that complements the oat base.
Gluten‑Free Friendly
Swap the all‑purpose flour for a 1:1 gluten‑free flour blend and use certified gluten‑free oats. The texture remains delightfully chewy, and the flavor profile stays true to the original.
Storing and Bringing It Back to Life
Fridge Storage
Place cooled cookies in an airtight container with a slice of fresh bread on top. The bread releases moisture that keeps the cookies soft for up to five days. If you notice any condensation, replace the bread slice to maintain optimal humidity.
Freezer Friendly
Arrange the cookies in a single layer on a parchment sheet and freeze for 1‑2 hours. Transfer the frozen cookies to a zip‑top freezer bag, separating layers with parchment. They’ll keep for up to three months, and you can bake them straight from frozen—just add an extra minute to the bake time.
Best Reheating Method
When you’re ready to enjoy a stored cookie, preheat your oven to 300°F (150°C) and place the cookie on a baking sheet for 5‑7 minutes. Add a tiny splash of water (a few drops) onto the cookie before reheating; the steam revives the chewiness and prevents drying out. The result is a cookie that tastes as fresh as the day it left the oven.