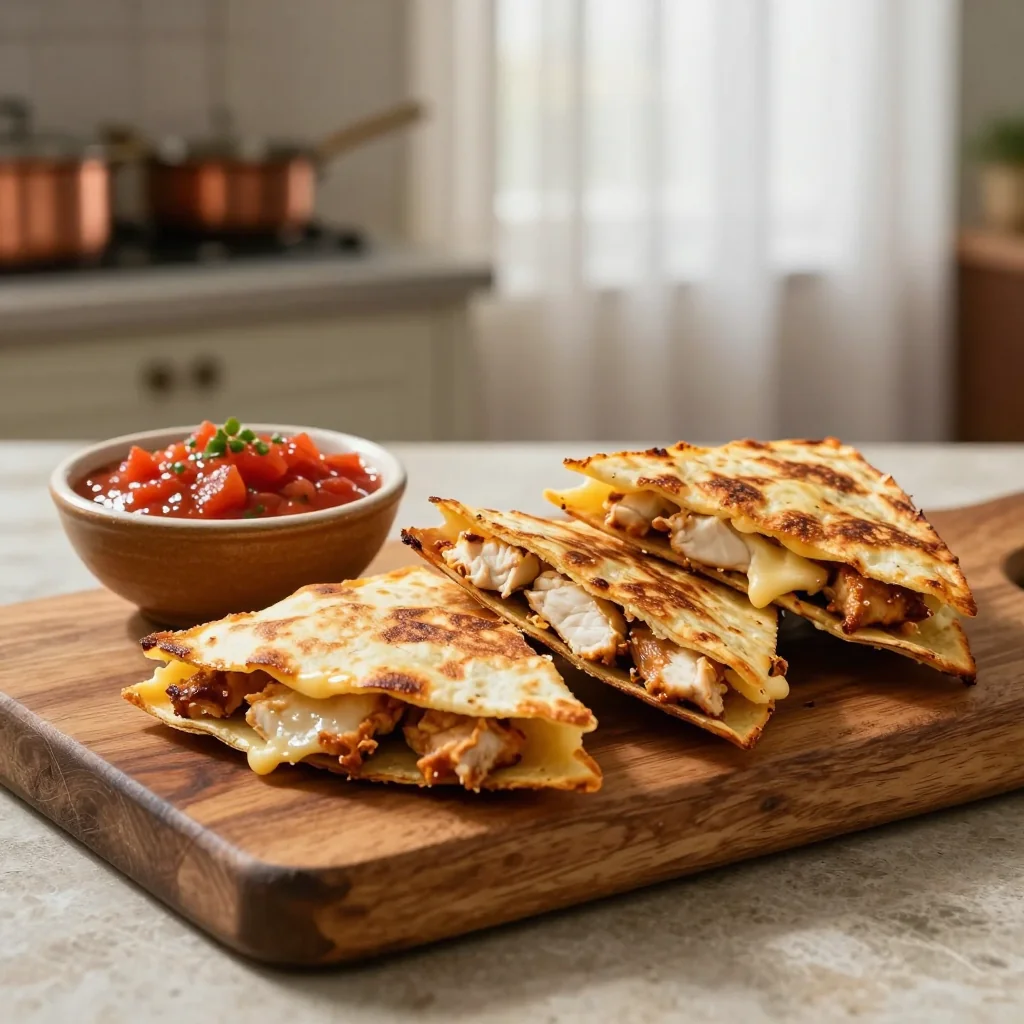
Crispy baked quesadillas stuffed with juicy chicken and served with a fresh, tangy salsa dip that will brighten any dinner table.
When I first visited a bustling street market in Oaxaca, the aroma of sizzling chicken wrapped in warm corn tortillas drifted through the air, mingling with the bright scent of fresh cilantro and lime. I was instantly transported back to childhood evenings when my family gathered around the kitchen, sharing stories over plates of homemade tacos. That memory sparked the idea for a baked version that captures the same smoky, comforting flavors while offering a hands‑off cooking experience.
Chicken quesadillas are a staple in Mexican cuisine, celebrated for their simplicity and versatility. By baking them instead of pan‑frying, we achieve an even golden crust without the need for constant attention, and the accompanying salsa dip adds a burst of freshness that balances the richness of melted cheese and tender chicken.
In this guide, you’ll discover how to layer flavors, manage textures, and master the perfect bake. I’ll walk you through each step, from seasoning the chicken to arranging the quesadillas for a flawless finish, ensuring that every bite delivers a harmonious blend of smoky, cheesy, and tangy notes.
Let’s dive in together and create a dish that will become a new family favorite, perfect for weeknight dinners or casual gatherings.
🌟 Why This Recipe Will Win Your Heart
This baked quesadilla combines convenience, bold flavor, and a beautiful presentation that makes any meal feel special.
- ✨ One‑Pan Simplicity: All the components bake together on a single sheet, reducing cleanup and allowing you to focus on flavor rather than dishes.
- ✨ Balanced Nutrition: Lean chicken breast provides high‑quality protein while the cheese adds calcium; the salsa contributes vitamin C and antioxidants.
- ✨ Customizable Heat: Adjust the amount of chili powder or add fresh jalapeños to suit mild or fiery palates without altering the core recipe.
- ✨ Crowd‑Pleaser: The golden, crispy edges and melty interior appeal to both kids and adults, making it an ideal party starter.
- ✨ Time‑Saving: With a total cook time under an hour, you can prepare a wholesome dinner even on busy weekdays.
- ✨ Versatile Serving: Serve with a side salad, guacamole, or even a light quinoa pilaf for a complete, balanced meal.
🥗 The Ingredients
📝 Complete Ingredient List
For the Chicken Filling:
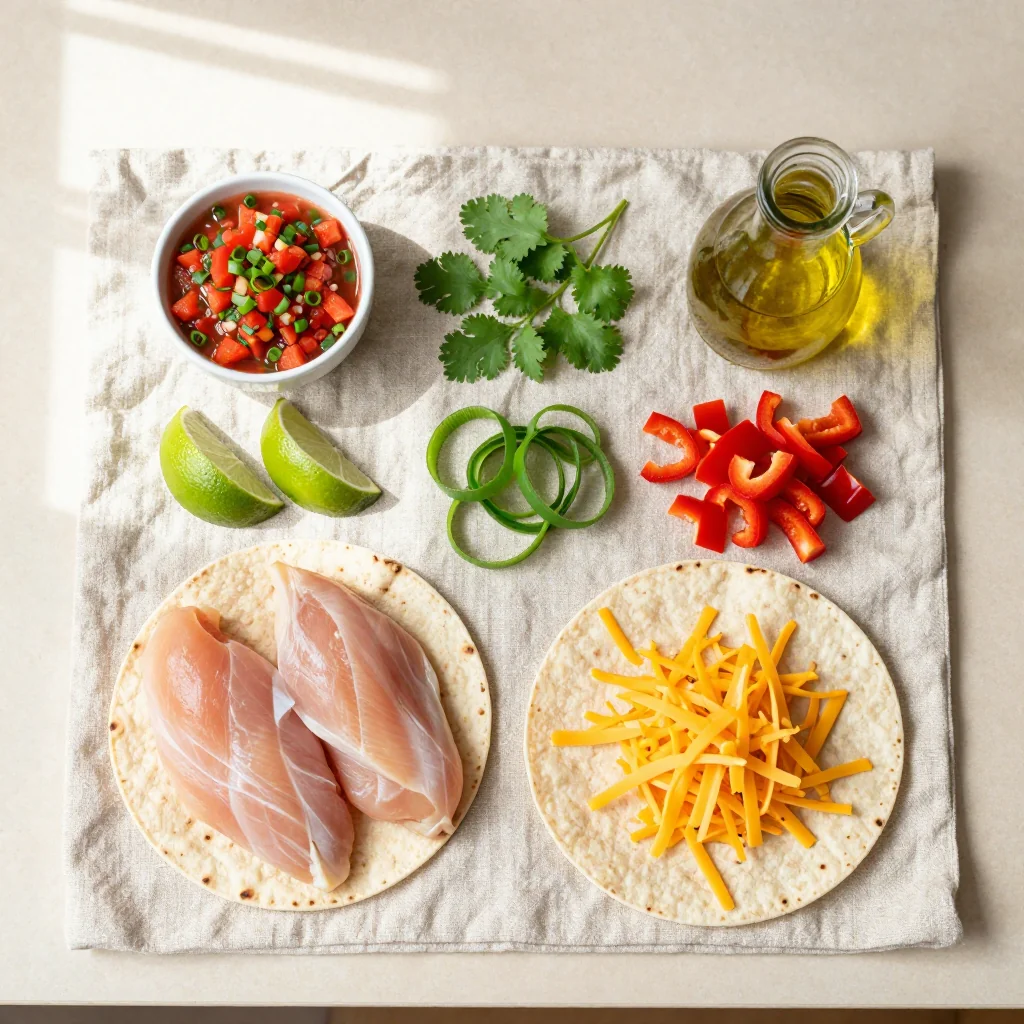
- 500 g boneless skinless chicken breast (cut into thin strips)
- 1 tbsp olive oil
- 1 tsp ground cumin
- 1 tsp chili powder
- 2 cloves garlic, minced
- ½ cup red bell pepper, diced
For the Quesadilla Assembly:
- 8 large whole‑wheat tortillas
- 200 g shredded Monterey Jack cheese
- 100 g shredded cheddar cheese
- 1 tbsp fresh lime juice
- 2 tbsp fresh cilantro, chopped
For the Salsa Dip:
- 400 g canned diced tomatoes
- 1 small red onion, finely chopped
- 1 clove garlic, minced
- 1 tsp ground cumin
- ½ tsp smoked paprika
- 1 tbsp fresh lime juice
- 2 tbsp cilantro, chopped
- to taste salt and pepper
🔍 Focus on Key Ingredients
Chicken Breast
Choosing fresh, boneless, skinless chicken breast ensures a lean protein source that stays tender when baked. Pat the pieces dry before seasoning to help the spices adhere and to avoid excess moisture that could make the quesadillas soggy.
Monterey Jack & Cheddar Cheese
The blend of Monterey Jack’s meltability with cheddar’s sharpness creates a balanced cheese pull and a depth of flavor. For a dairy‑free version, substitute with shredded vegan mozzarella.
Fresh Lime Juice
Lime juice brightens the dish, cutting through the richness of the cheese and chicken. Adding it both to the filling and the salsa amplifies the citrus notes, making each bite refreshing.
🔄 Quick Substitutions
| If you don’t have... | Use instead... |
|---|---|
| Whole‑wheat tortillas | Regular flour tortillas |
| Monterey Jack | Shredded mozzarella |
| Fresh cilantro | Fresh parsley (different flavor) |
👨🍳 Step‑by‑Step Instructions
Follow these clear steps to assemble, bake, and serve the perfect chicken quesadillas with a vibrant salsa dip.
📋 Phase 1: Preparation & Mise en Place
First we’ll season and cook the chicken, then prep the salsa while the oven heats.
Season and Cook the Chicken
In a bowl, toss the chicken strips with olive oil, cumin, chili powder, and minced garlic. Heat a large skillet over medium‑high heat, add the chicken, and sauté for 5‑7 minutes until lightly browned and cooked through. Transfer the cooked chicken to a plate and set aside.
Prepare the Salsa Dip
Combine diced tomatoes, finely chopped red onion, minced garlic, cumin, smoked paprika, lime juice, and chopped cilantro in a mixing bowl. Season with salt and pepper to taste. Stir gently and let the flavors meld while the oven preheats.
🔥 Phase 2: Assembly & Baking
Now we’ll build the quesadillas and bake them to golden perfection.
Preheat the Oven
Set the oven to 200 °C (390 °F) and line a baking sheet with parchment paper. This temperature ensures a crisp exterior without drying out the filling.
Assemble the Quesadillas
Lay a tortilla on the prepared sheet, sprinkle a mixture of shredded Monterey Jack and cheddar (about ¼ cup), add a generous portion of the cooked chicken, a spoonful of the diced bell pepper, and a drizzle of lime juice. Fold the tortilla in half, pressing lightly. Repeat for the remaining tortillas.
Bake Until Golden
Place the assembled quesadillas in the oven and bake for 12‑15 minutes, flipping halfway through, until the cheese is fully melted and the tortillas are crisp and lightly browned.
✨ Phase 3: Finishing Touches & Serving
Final checks and plating for a restaurant‑style presentation.
Check Doneness
Ensure the cheese is fully melted and the tortillas have a uniform golden‑brown color. If any spots are still pale, give them an extra 2‑3 minutes.
Plate the Quesadillas
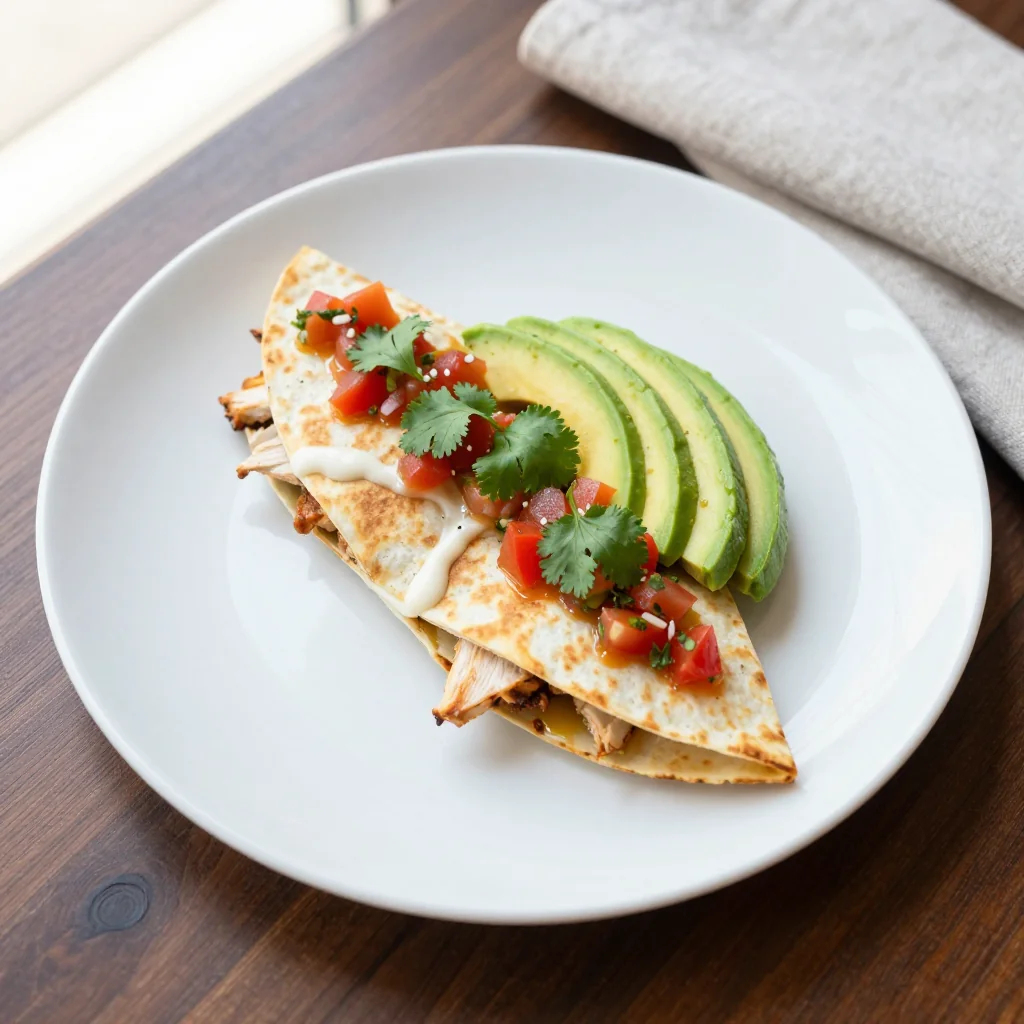
Cut each quesadilla into three wedges, arrange on a platter, and garnish with a sprinkle of fresh cilantro and a lime wedge on the side.
Serve with Salsa Dip
Place a generous bowl of the prepared salsa dip in the center of the platter. Encourage diners to dip each wedge for an extra burst of flavor.
💡 Expert Tips & Tricks
🛒 Choosing the Right Ingredients
Opt for organic chicken breasts when possible; they tend to be more tender and free from added hormones. Look for tortillas that are pliable yet sturdy enough to hold the filling without tearing. Fresh cilantro should have bright green leaves without yellowing, and the lime should feel heavy for its size, indicating juiciness.
🔪 Preparation Techniques
Slice the chicken against the grain to keep the fibers short, which results in a more tender bite. When dicing the bell pepper, keep the pieces uniform so they cook evenly and distribute flavor throughout the quesadilla. Use a micro‑plane to zest the lime before juicing for an extra aromatic boost.
🌡️ Mastering the Bake
The key to a perfect crust is a hot oven and a short, intense bake. If you prefer a softer interior, lower the temperature to 180 °C (350 °F) and extend the bake by 5 minutes, but watch closely to prevent sogginess.
🍽️ Presentation & Service
Arrange the wedges in a fan shape on a large white platter to showcase the golden edges. Add a drizzle of crema or a dollop of guacamole for extra richness. A small bowl of extra salsa on the side invites guests to customize their bites.
🏆 Pro Tips
Professional chefs focus on precision, flavor layering, and texture control to elevate a simple dish into something unforgettable.
- 🎯 Brine the Chicken: Soak the chicken strips in a light brine (1 tbsp salt per litre of water) for 15 minutes before seasoning. This increases moisture retention, resulting in juicier meat after baking.
- 🎯 Use a Pizza Stone: Placing the baking sheet on a pre‑heated pizza stone transfers heat more evenly, creating an ultra‑crisp tortilla surface.
- 🎯 Double‑Layer Cheese: Sprinkle a thin layer of cheese on the bottom tortilla, add the filling, then top with another thin cheese layer before folding. This prevents the cheese from leaking out during baking.
- 🎯 Finish with a Char: After baking, briefly broil the quesadillas for 1‑2 minutes to add a subtle char that mimics a traditional grill.
- 🎯 Balance Acidity: Taste the salsa after mixing; if it feels too sharp, add a pinch of sugar to balance the acidity without compromising freshness.
- 🎯 Rest Before Cutting: Allow the baked quesadillas to rest for 3 minutes after removing from the oven. This lets the cheese set slightly, making clean cuts easier.
"The secret to great Mexican food is simplicity and respect for each ingredient's natural flavor." — Chef Enrique Olvera
🔄 Variations & Adaptations
This recipe is a flexible canvas; feel free to experiment with proteins, spices, and dietary tweaks.
🥬 Vegetarian / Vegan Version
Replace the chicken with roasted cauliflower florets or seasoned black beans. Use a vegan cheese blend and a plant‑based tortilla. The salsa dip remains unchanged, providing the same bright flavor.
- Substitution 1: 400 g cauliflower florets, tossed in olive oil, cumin, and smoked paprika.
- Substitution 2: 1 can (400 g) black beans, rinsed and lightly mashed.
🌶️ Flavor Variations
Explore different cultural twists by swapping spices or adding complementary ingredients.
Spicy Version
Increase chili powder to 2 tsp, add 1 finely chopped jalapeño to the chicken mixture, and finish the salsa with a dash of hot sauce.
Mediterranean Version
Incorporate crumbled feta cheese, chopped sun‑dried tomatoes, and a sprinkle of oregano in the filling. Serve with a side of tzatziki instead of salsa.
Asian Fusion Version
Marinate the chicken in soy sauce, ginger, and a touch of honey. Use a blend of mozzarella and shredded Asian cheese, and serve with a quick cucumber‑soy dipping sauce.
⚠️ Dietary Adaptations
Gluten‑Free
Swap whole‑wheat tortillas for certified gluten‑free corn tortillas. Ensure the salsa dip contains no added thickeners that contain gluten.
Lactose‑Free
Use lactose‑free shredded cheese or a dairy‑free cheese alternative. The salsa dip is naturally dairy‑free.
Low‑Calorie
Reduce the cheese amount by half and use low‑fat chicken breast. Serve with a side salad dressed with a light vinaigrette to keep the meal satisfying yet lighter.
👶 Kid‑Friendly Version
Omit the chili powder and use a milder cheese blend like mozzarella only. Cut the quesadillas into small bite‑size triangles and serve with a mild avocado dip for added creaminess.
📦 Storage & Reheating
🧊 Conservation
Refrigerator:
- Duration: 3 days
- Container: Airtight glass container
- Tip: Place a paper towel on top to absorb excess moisture.
Freezer:
- Duration: 2 months
- Method: Wrap each quesadilla individually in parchment, then place in a zip‑top freezer bag.
- Defrosting: Transfer to the refrigerator overnight before reheating.
💡 For best texture, reheat from frozen rather than thawing completely to avoid sogginess.
♨️ Reheating
🔥 Oven (Recommended):
- Preheat to 180 °C (350 °F).
- Place quesadillas on a baking sheet, cover loosely with foil.
- Heat for 10 minutes.
- Remove foil and bake an additional 5 minutes to restore crispness.
⚡ Microwave (Quick):
- Cover with a microwave‑safe lid.
- Heat on medium power for 1 minute.
- Flip and heat for another 30 seconds if needed.
🍳 Skillet:
Heat a non‑stick skillet over medium heat, add a drizzle of oil, and cook each side for 2‑3 minutes until golden and heated through.
🍷 Perfect Pairings
🥗 Side Dishes
- Mexican Street Corn Salad: Grilled corn kernels tossed with mayo, cotija, lime, and cilantro provide a creamy contrast.
- Black Bean & Avocado Salad: The buttery avocado balances the spice while black beans add protein.
- Simple Mixed Greens: Lightly dressed with citrus vinaigrette to refresh the palate.
🍷 Wine / Beverage Pairings
- Rosé (dry): Its bright acidity complements the lime and salsa.
- Light Mexican Lager: The crisp carbonation cuts through the cheese richness.
- Non‑Alcoholic: Sparkling water with a splash of grapefruit juice adds a festive touch.
🍰 To Complete the Meal
Start with a chilled cucumber gazpacho or a fresh mango salsa as an appetizer. For dessert, serve a tropical fruit crumble topped with vanilla ice cream, letting the cool sweetness round off the spicy main course.
❓ Frequently Asked Questions
Q: Can I use rotisserie chicken instead of raw chicken?
Yes, shredded rotisserie chicken works well and saves time. Skip the cooking step, but add a tablespoon of olive oil and the spices to keep the flavor profile consistent.
Q: What if I don’t have a pizza stone?
A standard baking sheet works fine; just preheat it thoroughly. For extra crispness, place the sheet on the middle rack and use the broiler for the final minute.
Q: How can I make the salsa dip less watery?
Drain the canned tomatoes before mixing, or use a fresh tomato that’s been seeded. Adding a teaspoon of tomato paste also thickens the dip without altering flavor.
Q: My quesadillas turned out soggy. What went wrong?
Sogginess often results from excess moisture in the filling. Pat the cooked chicken dry, avoid over‑loading the tortillas, and ensure the oven is fully preheated before baking.
Q: Can I prepare the salsa dip a day ahead?
Absolutely. Store the salsa in an airtight container in the refrigerator; flavors will meld further, enhancing the dip. Bring to room temperature before serving.
Q: Is there a way to make this recipe gluten‑free?
Swap the whole‑wheat tortillas for certified gluten‑free corn tortillas. Verify that any added spices or sauces are gluten‑free, as some commercial blends contain hidden wheat flour.
🎉 Let’s Get Cooking!
These baked chicken quesadillas bring together the comforting familiarity of a classic favorite with the bright, fresh zing of a homemade salsa dip. By following the detailed steps, you’ll achieve a perfectly crisp exterior, a melty cheesy interior, and juicy chicken that’s infused with aromatic spices. The recipe’s flexibility means you can tweak heat levels, swap proteins, or adjust portions with ease, making it suitable for any occasion—from a quick family dinner to a festive gathering.
Remember, the secret lies in preparation: seasoning the chicken well, preheating the oven, and using the portion‑adjuster to scale the recipe without losing balance. I’m confident you’ll love the result, and I can’t wait to see your own creative twists.
Have you tried this recipe?
Leave a comment and rating below! Share your photos on Instagram with #QuesadillaFiesta for a chance to be featured.
Chicken Quesadillas Baked with Salsa Dip
Crispy baked quesadillas stuffed with juicy chicken, melty cheese, and a fresh salsa dip.
📝 Ingredients
Chicken Filling
Quesadilla Assembly
Salsa Dip
👨🍳 Instructions
- 1
Season chicken strips with olive oil, cumin, chili powder, and garlic; sauté until cooked through.
- 2
Mix all salsa dip ingredients in a bowl; let rest while the oven preheats.
- 3
Preheat oven to 200 °C (390 °F) and line a baking sheet with parchment.
- 4
Assemble each quesadilla: tortilla, cheese blend, chicken, bell pepper, lime juice, and cilantro; fold.
- 5
Bake for 12‑15 minutes, flipping halfway, until golden and cheese is melted.
- 6
Check for even browning; add 2‑3 minutes if needed.
- 7
Cut each quesadilla into three wedges and arrange on a platter.
- 8
Serve with a bowl of salsa dip; garnish with extra cilantro and lime wedges.
- 9
Optional: drizzle a little sour cream over the top for added richness.
- 10
Enjoy immediately while hot and crispy!
🥗 Nutrition Facts (per serving)
*Nutritional values are estimates based on standard ingredient brands.
📚 You Might Also Like
Spicy Shrimp Tacos
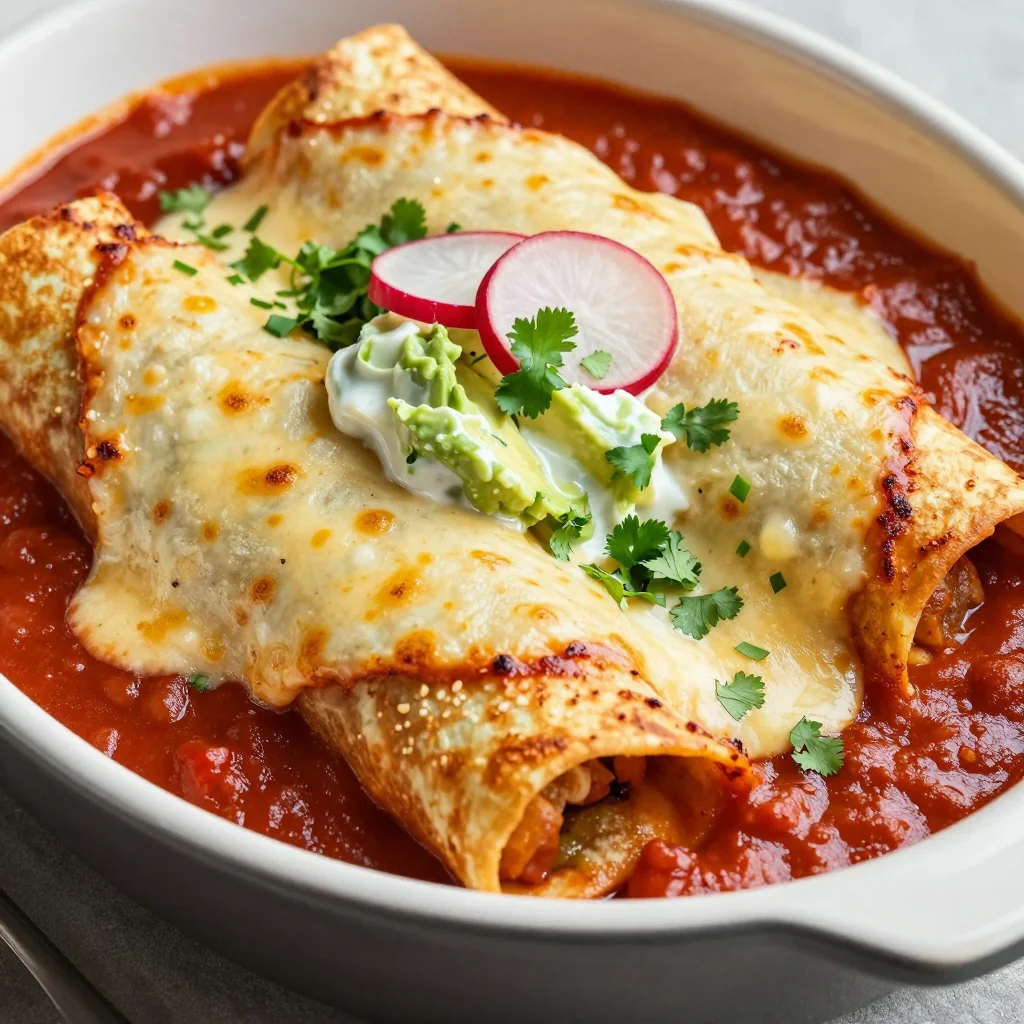
Chicken Enchilada Bake
Veggie Fajita Quesadillas


💬 Comments & Reviews
Leave a Comment
No comments yet. Be the first to share your thoughts!