I remember the night I almost ruined my entire dinner party because I tried to impress my guests with a fancy dessert that turned out more like a science experiment gone wrong. I had a stack of plain cupcakes, a handful of pistachios, and a bottle of rose water, and I thought, “Why not combine them into something that feels like a floral garden in miniature?” The result was a batch of mini rose pies that not only tasted like a sweet, buttery dream but also looked like a bouquet of edible roses. If you’re reading this, you’re probably craving something that’s both elegant and surprisingly simple, and I’m about to show you exactly how to hit that sweet spot.
Picture this: you’re standing in a kitchen that smells of citrus and toasted almond, the oven timer ticking down, and the gentle hum of the blender blending soy milk into a silky base. The sight of the batter—light green from the vegan dye, flecked with pistachio shards—glides into a silicone mold, each cup a tiny canvas waiting to be painted with rose water and powdered sugar. The first bite is a soft, airy crumb that melts like butter, a subtle lemon tang that wakes your palate, and a burst of nutty flavor that lingers like a secret whisper. That’s the kind of sensory fireworks we’re aiming for.
What makes this version stand out isn’t just the ingredients; it’s the way they’re orchestrated. I’ve taken the classic mini rose pie concept and elevated it with a vegan twist, a splash of color, and an unexpected texture that makes every bite a revelation. The pistachios aren’t just a garnish—they’re a crunchy chorus that balances the buttery softness. The rose water is not an afterthought; it’s the heart that carries the entire flavor profile. And the green dye? It’s a visual cue that tells you you’re about to indulge in something that feels both playful and sophisticated.
I dare you to taste this and not go back for seconds. I’ll be honest—after the first bite, I found myself reaching for another, and by the time I finished the last one, the kitchen smelled like a spring garden. This is hands down the best version you’ll ever make at home, and it’s not because of the fancy ingredients alone but because of the method that ensures each mini pie is a perfect balance of sweet, savory, and aromatic. Picture yourself pulling this out of the oven, the whole kitchen smelling incredible, and your guests’ eyes widening as they see these tiny, green‑golden delights. Let me walk you through every single step—by the end, you’ll wonder how you ever made it any other way.
What Makes This Version Stand Out
- Flavor: The subtle lemon twist lifts the sweet base, while the rose water adds a floral depth that is both delicate and unmistakably fragrant.
- Texture: Each bite delivers a soft, airy crumb that melts in your mouth, punctuated by the satisfying crunch of pistachios.
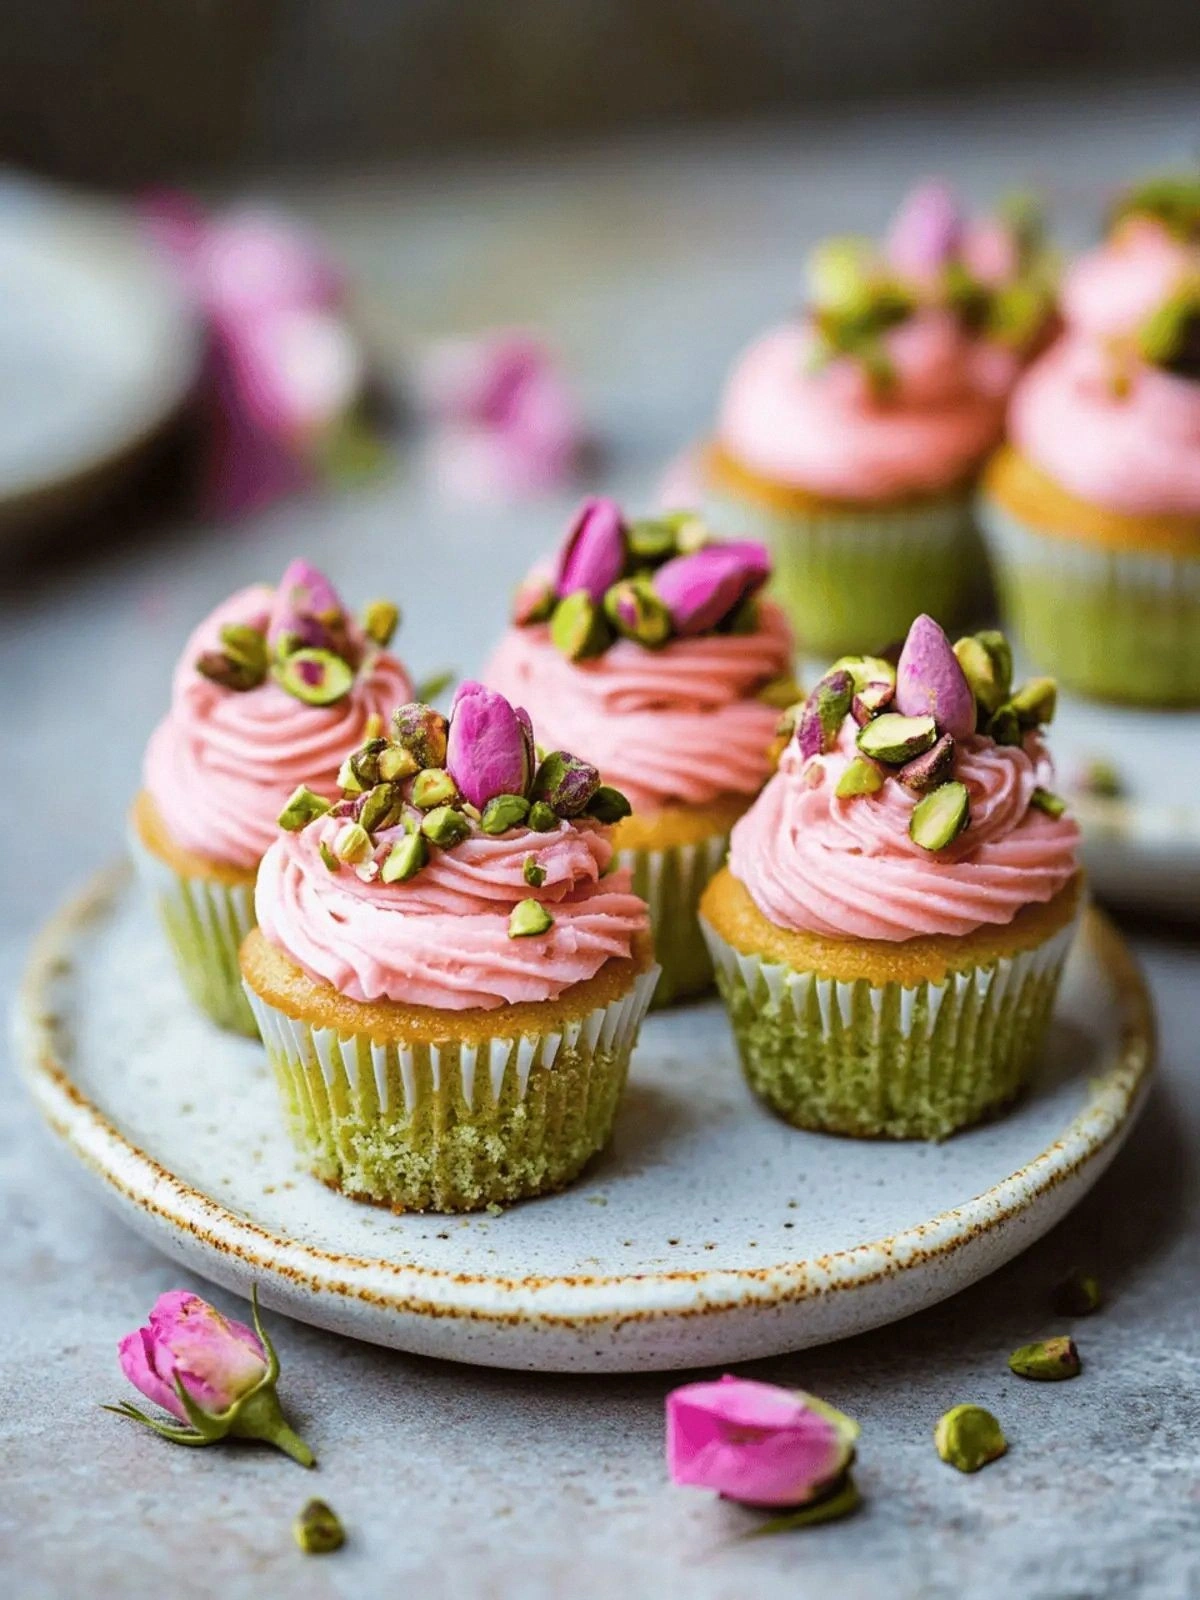
- Color: The green dye gives a fresh, garden‑inspired hue that turns the cupcakes into edible works of art.
- Simplicity: The recipe uses only a handful of pantry staples, making it a go‑to for last‑minute gatherings.
- Uniqueness: Combining rose water with pistachios in a vegan base is a rare twist that sets this recipe apart from standard mini pies.
- Make‑Ahead: These cupcakes can be prepared a day ahead, chilled, and then frosted right before serving, saving you time on the day of the event.
Alright, let’s break down exactly what goes into this masterpiece…
Inside the Ingredient List
The Flavor Base
Soy milk is the backbone of this batter, providing moisture and a neutral flavor that lets the other ingredients shine. If you’re sensitive to soy, a coconut milk or oat milk works just as well, but keep the consistency in check; you want a slightly thick but pourable batter.
Lemon juice is the secret that injects brightness. A half tablespoon may seem small, but it cuts through the sweetness and adds a fresh zing that keeps the flavor profile from becoming cloying. Skip it, and you’ll end up with a flat, syrupy cupcake that lacks personality.
Extra virgin olive oil is the unexpected hero here. It replaces butter entirely, giving the cupcakes a silky mouthfeel while keeping the recipe plant‑based. If you’re looking for a neutral oil, canola or sunflower will do, but the olive oil’s subtle fruitiness enhances the rose water’s floral notes.
The Texture Crew
All-purpose flour is the structural glue. It binds the batter, providing lift and a tender crumb. Don’t substitute whole wheat flour; it would add a denser texture that clashes with the airy base.
Baking powder and baking soda are the leavening powerhouses. They create tiny air pockets that make the cupcakes fluffy. If you only have baking powder, add an extra teaspoon to compensate for the missing soda.
The vegan butter, though not part of the batter, is crucial for the glaze. It creates a glossy finish that mimics the sheen of a real pie crust. Use a cold, solid butter to keep the glaze firm and prevent it from melting too quickly.
The Unexpected Star
Vegan green food dye isn’t just for aesthetics; it signals to your eyes that the cupcakes are fresh and vibrant. Use a high‑quality dye that won’t cloud the batter; a splash of a darker hue can actually make the color pop.
Pistachios are the crunch factor. They’re chopped to small pieces so each bite has a subtle nutty crunch that contrasts the soft crumb. If you prefer a more pronounced nut flavor, toast the pistachios lightly before adding them.
The Final Flourish
Powdered sugar is the sweetener that coats the glaze, giving it a fine, silky texture. It’s also the key to the signature “rose” look—sprinkling it over the cooled cupcakes creates a delicate dusting that resembles petals.
Rose water is the star that brings the entire dish together. A tablespoon is enough to infuse the glaze with a subtle floral aroma without overpowering the other flavors. If you can’t find rose water, a few drops of natural vanilla extract will provide a softer, sweeter note.
Mini dried rose buds add a visual pop and an extra layer of floral nuance. They’re not just decorative; they dissolve slowly, releasing a faintly sweet scent as you bite into the cupcake.
Everything’s prepped? Good. Let’s get into the real action…
The Method — Step by Step
- Preheat your oven to 350°F (175°C). Line a mini muffin tin with silicone cups or paper liners. This step is crucial because a properly lined tin prevents the cupcakes from sticking, making for a cleaner presentation. While the oven warms, gather all your ingredients so you can move smoothly through the process.
- In a medium bowl, whisk together the soy milk, lemon juice, and olive oil until the mixture is smooth. The olive oil will create a silky base, so make sure it’s fully incorporated. At this point, add the vanilla extract, and let the flavors mingle for a minute or two—this helps the vanilla diffuse throughout the batter.
- Sift the flour, baking powder, and baking soda into a separate bowl. Sifting removes clumps and ensures a light, even batter. Sprinkle in the sea salt and vegan green food dye; the dye will give the cupcakes a fresh, garden‑inspired hue. Stir the dry ingredients together until they’re well combined.
- Pour the wet mixture into the dry mixture gradually, stirring gently with a spatula. The batter should be smooth but not overmixed; overmixing can lead to a dense crumb. Once the batter is ready, fold in the chopped pistachios, ensuring they’re evenly distributed for that delightful crunch.
- Fill each mini cup about two-thirds full with the batter. The cupcakes should be slightly domed on top, which helps them rise evenly. Tap the tin gently on the counter to release any air bubbles. This simple step ensures a smooth surface that will look pristine when frosted.
- Bake for 18–20 minutes, or until the tops are lightly golden and a toothpick inserted into the center comes out clean. The smell of toasted almond and citrus should fill your kitchen—this is the moment of truth. Let the cupcakes cool in the tin for 5 minutes before transferring them to a wire rack to cool completely.
- While the cupcakes cool, prepare the glaze. In a small saucepan, melt the vegan butter over low heat until it’s just fluid. Add the powdered sugar, stirring until the mixture is smooth and glossy. The glaze should be thick enough to coat the cupcakes but still pourable. If it’s too thick, add a teaspoon of soy milk to thin it out.
- Drizzle the glaze over the cooled cupcakes, letting it pool slightly at the base. The glaze should create a glossy finish that resembles a miniature pie crust. While the glaze is still wet, sprinkle the rose water over each cupcake, then dust with powdered sugar to form a delicate petal effect. Finally, arrange the mini dried rose buds on top for an extra pop of color and fragrance.
- Once the glaze has set for about 10 minutes, your cupcakes are ready to serve. Arrange them on a platter, and if you have time, garnish the platter with a few extra pistachios and a drizzle of extra rose water. This final touch adds a professional finish that will impress even the most discerning palates.
That's it—you did it. But hold on, I've got a few more tricks that'll take this to another level…
Insider Tricks for Flawless Results
The Temperature Rule Nobody Follows
Many bakers bake mini pies at a high temperature for a short time, but the secret to a light crumb is a steady, moderate heat. Bake at 350°F (175°C) for the full 20 minutes; this allows the batter to rise evenly without developing a hard crust on the outside.
Why Your Nose Knows Best
When the cupcakes are baking, the aroma that fills the kitchen is a reliable indicator of doneness. A subtle, nutty scent with a hint of citrus signals that the cupcakes are ready. If the smell is overpoweringly sweet, they need a few more minutes.
The 5-Minute Rest That Changes Everything
After removing the cupcakes from the oven, let them sit in the tin for 5 minutes before transferring them to a wire rack. This brief rest allows the structure to set, preventing the cupcakes from cracking when they cool.
The Frosting Formula
If you prefer a thicker glaze, add an extra tablespoon of powdered sugar to the butter mixture. This will give the glaze a richer texture that holds better on the cupcakes.
The Rose Water Trick
For a more pronounced floral note, let the rose water sit in the glaze for a minute after mixing. This allows the aroma to infuse fully, giving each cupcake a subtle perfume that lingers.
The Final Dusting
Just before serving, lightly dust the cupcakes with extra powdered sugar. This final touch not only enhances the visual appeal but also adds a slight crunch that complements the soft interior.
Creative Twists and Variations
This recipe is a playground. Here are some of my favorite ways to switch things up:
Citrus Burst
Add a tablespoon of orange zest to the batter for a bright, tangy twist that pairs beautifully with pistachios. The citrus will cut through the sweetness and give the cupcakes an extra layer of freshness.
Chocolate Surprise
Fold in 1/4 cup of unsweetened cocoa powder into the batter for a rich, chocolatey version. Keep the rose water, but reduce it to half a tablespoon to balance the deeper flavor profile.
Nutty Caramel
Replace the powdered sugar glaze with a caramelized almond butter glaze. Drizzle it over the cupcakes after they’ve cooled, then sprinkle with toasted almond slivers for a decadent treat.
Minty Fresh
Swap the green food dye for a few drops of mint extract, and add a handful of fresh mint leaves to the glaze. The mint will complement the rose water, creating a refreshing palate cleanser.
Spiced Delight
Add a pinch of ground cinnamon and nutmeg to the batter for a warm, spiced flavor. This variation works especially well during the fall and winter months, adding a cozy aroma to your dessert table.
Storing and Bringing It Back to Life
Fridge Storage
Store the cupcakes in an airtight container in the refrigerator for up to 3 days. The glaze will firm up slightly, so let them sit at room temperature for 10 minutes before serving to restore their glossy sheen.
Freezer Friendly
For longer storage, wrap each cupcake individually in plastic wrap, then place them in a freezer bag. Freeze for up to 2 weeks. Thaw overnight in the refrigerator, then warm briefly in a 300°F (150°C) oven for 5 minutes to revive the texture.
Best Reheating Method
When reheating, add a splash of water to the glaze to rehydrate it, then drizzle it over the cupcakes again. This simple trick steams the glaze back to perfection, giving each bite the same delightful crunch and sweetness as fresh.