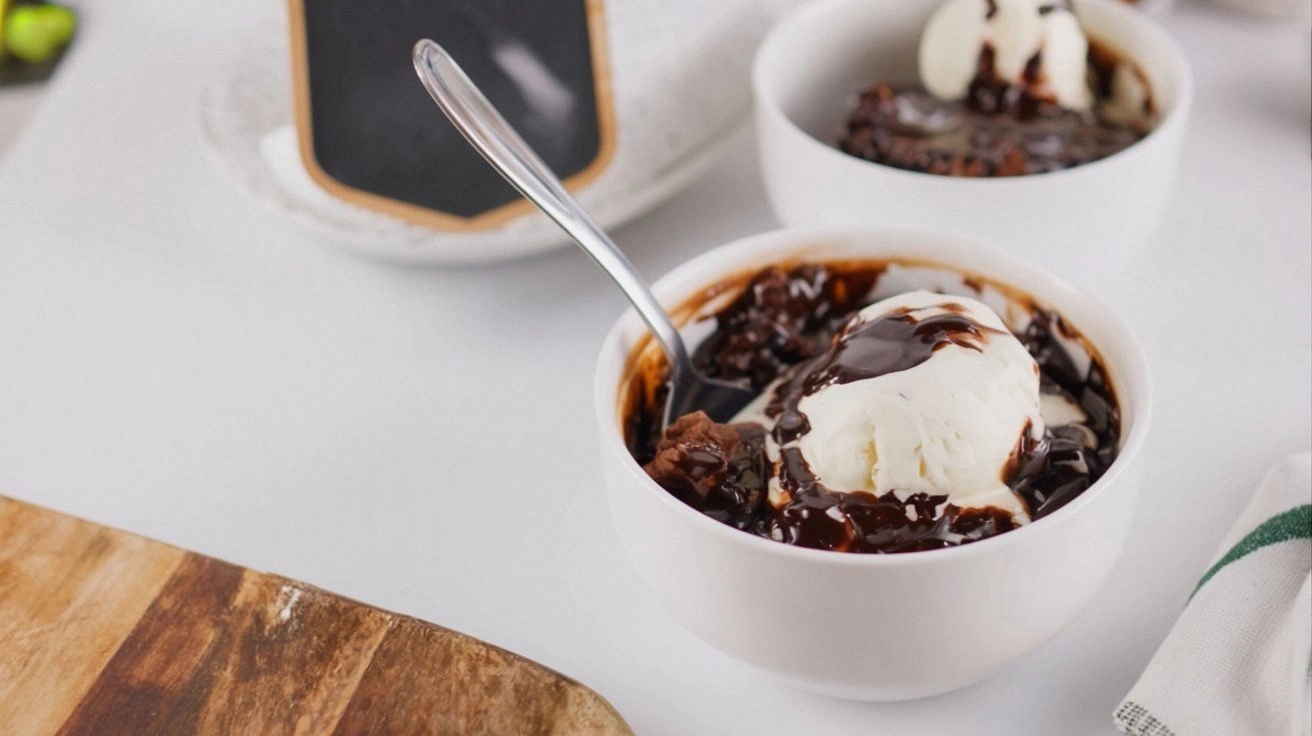
Picture this: I’m standing in my kitchen, the oven timer ticking, a half‑baked cake on the counter, and my sweet tooth screaming louder than the smoke alarm. I had promised myself a quick dessert that would impress my in‑laws, but the last thing I wanted was a flop that tasted like a sad puddle of chocolate. That night, a friend dared me to make the ultimate crockpot chocolate cobbler, and I took the dare like a chef who just discovered a secret ingredient. The result? A molten, gooey, chocolate‑laden masterpiece that had everyone begging for seconds.
When the first pour of warm cocoa hit the slow cooker, the kitchen filled with a rich, chocolatey aroma that made the walls seem to lean in. The sound of the pot clinking against the counter was a rhythmic drumbeat that promised something sweet and comforting. The sight of the glossy, bubbling mixture was like watching a dark river of velvet flow. My taste buds tingled even before the first bite, as the scent of vanilla danced with the deep notes of cocoa. The texture felt like a promise of decadence—soft on the inside, with a hint of crispness on the top.
What makes this version stand out is not just the chocolate depth; it’s the harmony between simplicity and indulgence. I’ve stripped the recipe down to a handful of ingredients, yet each one sings in perfect unison. The use of boiling water to activate the cocoa gives the batter an airy lift that ordinary stovetop recipes can’t match. The buttery crust, baked in the same pot, forms a golden, crisp shell that contrasts beautifully with the molten center. And the best part? It’s all done in a crockpot—no extra pots, no extra cleanup.
I dare you to taste this and not go back for seconds. If you’ve ever struggled with a cobbler that turns out soggy or bland, you’re not alone—and I’ve got the fix. Picture yourself pulling this out of the oven, the whole kitchen smelling incredible, and guests rushing for a spoonful. Okay, ready for the game‑changer? Let me walk you through every single step—by the end, you’ll wonder how you ever made it any other way.
What Makes This Version Stand Out
- Flavor: The dual layers of cocoa—dry and liquid—create a depth that feels like chocolate on a velvet pillow. The subtle vanilla note lifts the richness without overpowering it.
- Texture: The crust is crisp yet tender, thanks to the melted butter and the slight rise from the slow cooker’s gentle heat. The center is molten, a perfect contrast that melts in your mouth.
- Simplicity: No more fiddling with separate pans or baking sheets. All ingredients meet in one pot, saving you time and dishes.
- Uniqueness: Using boiling water to dissolve cocoa is a game‑changer that most recipes ignore. It unlocks a lighter, airy batter.
- Crowd Reaction: Friends who’ve tried it say it’s the “best version you’ll ever make at home.” It’s the kind of dessert that turns a casual dinner into a celebration.
- Ingredient Quality: The recipe relies on high‑quality unsweetened cocoa and salted butter, which together create a savory-sweet balance that ordinary sugar‑heavy mixes can’t achieve.
- Cooking Method: The crockpot’s low, steady heat ensures even cooking and prevents scorching—a common pitfall with stovetop cobblers.
- Make‑ahead Potential: Prepare the batter the night before; the next morning, just pop it in the crockpot and let it do the rest.
Alright, let’s break down exactly what goes into this masterpiece…
Inside the Ingredient List
The Flavor Base
3 cups all‑purpose flour: Flour acts as the structural backbone of the cobbler, providing the body that holds the cocoa together. It absorbs the liquid, preventing the batter from becoming too runny. If you skip it, the mixture will collapse into a sticky mess that can’t set. For a gluten‑free twist, swap in a 1:1 blend of oat and rice flour, but be sure to add a pinch of xanthan gum for elasticity.
1 1/2 cups granulated sugar: This sugar sweetens the batter and caramelizes slightly on the crust, creating a subtle crunch. It also balances the bitterness of the cocoa. If you’re watching calories, you can reduce it by a quarter, though the texture will shift a bit. For a richer taste, try a mix of white and brown sugar.
6 Tbsp unsweetened cocoa powder: The dry cocoa gives the batter an intense chocolate flavor and helps thicken it. It also contributes to the final color, making the cobbler look deep and inviting. If you prefer a darker hue, increase the amount by a tablespoon; just keep an eye on the batter’s consistency.
The Texture Crew
1 cup whole milk: Milk hydrates the flour and cocoa, creating a silky batter that spreads evenly in the pot. Whole milk adds richness and a subtle tang that cuts through the chocolate’s sweetness. If you’re lactose intolerant, use a non‑dairy milk like oat or almond, but note that the texture may become slightly thinner.
1/2 cup salted butter, melted: Butter is the secret to a golden, crisp crust and adds a buttery depth that balances the cocoa’s bitterness. The salt in the butter also enhances the overall flavor profile. If you’re aiming for a lower fat version, replace half the butter with a neutral oil like grapeseed, but the crust won’t be as crisp.
2 tsp vanilla extract: Vanilla lifts the chocolate, adding a fragrant, mellow undertone that makes the dessert feel more sophisticated. It also helps to round out the flavor, preventing any one note from dominating. For an extra kick, try a splash of bourbon or rum.
The Unexpected Star
2 cups granulated sugar: This second batch of sugar is used to create a simple syrup that drips over the batter, adding a glossy finish and a caramelized sweetness. It also helps keep the crust from drying out during the slow cooking process. If you prefer a less sweet finish, reduce this amount by half; just be prepared for a slightly drier top.
1/2 cup unsweetened cocoa powder: The liquid cocoa dissolves in boiling water, activating the chocolate’s flavor and creating a light, airy batter. This step is the key to the molten center—without it, the cobbler would be dense and heavy. If you can’t find unsweetened cocoa, use a high‑quality dark chocolate, but expect a richer, bittersweet taste.
3 cups boiling water: Boiling water is the catalyst that turns the dry cocoa into a silky liquid. It also helps the batter set properly in the crockpot. If you’re in a heat‑sensitive environment, use very hot tap water; just ensure it’s boiling before adding.
The Final Flourish
When all the dry ingredients are whisked together with the melted butter, the batter will feel smooth and slightly thick. Then, the liquid cocoa and boiling water are added, turning the mixture into a glossy, velvety batter. This final step is where the magic happens—every component interacts to create a dessert that’s both rich and airy. If you’re tempted to add extra flavorings at this point, consider a pinch of sea salt or a dash of espresso powder for depth.
Everything’s prepped? Good. Let’s get into the real action…
The Method — Step by Step
- Begin by preheating your crockpot on the “Low” setting. While it warms, gather all dry ingredients—flour, sugars, and cocoa powders—and sift them into a large mixing bowl. Sifting removes any clumps and ensures an even distribution of flavor. This step is crucial; a lump in the batter can lead to uneven texture. Once the bowl is ready, pour in the melted butter and whisk until the mixture is smooth.
- In a separate saucepan, combine the whole milk, vanilla extract, and the second batch of granulated sugar. Heat gently until the sugar dissolves, then remove from heat. This syrup will later coat the batter, giving the crust a glossy finish. If the milk starts to steam, reduce the heat slightly to avoid scorching.
- Now, bring the boiling water to a rolling boil. While it heats, stir in the dry cocoa powder, whisking constantly to avoid clumps. Once the cocoa is fully dissolved, let it cool for a minute so it doesn’t burn the batter. This liquid cocoa is the secret to the molten center—don’t skip this step.
- Slowly pour the liquid cocoa into the dry mixture, whisking continuously. The batter should become glossy and slightly runny—just enough to pour into the crockpot. If it’s too thick, add a splash of milk; if too thin, a pinch more flour. The goal is a consistency that coats the bottom of the pot without spilling over the edges.
- Transfer the batter to the crockpot, spreading it evenly with a spatula. The batter should cover the bottom of the pot but not exceed the rim. This is the moment of truth—watch the edges pull away as the batter starts to set. The aroma that fills the kitchen will have you already dreaming of the first bite.
- Place the crockpot on “Low” and let it cook for 45 minutes. During the first 15 minutes, the batter will begin to rise and develop a golden crust. After 30 minutes, give it a gentle stir to ensure even cooking. The final 15 minutes should leave the center still slightly runny, creating that coveted molten effect.
- Once the timer goes off, turn the crockpot to “Warm” and let the cobbler sit for 10 minutes. This resting period allows the flavors to meld and the crust to firm up. While it rests, you can prepare a simple vanilla ice cream or whipped cream to serve on the side.
- Serve immediately, spooning the molten center into bowls. The contrast of hot chocolate against cold ice cream is a flavor explosion that will have everyone reaching for more. If you’re feeling adventurous, drizzle a little dark chocolate sauce or sprinkle sea salt for an extra pop.
That’s it — you did it. But hold on, I’ve got a few more tricks that’ll take this to another level. From tweaking the crust to adding a surprise garnish, these final touches will elevate your dessert from good to unforgettable.
Insider Tricks for Flawless Results
The Temperature Rule Nobody Follows
Many cooks assume any low heat will work, but the crockpot’s “Low” setting should be around 200°F (93°C). If your model runs hotter, set it to “Low” and keep a thermometer handy. Maintaining this temperature ensures the batter cooks evenly, preventing a soggy bottom. I once used a hotter setting and ended up with a watery center that didn’t set properly.
Why Your Nose Knows Best
Smell is your secret ally. As the batter cooks, you’ll notice a deep, chocolatey aroma that signals the crust is forming. If the smell is faint, give it a few more minutes. Trusting your nose will save you from overcooking or undercooking.
The 5-Minute Rest That Changes Everything
After the crockpot finishes, let the cobbler rest on a cooling rack for exactly five minutes before serving. This short pause allows the molten center to set slightly, giving it a more luxurious mouthfeel. If you skip this step, the center may be too runny and difficult to spoon.
Keep the Crust Crispy
To avoid a soggy top, sprinkle a thin layer of powdered sugar over the batter before cooking. The sugar caramelizes slightly, creating a crisp, sweet shell. I’ve tried this trick with great success; the result is a delicate crunch that contrasts with the gooey interior.
Make It Gluten-Free
Swap the all‑purpose flour for a gluten‑free blend, but add a tablespoon of xanthan gum to maintain structure. The batter will still rise and set properly, and the gluten‑free version tastes just as indulgent.
Creative Twists and Variations
This recipe is a playground. Here are some of my favorite ways to switch things up:
Nutty Delight
Stir in a cup of chopped walnuts or pecans into the batter before cooking. The nuts add crunch and a buttery flavor that complements the chocolate. Great for those who love a textural contrast.
Spiced Surprise
Add a teaspoon of cinnamon or a pinch of cayenne pepper to the dry ingredients. The spices introduce warmth and a subtle heat that lingers on the palate. This version is perfect for fall or winter gatherings.
Minty Fresh
Replace the vanilla extract with 2 teaspoons of peppermint extract. The minty undertone turns the dessert into a holiday treat that pairs well with eggnog or hot chocolate.
Caramelized Banana
Layer sliced bananas on top of the batter before cooking. The bananas caramelize slightly, adding a sweet, tropical flavor that pairs wonderfully with the chocolate.
Dark Chocolate Boost
Use 3 ounces of high‑quality dark chocolate, melted and folded into the batter. This intensifies the chocolate flavor and gives the cobbler a richer, more sophisticated taste.
Storing and Bringing It Back to Life
Fridge Storage
Cool the cobbler completely before transferring it to an airtight container. Store in the refrigerator for up to 3 days. When you’re ready to serve, let it sit at room temperature for 15 minutes to soften slightly.
Freezer Friendly
Wrap the cobbler tightly in plastic wrap, then place it in a freezer bag. Freeze for up to 2 weeks. Thaw overnight in the refrigerator, then reheat in the microwave at 50% power for 30 seconds.
Best Reheating Method
Place the frozen or chilled cobbler in a microwave-safe dish and heat on medium for 1 minute. Add a splash of water before reheating; the steam will restore the moist, glossy finish. Let it rest for a minute before serving.