Picture this: you’re standing in a cramped kitchen, the timer on your old microwave beeping like a frantic metronome, and a sudden craving for something that feels like a hug wrapped in flaky pastry hits you out of nowhere. I was in that exact spot last Sunday, fighting a stubborn batch of burnt toast while the scent of a bakery wafted through the open window from the street below. My mind was racing, my stomach growling, and the only thing that could possibly rescue the morning was a pastry that combined the tang of cherries, the creaminess of cheese, and the buttery crunch of puff pastry—all in one bite-sized marvel. I dared a friend to a “who can resist a danish” challenge, and let’s just say the loser ended up licking the spoon clean.
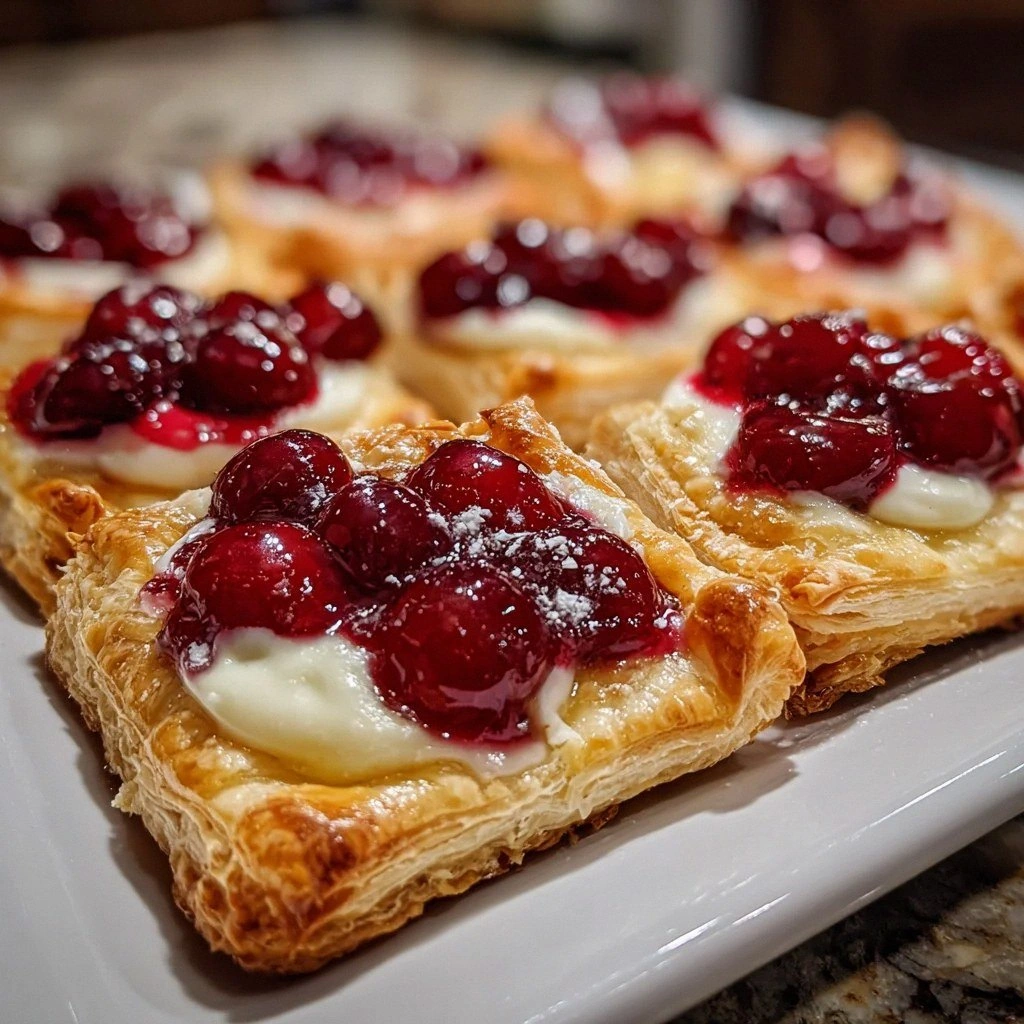
The moment I pulled the first tray of golden‑brown mini danishes from the oven, the kitchen transformed into a symphony of aromas: caramelized butter, sweet‑tart cherry, and a faint whisper of vanilla that made the air feel like a warm blanket on a chilly day. You could hear the faint crackle of the pastry edges as they lifted, a sound that promised a perfect, flaky texture that shatters like thin ice under a gentle press. My fingertips tingled as I brushed the egg wash across the tops, watching the glossy sheen develop like a tiny mirror reflecting the sunrise. When I finally tasted the first bite—creamy cheese melting into a burst of cherry—my eyes widened, and I thought, “This is hands down the best version you’ll ever make at home.”
Most recipes for cherry cheese danishes either drown you in sugar, leave the pastry soggy, or forget that the cheese filling should be as smooth as satin. I’ve tried the “quick fix” versions that use pre‑made frosting, and they ended up tasting like a candy store after a sugar rush. This version, however, respects each component: the puff pastry stays airy because we handle it cold, the cream cheese is softened just enough to blend without lumps, and the cherry pie filling is folded in at the perfect moment to keep its bright zing. The secret? A tiny dash of vanilla that ties everything together, and a strategic egg wash that gives the tops that irresistible, bakery‑level shine.
Now, I’m about to walk you through every single step — by the end, you’ll wonder how you ever made it any other way. Okay, ready for the game‑changer? I dare you to taste this and not go back for seconds. Stay with me here — this is worth it.
What Makes This Version Stand out
- Flavor Harmony: The sweet‑tart cherry perfectly balances the rich, buttery cheese, creating a taste profile that feels like a well‑orchestrated duet rather than a solo performance.
- Texture Triumph: The puff pastry stays light and flaky, while the cheese filling remains silky, and the cherry topping adds a juicy pop that keeps every bite exciting.
- Simplicity: With just six core ingredients, you won’t need a pantry raid; everything you need is likely already in your fridge or freezer.
- Unique Twist: A splash of vanilla extract elevates the filling from ordinary to extraordinary, adding depth without overpowering the fruit.
- Crowd Reaction: These minis disappear faster than you can say “second round,” making them the perfect party starter or after‑dinner treat.
- Ingredient Quality: Using real butter‑based puff pastry and full‑fat cream cheese ensures a luxurious mouthfeel you can’t fake with shortcuts.
- Cooking Method: Baking at a high temperature creates that coveted “edge pull‑away” effect, a hallmark of professional pastry.
- Make‑Ahead Potential: Assemble the danishes a day ahead, refrigerate, then bake fresh for a stress‑free morning or last‑minute gathering.
Inside the Ingredient List
The Flavor Base
Cream Cheese: This is the heart of the filling, providing a luscious, tangy backdrop that lets the cherry shine without being overpowered. Softening it at room temperature makes it blend smoothly with sugar and vanilla, preventing those dreaded grainy pockets. If you skip it, you’ll end up with a watery, uneven filling that looks like a sad pancake batter. For a richer taste, opt for full‑fat cream cheese; reduced‑fat versions can make the mixture too loose.
The Sweet & Tangy Duo
Cherry Pie Filling: The vibrant star of these pastries! Its natural acidity cuts through the richness of the cheese, creating that perfect sweet‑tart balance. Using a high‑quality canned filling ensures consistent flavor and texture, but fresh frozen cherries tossed with a splash of lemon juice work beautifully too. If you’re feeling adventurous, stir in a pinch of almond extract for a nutty undertone that deepens the flavor profile.
The Texture Crew
Puff Pastry: The star of our danishes! You can find this in the frozen section of your grocery store. Make sure to thaw it for easy handling. The layers of butter in the dough create that airy, flaky texture when baked at a high heat. If you use a pre‑rolled sheet, watch out for tearing—keep it cold until you’re ready to cut. A good tip is to let the pastry rest on the counter for just 5‑10 minutes after thawing; this relaxes the gluten and prevents shrinkage.
Granulated Sugar: Just a couple of tablespoons will sweeten the cream cheese filling perfectly. You can substitute with powdered sugar for a smoother finish, but the granules help dissolve the cheese without creating a gritty texture. Skipping sugar isn’t an option unless you love a cheese‑only bite, which, let’s be honest, is a niche preference.
The Final Flourish
Vanilla Extract: A splash of this extract enhances the flavor, giving your filling a warm, inviting aroma. Feel free to use almond extract for a nutty twist, but keep it to half the amount to avoid overwhelming the cherry. The vanilla’s subtle sweetness ties the entire pastry together, making each bite feel cohesive.
Egg (for egg wash): This is optional but recommended for achieving that golden, flaky finish. If you’re avoiding eggs, a milk wash works too, though it won’t give the same glossy sheen. Brushing the tops lightly ensures an even color and a slight crispness that’s just the right amount of crunch.
Everything's prepped? Good. Let's get into the real action...
The Method — Step by Step
Start by preheating your oven to 400°F (200°C). While the oven warms, line a baking sheet with parchment paper; this prevents sticking and makes cleanup a breeze. I dare you to feel the heat radiating from the oven door—this is the moment where the magic begins, and the temperature is crucial for that puff‑perfect lift.
Take your thawed puff pastry sheet and, using a lightly floured rolling pin, roll it out to about 1/8‑inch thickness. Cut the dough into 3‑inch squares; the size is perfect for bite‑size indulgence. If the dough feels too soft, pop it back in the fridge for a few minutes—cold butter equals flaky layers.
In a mixing bowl, combine the softened cream cheese, granulated sugar, and vanilla extract. Beat with a handheld mixer on low speed until smooth—no lumps, just a creamy cloud. This step is pure therapy; watch the mixture transform, and remember, a smooth filling is the secret to a glossy, non‑runny top.
Gently fold the cherry pie filling into the cream cheese mixture, being careful not to over‑mix. You want streaks of bright red to swirl through the white base, creating a marbled effect that looks as good as it tastes. If you’re using fresh cherries, let them sit for a minute to release juices before folding them in.
Place a generous teaspoon of the cherry‑cheese blend into the center of each pastry square, spreading it just to the edges of the cut‑out circle. The filling should be thick enough to hold its shape but soft enough to melt slightly during baking. This is the part where the pastry starts to look like a mini masterpiece, and the anticipation builds.
Brush the exposed pastry edges with a lightly beaten egg (or milk if you prefer). The egg wash will turn the tops a gorgeous golden‑brown, and the glossy finish will make them look bakery‑fresh. If you’re feeling fancy, sprinkle a pinch of coarse sugar on the edges for a subtle crunch.
Slide the sheet into the preheated oven and bake for 12‑15 minutes, or until the pastry edges are puffed and a deep golden hue appears. Around the 10‑minute mark, peek through the oven window; you should see the tops beginning to crackle like thin ice, a sign they’re on the right track. The aroma will fill your kitchen, making it impossible to resist opening the door early.
Remove the danishes from the oven and let them cool on a wire rack for at least 5 minutes. This short rest lets the filling set just enough to avoid a messy spill when you bite in. While they’re cooling, the scent will linger, promising that first bite will be a perfect balance of warm pastry and cool, tangy cherry.
That's it — you did it. But hold on, I've got a few more tricks that'll take this to another level...
Insider Tricks for Flawless Results
The Temperature Rule Nobody Follows
Always bake puff pastry at a high temperature (400‑425°F). The sudden burst of heat creates steam inside the layers, causing them to puff dramatically. I once tried a lower temperature to “save energy,” and the result was a dense, soggy mess that could barely hold the filling. Trust the heat; it’s the secret weapon for that airy lift.
Why Your Nose Knows Best
Instead of watching a timer obsessively, listen for the subtle scent of caramelizing butter. When the kitchen smells like a bakery on a Saturday morning, you’re close to perfection. This sensory cue is more reliable than a clock because ovens can vary by a few degrees.
The 5‑Minute Rest That Changes Everything
After mixing the cream cheese filling, let it rest for five minutes before folding in the cherries. This short pause allows the sugar to dissolve fully, preventing a gritty texture. I once skipped this step, and the filling felt grainy—lesson learned.
Egg Wash Alternatives for the Egg‑Free
If you’re avoiding eggs, a quick brush of milk mixed with a teaspoon of melted butter works surprisingly well. It gives a comparable shine and a hint of richness, though it won’t achieve the exact same deep gold hue. For vegans, a light almond milk spray can do the trick.
Freezing for Future Feasts
Assemble the danishes up to the egg‑wash stage, then freeze them on the tray. Once solid, transfer to a zip‑top bag. When you’re ready, bake straight from frozen, adding an extra 2‑3 minutes to the cooking time. This hack turned my last-minute brunch into a stress‑free triumph.
Creative Twists and Variations
This recipe is a playground. Here are some of my favorite ways to switch things up:
Almond Joy
Swap the cherry filling for a mixture of almond paste and shredded coconut, then drizzle with dark chocolate after baking. The result is a tropical, nutty bite that feels like a mini dessert bar.
Berry Medley
Combine raspberry and blueberry jam with the cherry filling for a burst of mixed berries. The tartness intensifies, and the colors create a visual feast that’s perfect for summer gatherings.
Savory Spin
Replace the sweet filling with a blend of softened goat cheese, fresh herbs, and a dollop of caramelized onions. Top with a thin slice of prosciutto after baking for a sophisticated appetizer.
Chocolate Swirl
Stir a tablespoon of cocoa powder into the cream cheese mixture and add mini chocolate chips. The chocolate pairs beautifully with the cherry, turning each bite into a decadent treat.
Spiced Autumn
Introduce a pinch of ground cinnamon and nutmeg into the filling, and use a spiced apple compote instead of cherry. This variation captures the cozy essence of fall, perfect for a chilly evening.
Lemon Zest Burst
Add fresh lemon zest to the cream cheese mixture and swap cherry for a bright lemon curd. The citrus tang cuts through the richness, delivering a refreshing palate cleanser.
Storing and Bringing It Back to Life
Fridge Storage
Place cooled danishes in an airtight container and store them in the refrigerator for up to three days. The pastry will retain most of its crispness, while the filling stays fresh and creamy.
Freezer Friendly
Arrange the baked (or unbaked, if you prefer) danishes on a parchment‑lined tray, freeze until solid, then transfer to a zip‑top freezer bag. They’ll keep for up to two months. When you’re ready to enjoy, bake from frozen at 400°F for 18‑20 minutes, adding a splash of water to the tray to create steam and revive the flaky texture.
Best Reheating Method
To bring them back to life, preheat your oven to 350°F and place the danishes on a baking sheet. Add a tiny splash of water to the pan (just a few drops) and cover loosely with foil. Heat for 8‑10 minutes; the steam will re‑crisp the pastry while keeping the filling moist. Skip the microwave—it makes the pastry rubbery.