Let me tell you about the Sunday afternoon when I accidentally created the most addictive dessert my kitchen has ever witnessed. I was supposed to be making a respectable strawberry cheesecake for book club, but halfway through I realized I'd forgotten to buy a springform pan. Again. My friend Karen was already en route, and my pride refused to let me serve store-bought cookies. In a moment of culinary desperation that would make my grandmother clutch her pearls, I started dumping things into a baking dish like a woman possessed. Twenty minutes later, my kitchen smelled like a strawberry field had collided with a cheesecake factory, and I was standing over the counter with a fork, making sounds I won't describe in polite company.
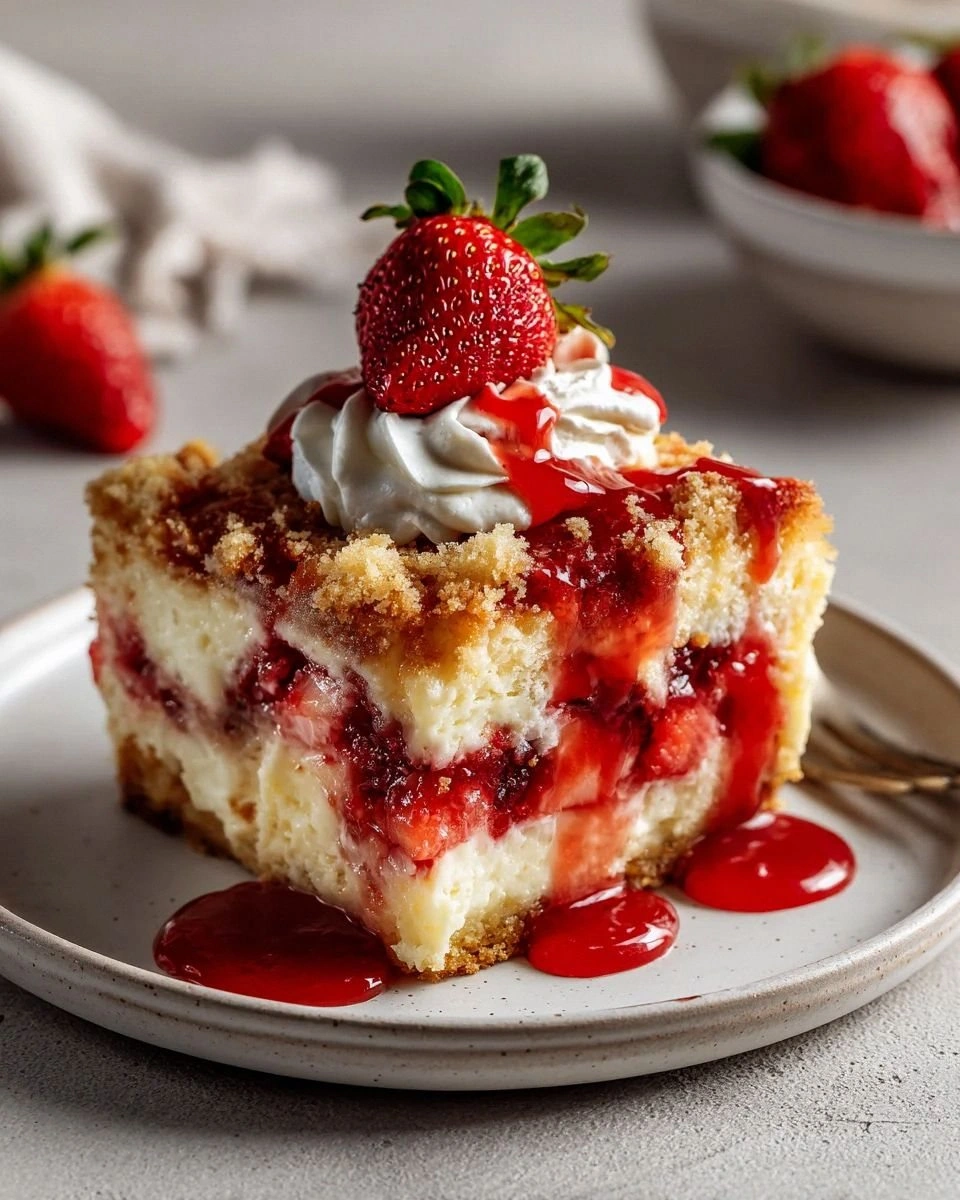
Picture this: bubbling strawberry pie filling creating these gorgeous crimson lava flows between pockets of tangy cream cheese that have somehow transformed into the creamiest custard you've ever tasted. The top? A buttery, golden crust that crackles like creme brulee under your spoon, revealing layers of cake and fruit that taste like someone took the best parts of strawberry shortcake, cheesecake, and cobbler, then waved a magic wand. My neighbors started showing up "just to check if I needed anything" when they caught wind of what was happening in my oven.
Here's what makes this recipe the ultimate game-changer: it's impossible to mess up. I'm talking completely foolproof. You could make this half-asleep, using one hand, while fielding questions from your mother-in-law about when you're finally going to use that china she gave you. Most dump cakes are just... fine. They're sweet, they're easy, they're forgettable. This one? This one will haunt your dreams in the best possible way. The secret lies in how the cream cheese layer interacts with the strawberry filling, creating these pockets of tangy-sweet perfection that make your taste buds do a happy dance.
Okay, ready for the game-changer? We're not just dumping and baking here. We're strategically layering flavors so every bite gives you that perfect ratio of fruit, cream cheese, and buttery cake. By the time you pull this golden beauty from the oven, your kitchen will smell like you've been slaving away for hours. I dare you to taste this and not go back for seconds. Actually, I dare you to make it to the table without "testing" at least three spoonfuls straight from the dish. Let me walk you through every single step — by the end, you'll wonder how you ever made it any other way.
What Makes This Version Stand Out
Most recipes get this completely wrong. They treat dump cakes like an afterthought, some sad fruit filling with dry cake mix scattered on top like edible confetti. That's not what we're doing here. This is the kind of dessert that makes people cancel their dinner plans because they're too busy having a religious experience with their fork.
Taste Explosion: The combination of strawberry pie filling and cream cheese creates this perfect sweet-tart balance that makes your mouth water just thinking about it. It's like someone took the best strawberry cheesecake you've ever had and turned it into comfort food form. The yellow cake mix doesn't just sit there getting soggy — it transforms into these buttery, golden nooks that catch the strawberry syrup like edible treasure. Texture Paradise: We're talking about a dessert with serious textural complexity. The bottom layer stays pudding-soft from the fruit juices, the middle becomes this silky cheesecake situation, and the top gets these crispy edges that shatter like thin ice when you dig in. Every spoonful is a new adventure. Weeknight Simple: If you can operate a can opener and melt butter in a microwave, you can make this masterpiece. No mixing bowls, no electric beaters, no praying to the baking gods that your cheesecake won't crack. Just layer, bake, and prepare to be treated like a dessert deity. Ingredient Quality: Using real cream cheese instead of that weird shelf-stable stuff makes all the difference. The strawberry pie filling provides consistent flavor year-round, but adding fresh berries on top takes it from great to "why would you ever make anything else?" Crowd Psychology: Bring this to any gathering and watch grown adults turn into dessert detectives, trying to figure out how you managed to combine strawberry cheesecake, cobbler, and coffee cake into one dish. I've seen people who claim they "don't really like sweets" go back for thirds. Make-Ahead Magic: This beauty actually gets better after a day in the fridge. The flavors meld together like they've been best friends forever. Most dump cakes turn into sad, soggy messes overnight. This one? It becomes the dessert equivalent of a fine wine.Alright, let's break down exactly what goes into this masterpiece...
Inside the Ingredient List
The Flavor Base
Yellow cake mix is our unsung hero here, but not for the reason you think. We're not making cake — we're using those perfectly balanced ratios of flour, sugar, and leavening agents as our structural foundation. When the melted butter hits that dry mix, it creates these incredible toasty, almost shortbread-like pockets that absorb the strawberry juices without turning to mush. Don't get fancy and try to use white cake mix or that organic stuff with the unicorn on the box. The yellow cake mix has vanilla notes that play beautifully with the cream cheese, creating this warm, nostalgic flavor that tastes like childhood summers.
The Texture Crew
Two cans of strawberry pie filling might seem like overkill, but hear me out. One can leaves you with a sad, thin layer that dries out during baking. Two cans create this luxurious fruit base that stays luscious and spoonable. The cornstarch in the filling thickens just enough to hold everything together while still being saucy. If you've ever had a dump cake where the fruit layer disappeared into the cake mix, you know why this matters. We're creating distinct layers here, not a strawberry-flavored cake.
The Unexpected Star
Cream cheese is where the magic happens, but only if you treat it right. Two full blocks might seem excessive, but remember — we're not spreading this on bagels. We're creating a cheesecake layer that needs to stand up to the heat of the oven and the moisture from the fruit. The sugar and vanilla aren't just for flavor; they help stabilize the cream cheese so it doesn't break and get grainy. I've seen recipes that call for less cream cheese, and they always end up tasting like fruit topping on slightly tangy cake. That's not what we're doing here.
The Final Flourish
Whipped topping is your insurance policy against dessert disaster. Folding it into the cream cheese lightens everything up, creating this mousse-like texture that melts on your tongue. Without it, you'd have a dense, heavy layer that sits in your stomach like a brick. The fresh strawberries on top aren't just for pretty — they add that bright, fresh flavor that makes the whole thing taste like you picked the berries yourself this morning. A light dusting of powdered sugar catches the light and makes everything look bakery-perfect.
Everything's prepped? Good. Let's get into the real action...

The Method — Step by Step
- Preheat your oven to 350°F (175°C) and position the rack in the center. This isn't the time to get creative with temperatures — too hot and your cream cheese will curdle, too cool and you'll end up with a sad, soupy mess. While the oven's heating, grab a 9x13-inch baking dish and give it a light spray with nonstick cooking spray. Not the heavy-duty stuff, just a whisper of spray so your masterpiece doesn't stick like superglue. Picture yourself pulling this beauty out of the oven in 45 minutes, the strawberry aroma making your neighbors jealous.
- Open both cans of strawberry pie filling and dump them into your prepared dish. But here's the key — don't just plop them in and call it a day. Use a spatula to spread them evenly, making sure you get into the corners where fillings like to hide. The goal is a consistent layer about half an inch thick. If you see any giant strawberry chunks, give them a gentle smush with your spatula. We're not making fruit salad here; we want every bite to have that perfect fruit-to-cake ratio.
- In a medium bowl (yes, we're using one bowl, try not to faint), combine the softened cream cheese, granulated sugar, and vanilla extract. Now, and this is crucial, beat them together until they're completely smooth and fluffy. This should take about 2-3 minutes with an electric mixer on medium speed, or 5 minutes of vigorous whisking if you're feeling ambitious. The mixture should look like thick whipped cream and leave soft peaks when you lift the beaters. If you still see little white lumps, keep going — those are cream cheese pockets that will never fully incorporate.
- Time for the game-changer: gently fold in half of the whipped topping using a rubber spatula. Don't stir like you're mixing cement — think of it like you're tucking the cream into bed. Use slow, sweeping motions from the bottom of the bowl, turning the bowl as you go. The goal is to maintain all that beautiful air we just whipped into the cream cheese. When you're done, you should have a cloud-like mixture that holds soft peaks and looks like it belongs in a fancy dessert shop window.
- Dollop this cream cheese mixture over the strawberry layer in big spoonfuls, then use your spatula to spread it gently. Don't press down too hard — you don't want to disturb the fruit layer underneath. Think of it like frosting a delicate cake. Leave about half an inch border around the edges so the strawberry can bubble up and create those gorgeous red streaks that make everyone think you're a dessert wizard. The cream cheese layer should be about three-quarters of an inch thick.
- Now for the part that makes traditional bakers clutch their pearls: sprinkle the entire box of dry yellow cake mix evenly over the cream cheese layer. Don't press it down, don't mix it with anything, just let it rain cake mix like you're decorating a very large cupcake. Make sure you get complete coverage — any bald spots will turn into weird chewy patches. The cake mix should look like a pale yellow snow covering your dessert landscape.
- Drizzle the melted butter over the cake mix, but here's the technique that separates the amateurs from the pros: start at one corner and work in a slow, steady stream, moving across the surface like you're painting with butter. You want to cover as much of the dry mix as possible, but don't stress if you miss a few spots — those will become delightfully crispy bits that provide textural contrast. Use all the butter, even if it looks like too much. Trust the process.
- Bake for 40-45 minutes, but start checking at 35 minutes. You're looking for the top to turn golden brown with some deeper amber spots where the butter pooled. The edges should be bubbling with strawberry magma, and the center should jiggle slightly when you gently shake the pan. If the top is browning too quickly, tent it with foil for the last 10 minutes. The smell test is foolproof here — when your kitchen smells like a strawberry shortcake factory, you're probably done.
- Cool for at least 15 minutes before serving. I know, I know — you've been smelling this for almost an hour and now I'm telling you to wait. But here's why: the cream cheese layer needs time to set, and the strawberry filling needs to cool from its molten state to something that won't remove the roof of your mouth. Use this time to make some coffee or tea, set out pretty dessert plates, and call everyone to the table. If you can wait longer, this is actually better at room temperature.
That's it — you did it. But hold on, I've got a few more tricks that'll take this to another level...
Insider Tricks for Flawless Results
The Temperature Rule Nobody Follows
Room temperature ingredients aren't just a suggestion from persnickety recipe writers — they're the difference between smooth, creamy perfection and a lumpy disaster. Cold cream cheese will never fully incorporate with the sugar, leaving you with white flecks that taste like you're biting into cream cheese curds. Cold eggs (if you were using them) would seize up the mixture faster than you can say "dump cake." Take the extra ten minutes to let everything come to room temperature. Your future self, swooning over perfect texture, will thank you.
Why Your Nose Knows Best
I've made this recipe more times than I care to admit, and I've discovered the foolproof doneness test: smell. When this cake first goes in the oven, you'll get whiffs of butter and cake mix. Around the 25-minute mark, the strawberry aroma starts wafting through your kitchen. But at the 40-minute mark, something magical happens — the scents meld into this intoxicating perfume that smells like strawberry shortcake had a baby with cheesecake. When you catch yourself unconsciously drifting toward the oven, that's when it's done. Trust your nose; it's smarter than any timer.
The 5-Minute Rest That Changes Everything
Here's where most people mess up dump cakes — they try to serve them immediately, ending up with dessert soup that slides off the spoon like a tragic landslide. The cream cheese layer needs just five minutes to set up, creating those beautiful distinct layers that make this look like you spent hours on it. During this time, the strawberry filling thickens slightly, and the cake mix absorbs just enough moisture to become tender instead of soggy. Use this time to tidy up, make your coffee, or practice looking modest when everyone starts complimenting your baking skills.
The Make-Ahead Miracle
This dessert breaks all the rules about fresh-baked goods. Most dump cakes degrade into sad, soggy messes overnight, but this one actually improves with a night in the fridge. The flavors meld together like they've been friends for years, creating this depth you can't get from a fresh batch. Make it the night before your event, let it cool completely, then cover with plastic wrap. Bring it to room temperature before serving, or pop individual portions in the microwave for 15 seconds. Your secret? You "just threw it together this morning."
Creative Twists and Variations
This recipe is a playground. Here are some of my favorite ways to switch things up:
Triple Berry Explosion
Replace one can of strawberry pie filling with raspberry or blackberry pie filling. The tartness of the berries creates this incredible contrast with the sweet cream cheese layer. Add a handful of fresh blueberries on top before serving for that "I totally planned this sophisticated flavor profile" look. The mixed berries make the whole thing taste like summer in a dish, even in the dead of winter.
Chocolate Strawberry Decadence
Use chocolate cake mix instead of yellow, and add a handful of mini chocolate chips to the cream cheese mixture. The chocolate and strawberry combination tastes like those fancy chocolate-covered strawberries, but in warm, scoopable form. Dust the top with cocoa powder instead of powdered sugar for a more sophisticated finish. This version is dangerously good — I'm talking "hide it from yourself in the back of the fridge" good.
Lemon Berry Brightness
Add the zest of one lemon to the cream cheese mixture, and use lemon cake mix instead of yellow. The citrus notes make the strawberry flavor pop like it's been hit with sunshine. Top with fresh mint leaves for a dessert that tastes like springtime. This version is perfect for Easter brunch or any time you want to pretend you're eating something light while consuming approximately a stick of butter.
Salted Caramel Strawberry Dream
Drizzle caramel sauce over the strawberry layer before adding the cream cheese mixture. Sprinkle a teaspoon of flaky sea salt over the top before baking. The salty-sweet combination creates this sophisticated flavor profile that makes people think you went to pastry school. Serve warm with vanilla ice cream for the kind of dessert that ends dinner parties on a high note.
Peaches and Cream Remix
Substitute peach pie filling for the strawberry during summer months. Add a teaspoon of cinnamon to the cake mix before sprinkling it on top. The peach version tastes like a cross between peach cobbler and cheesecake, with those warm spices making it perfect for fall gatherings. Top with toasted pecans for crunch, and watch people try to figure out why this tastes like their grandmother's kitchen but better.
Individual Mini Magic
Divide the recipe among 8-10 ramekins for individual servings. Reduce baking time to 20-25 minutes. These personal portions are perfect for dinner parties where you want to look fancy without actually being fancy. Plus, everyone gets their own crispy edges, which are the best part anyway. They're like little dessert insurance policies against sharing.
Storing and Bringing It Back to Life
Fridge Storage
Once completely cooled, cover your masterpiece with plastic wrap and refrigerate for up to 5 days. Yes, you heard that right — five whole days of dessert availability. The flavors actually deepen and improve after the first day, making this the ultimate make-ahead dessert. Store it in the original baking dish if you're planning to serve from it, or transfer to an airtight container if you need the dish for other purposes. The top will lose some of its initial crunch, but the trade-off in flavor development is worth it.
Freezer Friendly
This dessert freezes beautifully, which is dangerous knowledge to have. Cut into portions, wrap each piece in plastic wrap, then aluminum foil, and freeze for up to 3 months. Thaw overnight in the refrigerator, then bring to room temperature for 30 minutes before serving. The texture won't be quite as perfect as fresh, but it's still better than most desserts that haven't been frozen. Pro tip: freeze individual portions so you can have emergency dessert whenever life requires it.
Best Reheating Method
Individual portions reheat like a dream in the microwave for 15-20 seconds. For larger portions, cover with foil and warm in a 300°F oven for 10-15 minutes. Add a tiny splash of water before reheating — it steams back to perfection. Whatever you do, don't overheat, or the cream cheese layer will separate and become grainy. Warm is better than hot here, so err on the side of caution.