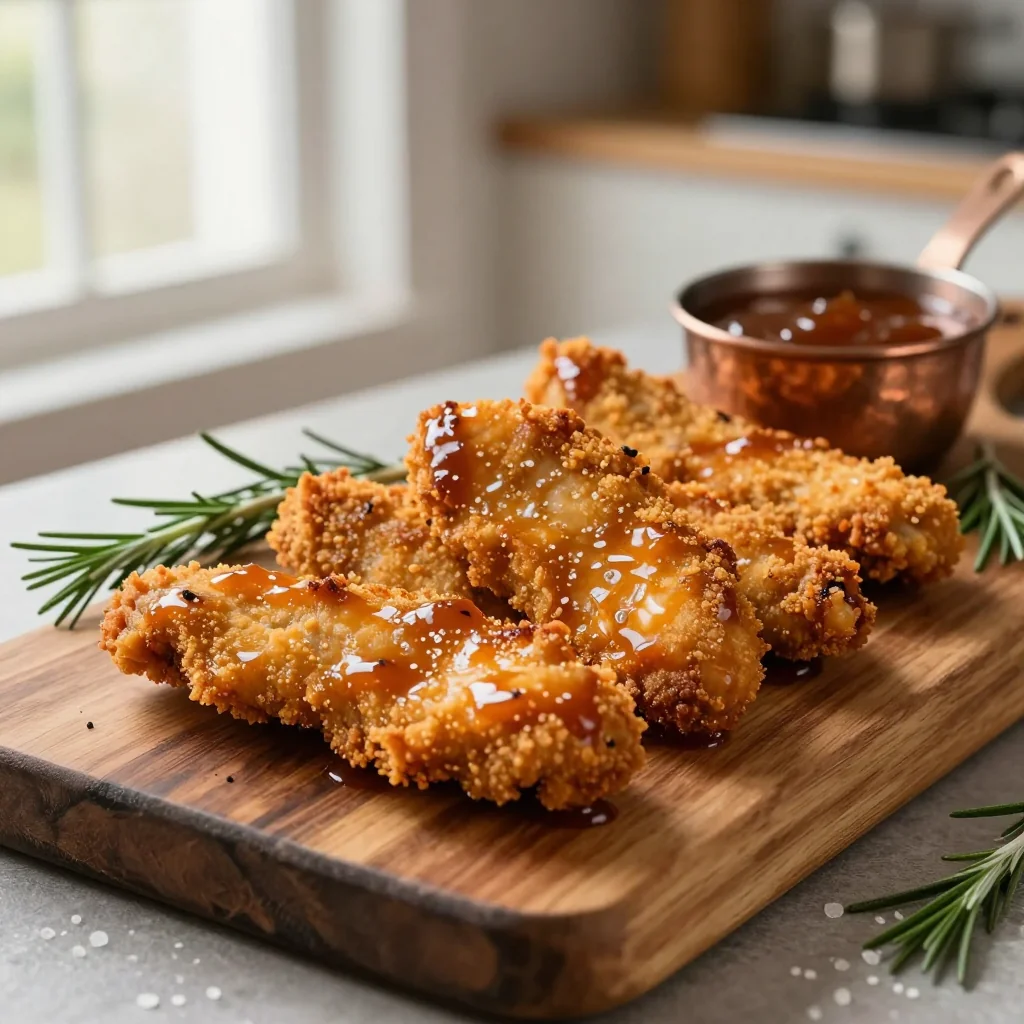
Crispy, golden chicken strips paired with a smoky-sweet barbecue sauce that will make every bite unforgettable.
When I was ten, my uncle took me to a backyard barbecue and handed me a plate of perfectly crisp chicken tenders dunked in a smoky sauce that seemed to whisper stories of summer evenings and laughter. The moment the sauce hit my tongue, I felt a burst of sweet, tangy, and slightly spicy flavors that made the simple act of eating feel like a celebration.
Chicken tenders are a staple in American comfort food, but the magic truly lies in the sauce that accompanies them. A good BBQ dip can turn a casual snack into a memorable dish, and that’s exactly why I’ve refined this recipe over the years, testing variations until I captured the perfect balance of caramelized sweetness and smoky depth.
In this article, you’ll discover how to create a crunchy coating that stays crisp even after a quick dip, and a sauce that can be made ahead of time, allowing the flavors to meld beautifully. I’ll walk you through each step, share troubleshooting tips, and reveal the science behind why this combination works so well together.
Ready to bring a taste of that backyard magic into your own kitchen? Let’s get started and make a batch that will have friends and family asking for seconds.
🌟 Why This Recipe Will Captivate You
From the first crunchy bite to the lingering smoky aftertaste, this dish offers a symphony of textures and flavors that keep you coming back for more.
- ✨ Perfect Crunch Every Time: The double coating of seasoned flour and panko creates a light, airy crust that stays crisp even after a brief dip in sauce.
- ✨ Balanced Sweet‑Smoky Sauce: A blend of ketchup, brown sugar, and smoked paprika delivers a sweet‑smoky profile that complements the chicken without overpowering it.
- ✨ Easy to Scale: The built‑in portion adjuster lets you increase or decrease the recipe for a family dinner or a quick snack for two.
- ✨ No Fancy Equipment Required: All you need is a skillet, a bowl, and a whisk – perfect for any home cook.
- ✨ Kid‑Friendly Yet Gourmet: The flavor is familiar enough for children while still satisfying adult palates looking for depth.
- ✨ Versatile Pairings: Serve with coleslaw, sweet potato fries, or a fresh garden salad for a complete meal.
🥗 The Ingredients
📝 Complete Ingredient List
For the Chicken Tenders:
- 680 g boneless skinless chicken breasts, cut into strips
- 60 g all‑purpose flour
- 5 g paprika
- 5 g garlic powder
- 5 g salt
- 2.5 g black pepper
- 2 large eggs, beaten
- 100 g panko breadcrumbs
- 2 cups vegetable oil for frying
For the BBQ Dipping Sauce:
- 240 ml ketchup
- 50 g brown sugar
- 30 ml apple cider vinegar
- 15 ml Worcestershire sauce
- 5 g smoked paprika
- 2.5 g chili powder
- 5 g garlic powder
- 5 g onion powder
- 15 ml Dijon mustard
- 1/4 tsp liquid smoke (optional)
- 2.5 g salt
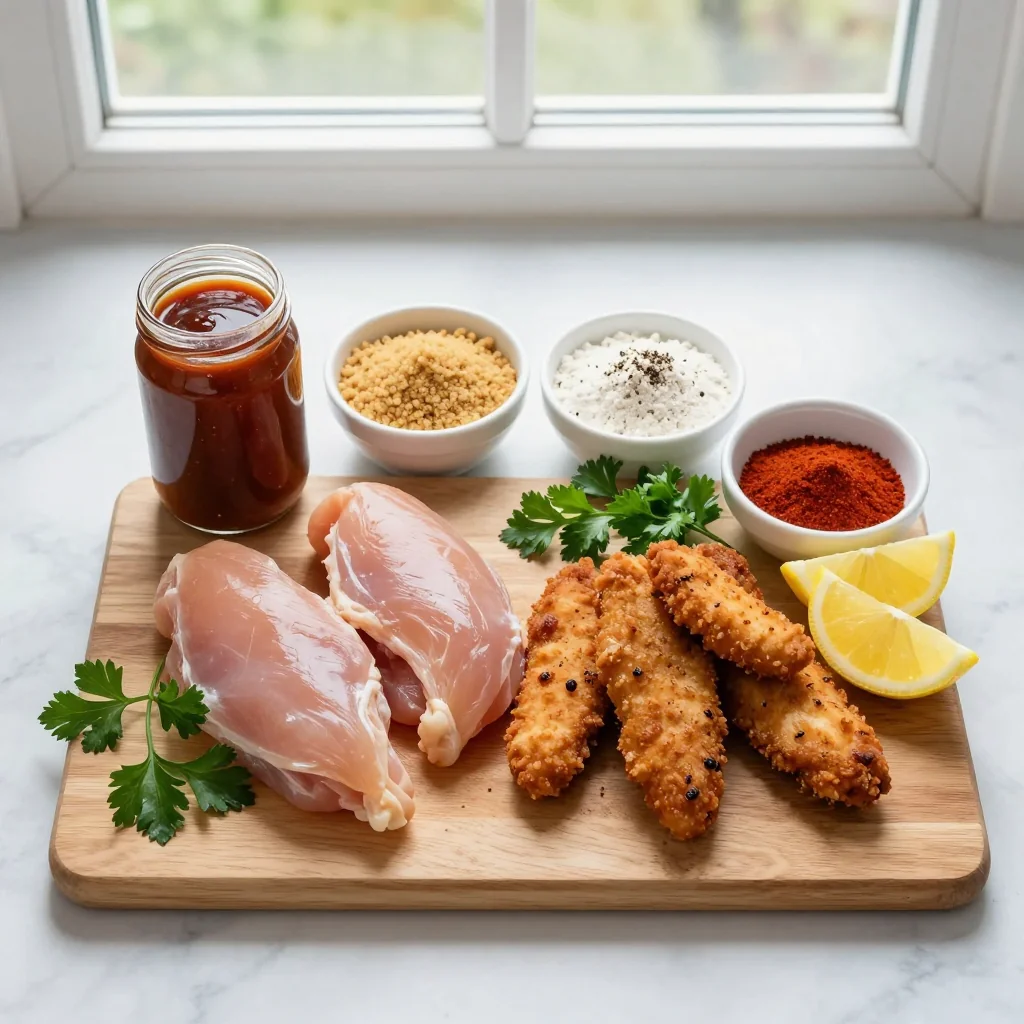
🔍 Focus on Key Ingredients
Chicken Breast
The star of the dish, chicken breast provides lean protein and a neutral canvas that absorbs the seasoning beautifully. Choose breasts that are uniform in size so they cook evenly. If you prefer a juicier bite, consider brining the strips in a light salt‑water solution for 15 minutes before coating.
Panko Breadcrumbs
Panko creates a lighter, airier crust compared to regular breadcrumbs. Its larger flakes trap less oil, resulting in a golden, non‑greasy finish. For extra flavor, toast the panko lightly in a dry pan before using.
Smoked Paprika
Smoked paprika adds a deep, wood‑fire aroma that defines the BBQ profile. It’s milder than regular paprika but brings that essential smoky nuance without needing a grill.
🔄 Quick Substitutions
| If you don’t have… | Use instead… |
|---|---|
| Panko breadcrumbs | Regular breadcrumbs toasted lightly |
| Smoked paprika | Regular paprika + a dash of liquid smoke |
| Apple cider vinegar | White wine vinegar |
👨🍳 Step‑by‑Step Instructions
Follow these detailed steps to achieve perfectly crispy tenders and a sauce that clings just enough to each bite.
📋 Phase 1: Preparation & Mise en Place
Gather, measure, and prep all components before you start cooking.
Trim and Slice the Chicken
Pat the chicken breasts dry with paper towels. Slice each breast into uniform strips about 1 inch wide and 3 inches long. Uniformity ensures even cooking and consistent coating.
Prepare the Breading Stations
Set up three shallow bowls. In the first, combine flour, paprika, garlic powder, salt, and pepper. In the second, whisk the eggs until smooth. In the third, spread the panko breadcrumbs evenly.
🔥 Phase 2: Cooking & Assembly
From coating the chicken to simmering the sauce, timing is key.
Coat the Chicken Strips
Dredge each strip first in the seasoned flour, shaking off excess. Dip it into the beaten egg, then roll it in panko until fully covered. Place the coated strips on a wire rack; this prevents steam from making the coating soggy.
Fry the Tenders
Heat vegetable oil in a deep skillet to 180 °C (350 °F). Fry the strips in batches, avoiding crowding, for 3–4 minutes per side or until golden brown and internal temperature reaches 74 °C (165 °F). Transfer to a paper‑towel‑lined plate.
Make the BBQ Dipping Sauce
In a saucepan, whisk together ketchup, brown sugar, apple cider vinegar, Worcestershire sauce, smoked paprika, chili powder, garlic powder, onion powder, Dijon mustard, and salt. Bring to a gentle simmer over medium heat, stirring constantly.
Reduce the heat and let the sauce thicken for 8–10 minutes, until it coats the back of a spoon. If you like a hint of smokiness, stir in the optional liquid smoke now.
✨ Phase 3: Finishing & Plating
Bring everything together for a stunning final presentation.
Check Doneness
Insert a meat thermometer into the thickest part of a tender; it should read 74 °C (165 °F). The coating should be a deep golden brown, and the sauce should have a velvety sheen.
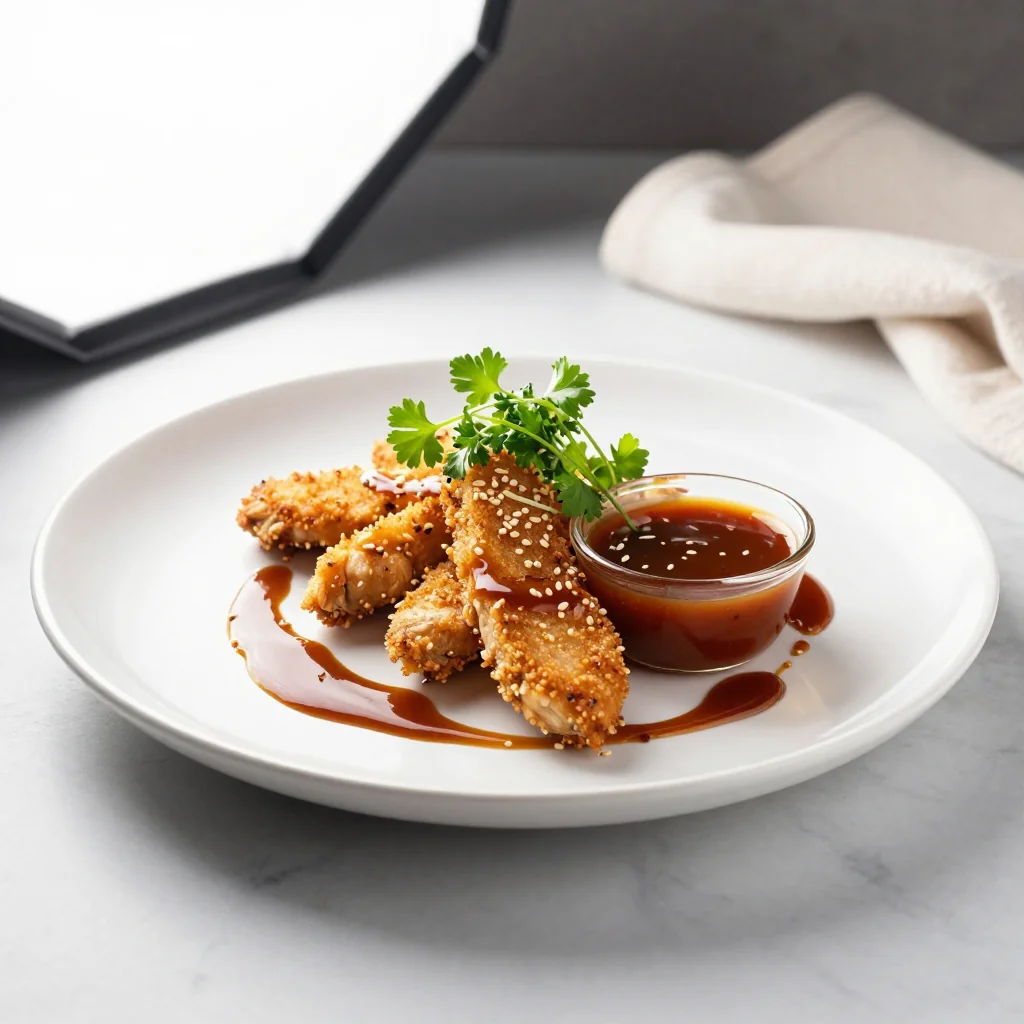
Plate the Tenders
Arrange the chicken strips on a serving platter. Drizzle a thin ribbon of BBQ sauce over the top, leaving the rest for dipping. Garnish with a sprinkle of chopped fresh parsley for a pop of color.
Serve Immediately
Serve the platter with small dipping bowls of the remaining sauce. Pair with a crisp coleslaw or sweet potato fries for a complete meal.
💡 Expert Tips & Tricks
🛒 Choosing the Right Ingredients
When selecting chicken, opt for breasts that are firm and pink without any gray edges. Freshness is key; a slight sheen indicates good quality. For the sauce, use a ketchup that lists simple ingredients – tomato paste, vinegar, and a touch of sugar – to avoid overly processed flavors. Finally, buy panko from the Asian aisle; Japanese-style panko yields the lightest crunch.
🔪 Preparation Techniques
Dry the chicken thoroughly before coating; moisture interferes with the flour’s ability to adhere. Season the flour mixture generously – the seasoning penetrates the meat during the brief oil bath. When dipping in egg, a quick whisk prevents clumps that could create uneven coating.
🌡️ Mastering the Cooking Process
Maintain oil temperature between 175‑185 °C (350‑365 °F). If the oil drops too low, the coating will absorb excess oil and become soggy. Use a thermometer or a small piece of bread as a temperature test: it should turn golden in 30 seconds. Fry in batches to keep the temperature stable.
🍽️ Presentation & Service
Serve the tenders on a rustic wooden board for visual appeal. Add a small ramekin of extra sauce for guests who love to dunk. Sprinkle microgreens or a light dusting of smoked sea salt just before serving to elevate the dish’s aroma.
🏆 Pro Tips
Understanding the science behind each step separates a good dish from a restaurant‑quality masterpiece.
- 🎯 Brine for Juiciness: Submerge the chicken strips in a solution of 1 tbsp salt per litre of water for 15 minutes. The salt denatures proteins, allowing them to retain moisture during frying.
- 🎯 Double Dredge for Extra Crunch: After the first flour‑egg‑panko coat, let the strips rest for 2 minutes, then repeat the egg and breadcrumb steps. This creates a thicker barrier that stays crisp.
- 🎯 Use a Wire Rack After Frying: Placing the tenders on a rack instead of paper towels prevents steam from softening the crust, preserving crunch.
- 🎯 Simmer Sauce Low and Slow: A gentle simmer allows the sugars to caramelize without burning, delivering a deep, balanced sweetness.
- 🎯 Add a Touch of Acid at the End: Finish the sauce with a squeeze of fresh lemon juice to brighten the flavor and cut through the richness.
- 🎯 Rest Before Serving: Let the tenders sit for 2 minutes after frying; this lets the interior finish cooking gently and the coating set.
"Great food is about balance – the harmony between texture, flavor, and emotion." — Thomas Keller
🔄 Variations & Adaptations
The base recipe is a flexible canvas that welcomes creative twists, whether you’re catering to dietary needs or craving bold new flavors.
🥬 Vegetarian / Vegan Version
Swap the chicken for thick-cut cauliflower florets or tofu strips. Coat tofu in the same flour‑egg (use plant‑based milk) and panko mixture. For a vegan sauce, replace honey‑sweetened ketchup with a no‑added‑sugar variety and use maple syrup instead of brown sugar.
- Use chickpea flour for a gluten‑free coating.
- Add smoked tempeh cubes for extra umami.
🌶️ Flavor Variations
Play with the sauce profile to match different culinary traditions.
Spicy Version:
Increase chili powder to 1 tsp, add ½ tsp cayenne, and finish the sauce with a dash of hot sauce.
Mediterranean Version:
Incorporate 1 tsp dried oregano, 1 tbsp olive oil, and a squeeze of lemon juice. Serve with a side of tzatziki.
Asian‑Inspired Version:
Swap smoked paprika for 1 tsp Chinese five‑spice, add 1 tbsp hoisin sauce, and garnish with toasted sesame seeds.
⚠️ Dietary Adjustments
Gluten‑Free:
Replace all‑purpose flour with rice flour and use gluten‑free panko or crushed cornflakes.
Lactose‑Free:
The recipe is already lactose‑free; just ensure any optional ingredients like butter in the sauce are swapped for plant‑based alternatives.
Low‑Calorie:
Bake the tenders at 200 °C (390 °F) on a wire rack for 15 minutes, turning halfway, instead of frying. Use a sugar‑free ketchup and reduce brown sugar by half.
👶 Kid‑Friendly Version
For picky eaters, reduce the amount of smoked paprika and replace it with a mild sweet paprika. Serve the sauce on the side for dipping, and offer carrot sticks or apple slices as additional companions.
📦 Storage & Reheating
🧊 Conservation
Refrigerator:
- Duration: 3 days
- Container: Airtight plastic container
- Tip: Store sauce separately to keep tenders crisp.
Freezer:
- Duration: 2 months
- Method: Flash‑freeze tenders on a tray, then transfer to a zip‑lock bag.
- Defrost: Thaw overnight in the refrigerator.
💡 For best texture, re‑heat from frozen using the oven method.
♨️ Reheating
🔥 Oven (Recommended):
- Preheat to 190 °C (375 °F).
- Place tenders on a baking sheet lined with parchment.
- Cover loosely with foil and heat for 8 minutes.
- Remove foil and continue for 4‑5 minutes to restore crispness.
⚡ Microwave (Quick):
- Cover with a microwave‑safe lid.
- Heat on medium power for 1 minute.
- Flip and heat another 30 seconds if needed.
🍳 Skillet:
Heat a thin layer of oil over medium heat, add tenders, and cook 2‑3 minutes per side, pressing gently to revive the crust.
🍷 Perfect Pairings
🥗 Side Dishes
- Classic Coleslaw: The creamy tang cuts through the sweet sauce, balancing the palate.
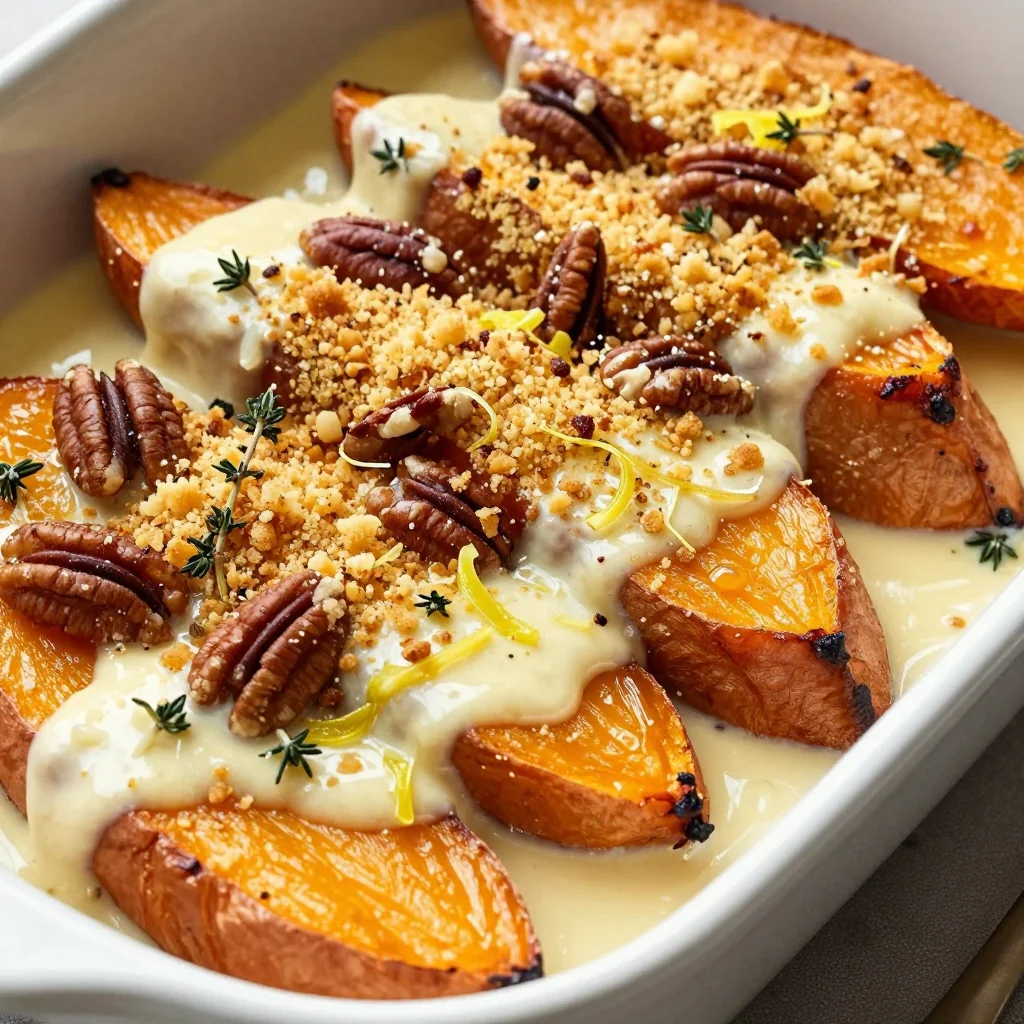
- Sweet Potato Fries: Their natural sweetness mirrors the BBQ notes while adding a different texture.
- Grilled Corn Salad: Charred corn kernels with lime and cilantro bring freshness.
🍷 Wine & Beverage Pairings
- Riesling (off‑dry): Bright acidity matches the sauce’s sweetness.
- Zinfandel: Its fruit‑forward profile complements smoky flavors.
- Non‑Alcoholic: Sparkling apple cider adds a crisp contrast.
🍰 Completing the Meal
Start with a light citrus salad, move to the chicken tenders as the main attraction, and finish with a vanilla bean panna cotta topped with fresh berries for a sweet, refreshing conclusion.
❓ Frequently Asked Questions
Q: Can I use chicken thighs instead of breasts?
A: Absolutely! Thigh meat is juicier and more forgiving if slightly overcooked. Trim excess fat, cut into strips, and follow the same coating process. Adjust cooking time to 4–5 minutes per side.
Q: How do I prevent the coating from falling off?
A: Pat the chicken dry, ensure each layer (flour, egg, panko) adheres fully, and let the coated strips rest briefly before frying. A double dip (egg‑panko twice) creates a stronger bond.
Q: Is there a way to make the sauce spicier without changing the flavor profile?
A: Add a pinch of chipotle powder or a few drops of chipotle hot sauce. The smoky heat integrates seamlessly with the existing smoked paprika.
Q: My sauce turned out too thin. What went wrong?
A: The sauce may not have simmered long enough. Continue cooking over low heat, stirring constantly, until it reduces by about one‑third and coats the back of a spoon.
Q: Can I prepare the sauce ahead of time?
A: Yes. The sauce improves after a few hours in the refrigerator as flavors meld. Reheat gently over low heat before serving.
Q: How do I store leftovers without losing crunch?
A: Keep the tenders in a single layer on a paper towel‑lined plate, covered loosely with foil. Re‑heat in an oven to restore crispness.
🎉 To Your Kitchen!
This recipe marries the satisfying crunch of perfectly fried chicken tenders with a sauce that sings of sweet, smoky, and tangy notes. Whether you’re feeding a crowd at a game night or treating yourself to a weekend snack, the balance of textures and flavors will keep you reaching for more. The portion adjuster ensures you can scale the recipe up or down without sacrificing quality, and the detailed tips guarantee consistent results every time.
Give it a try, experiment with the variations, and don’t hesitate to make it your own. I can’t wait to see your photos, hear about your tweaks, and read your feedback. Happy cooking!
Did you try this recipe?
Leave a comment and rating below! Share your photos on Instagram with #CrispyBBQTenders for a chance to be featured.
Chicken Tenders with BBQ Dipping Sauce
Crispy chicken strips with a sweet‑smoky BBQ dip that’s perfect for any occasion.
📝 Ingredients
Chicken Tenders
BBQ Dipping Sauce
👨🍳 Instructions
- 1 Pat chicken dry, cut into strips, and set up flour, egg, and panko stations.
- 2 Dredge each strip in flour, dip in egg, then coat with panko; let rest 2 minutes.
- 3 Heat oil to 180 °C and fry strips in batches until golden, about 3‑4 minutes per side.
- 4 Remove tenders, drain on paper towels, and keep warm.
- 5 Combine all sauce ingredients in a saucepan; bring to a simmer.
- 6 Reduce heat and let sauce thicken for 8‑10 minutes, stirring frequently.
- 7 Taste and adjust salt or add a dash of lemon juice if needed.
- 8 Arrange tenders on a platter, drizzle lightly with sauce, and garnish.
- 9 Serve with extra sauce on the side and chosen accompaniments.
- 10 Enjoy immediately while hot and crisp.
🥗 Nutritional Information (per serving)
*Values are estimates based on standard ingredient brands.
📚 You Might Also Like
Spicy Honey Chicken Wings
Garlic Parmesan Fries
Classic Caesar Salad


💬 Comments & Reviews
Leave a Comment
No comments yet. Be the first to share your thoughts!