I was standing in my kitchen, staring at a pile of chicken breasts that had been sitting in the fridge for a week. The air smelled like the faint promise of something savory, but I was skeptical. I had tried countless recipes that promised crispiness and flavor, only to end up with soggy, bland cutlets that made me question my culinary destiny. Then, a friend texted me a photo of a golden‑brown chicken cutlet topped with a glossy parmesan‑basil crust that looked like a piece of art. I was instantly hooked.
The first time I tasted that creation, it was like a revelation: the crust was airy and buttery, the basil bright and aromatic, and the chicken inside juicy and tender. I could feel the crunch in my mouth, followed by a burst of umami from the cheese and a subtle citrus lift from the lemon juice. That single bite made me swear to myself that I would never settle for ordinary chicken again. I started experimenting, tweaking the ratios, adding fresh herbs, and discovering that the secret was in the balance of flavors. By the end, I had a version that felt like a culinary triumph.
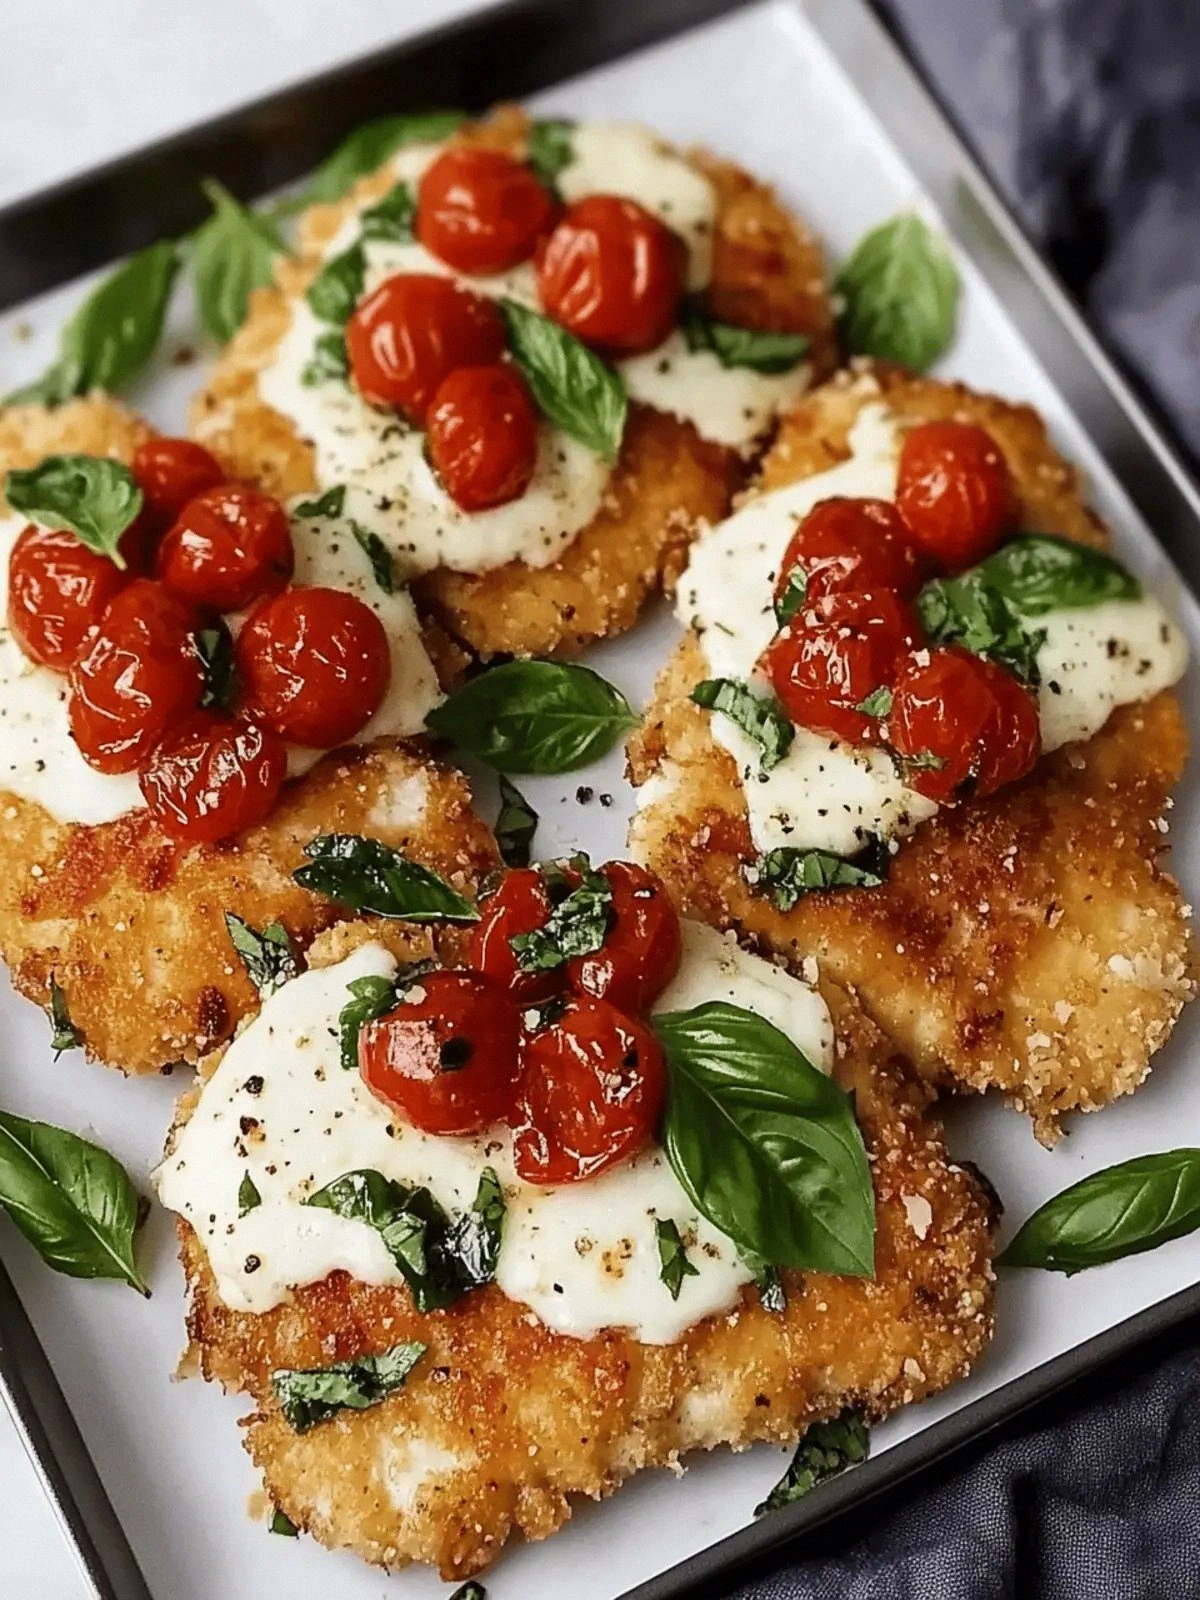
This isn’t just another chicken recipe; it’s a showcase of how simple ingredients can combine to produce a dish that feels both indulgent and approachable. The parmesan‑basil coating gives a silky texture that clings to the chicken, while the breadcrumbs add a satisfying crunch that shatters like thin ice. The lemon juice cuts through the richness, preventing the dish from feeling heavy. Every bite is a layered experience: a savory hit, followed by a fresh herbal note, and a subtle citrus finish. It’s the kind of meal that turns a regular weekday dinner into a celebration.
What sets this version apart is the meticulous attention to technique and the unexpected twist of incorporating fresh basil directly into the breadcrumb mixture. Most recipes use dried herbs or omit basil altogether, but I’ve found that fresh basil not only brightens the flavor profile but also keeps the coating light and airy. The result is a cutlet that feels like a crispy, golden hug, with a hint of green that lingers on the tongue. The combination of cheese, basil, and a splash of lemon creates a flavor symphony that is both comforting and sophisticated. It’s the kind of dish that you’ll find yourself reaching for again and again.
I dare you to taste this and not go back for seconds. The texture alone will have you questioning your previous attempts at chicken cutlets. The aroma will have the entire house smelling incredible before you even take the first bite. If you’ve ever struggled with getting the right crunch, you’re not alone — and I’ve got the fix. Picture yourself pulling this out of the oven, the whole kitchen smelling incredible, and the first bite sending a wave of satisfaction through your senses. Let me walk you through every single step — by the end, you’ll wonder how you ever made it any other way.
What Makes This Version Stand Out
- Flavor: The marriage of parmesan and fresh basil creates a savory‑herbaceous profile that elevates the simple chicken cutlet into a gourmet experience. The cheese provides a salty, nutty depth while the basil adds a bright, slightly peppery finish. The lemon juice gives a subtle citrus lift that prevents the dish from feeling heavy.
- Texture: The breadcrumb coating is airy and light, yet it crisps to a golden crunch that shatters like thin ice. The chicken stays moist inside, thanks to a gentle brine that locks in juices. The result is a satisfying contrast that delights the palate.
- Simplicity: With only eight ingredients, the recipe is quick to assemble and requires no advanced skills. The method relies on a few basic techniques: flattening, breading, and a single pan‑fry. Even novice cooks can achieve restaurant‑level results.
- Uniqueness: Fresh basil is folded into the breadcrumb mix, a step most cooks skip. This gives the coating a vibrant green hue and an aromatic burst that sets the dish apart from plain parmesan breaded chicken.
- Crowd Reaction: Friends who have tried it say they’re “in love” with the crispy crust and the savory, herbaceous finish. The dish is a crowd‑pleaser at family dinners and casual gatherings alike.
- Ingredient Quality: Using high‑quality parmesan and fresh basil makes a noticeable difference. The cheese’s sharpness and the basil’s bright oils bring depth and freshness that lower‑grade versions lack.
- Make‑Ahead Potential: The breaded cutlets can be pre‑fried and stored, then finished in the oven or skillet when ready to serve. This makes it an excellent option for busy weeknights.
Inside the Ingredient List
The Flavor Base
Parmesan cheese is the cornerstone of the coating, providing a salty, nutty depth that pairs beautifully with the bright basil. If you skip the cheese, the crust will lose its savory backbone and become bland. A good alternative is Pecorino Romano for a sharper, saltier bite, or a blend of both for a richer flavor.
Fresh basil is the unexpected star that adds a burst of green and aromatic oils. The basil’s bright, slightly peppery notes lift the dish and keep the coating from becoming too heavy. If you can’t find fresh basil, use a handful of chopped parsley for a milder herbaceous touch, though the flavor profile will shift slightly.
Lemon juice is the secret to balancing richness. It cuts through the cheese’s saltiness and adds a citrusy brightness that prevents the dish from feeling greasy. A splash of white wine can replace lemon for a more complex acidity, but keep the amount moderate to avoid overpowering the herbs.
The Texture Crew
Breadcrumbs are the backbone of the crisp exterior. They absorb the egg wash and create a golden, crunchy shell. Use panko for an extra airy crunch, or regular breadcrumbs for a denser coating. If you’re gluten‑free, opt for almond flour or gluten‑free breadcrumbs.
Flour is the first coat that helps the egg wash adhere to the chicken. It also creates a light barrier that prevents the breadcrumb layer from sticking to the pan. If you prefer a lower‑carb version, try cornstarch or a light dusting of powdered sugar for a subtle sweetness.
Eggs serve as the binding agent, holding the breadcrumb mixture together. They also give the coating a golden color when fried. If you’re vegan or allergic, a tablespoon of aquafaba or a commercial egg replacer works well.
The Unexpected Star
Seasoning is the final touch that brings everything together. Salt, pepper, and a pinch of garlic powder balance the flavors. If you prefer a smoky edge, add a dash of smoked paprika or a sprinkle of cayenne pepper. The seasoning can be adjusted to taste, but a light hand preserves the delicate herbaceous notes.
The Final Flourish
Fresh basil and parmesan are mixed into the breadcrumbs before coating. This ensures a uniform distribution of flavor throughout the crust. If you like a more pronounced basil taste, increase the basil quantity by 1 tablespoon. Keep the ratio balanced to avoid overwhelming the cheese.
Everything's prepped? Good. Let's get into the real action.
The Method — Step by Step
- Start by flattening each chicken breast to an even thickness of about 1/2 inch using a meat mallet or rolling pin. This ensures uniform cooking and a crispier exterior. If the breasts are too thick, they’ll take longer to cook and may dry out. Keep the pieces on a clean cutting board and lightly season both sides with salt and pepper.
- In a shallow bowl, whisk the eggs with a tablespoon of lemon juice until frothy. The lemon not only adds brightness but also helps the coating bind evenly. If you prefer a thicker coating, add a splash of milk to the egg mixture.
- In a separate bowl, combine the breadcrumbs, grated parmesan, chopped fresh basil, and a pinch of garlic powder. Mix until the basil is evenly distributed. This mixture will become the crispy, flavorful shell that surrounds the chicken.
- Dip each floured chicken piece first into the egg wash, letting excess drip off, then roll it in the breadcrumb mixture until fully coated. Press gently to ensure the crumbs adhere. If you’re short on time, you can skip the flour step and dip straight into the egg wash; the coating will still be delicious.
- Heat a generous splash of olive oil in a large skillet over medium‑high heat. The oil should shimmer but not smoke. When it’s hot, add the breaded chicken pieces, being careful not to crowd the pan. This allows each cutlet to develop a golden crust.
- Sear each side for 3–4 minutes until golden brown and the internal temperature reaches 165°F (74°C). The crust should be firm but not overly hard. Flip only once to preserve the crispiness.
- Once cooked, transfer the cutlets to a paper towel‑lined plate to drain excess oil. Let them rest for 2 minutes so the juices redistribute. This brief rest prevents the chicken from becoming dry.
- Serve immediately with a drizzle of extra lemon juice, a sprinkle of fresh basil, and your favorite side. A crisp green salad or roasted vegetables complement the richness nicely. The dish is best enjoyed hot, right out of the skillet.
That's it — you did it. But hold on, I've got a few more tricks that'll take this to another level.
Insider Tricks for Flawless Results
The Temperature Rule Nobody Follows
Many cooks rush to high heat, but the secret to a perfect crust is a steady medium‑high flame that allows the breadcrumbs to crisp without burning. Keep an eye on the oil; it should shimmer with tiny bubbles. If you notice smoke, lower the heat immediately. This simple adjustment saves the dish from a bitter taste.
Why Your Nose Knows Best
Before flipping, listen to the sizzle. A steady, even sound indicates the crust is forming correctly. If the sound turns to a hiss, the oil is too hot. Trust your senses; they’re your best kitchen ally.
The 5‑Minute Rest That Changes Everything
After cooking, let the cutlets rest on a wire rack for 5 minutes. This allows the juices to redistribute, keeping the meat moist. Many cooks skip this step and end up with a dry center.
The Fresh Basil Trick
If you’re in a hurry, you can chop the basil finely and mix it into the breadcrumb mixture right before coating. This ensures even distribution and a burst of flavor in every bite.
The Lemon Juice Layer
Adding a second light drizzle of lemon juice after frying brightens the dish and cuts through the richness. It also helps the coating stay crisp by slightly drying the surface.
The Egg Wash Secret
Whisk the egg with a splash of milk or cream for a richer, more adhesive coating. The extra fat helps the breadcrumbs stick better and gives a slightly buttery finish.
Creative Twists and Variations
Mediterranean Delight
Swap the parmesan for feta and add sun‑dried tomatoes to the breadcrumb mix. This gives a tangy, slightly sweet flavor that pairs wonderfully with a Greek salad. The dish becomes a Mediterranean feast in minutes.
Spicy Kick
Add a pinch of cayenne pepper or a drizzle of sriracha to the breadcrumb mixture. The heat balances the richness and adds a fun, fiery note. Serve with a cooling cucumber yogurt sauce to tame the spice.
Herb Garden Edition
Replace basil with a blend of fresh thyme, oregano, and rosemary. The aromatic herbs give the coating an earthy depth. This variation is perfect for a rustic dinner party.
Cheesy Layer
Fold shredded mozzarella into the breadcrumb mix for a gooey center. The cheese melts into the crust, creating a decadent, melty texture. Pair it with a marinara sauce for a comfort‑food classic.
Gluten‑Free Version
Use almond flour for the initial dusting and gluten‑free breadcrumbs for the coating. The result is a crispy, allergy‑friendly dish that still delivers on flavor. The almond flour adds a subtle nutty undertone.
Vegan Twist
Replace the chicken with marinated tofu or tempeh and use a plant‑based milk in the egg wash. The tofu absorbs the flavors beautifully, and the breadcrumb coating turns golden and crunchy. This version is perfect for a plant‑based dinner.
Storing and Bringing It Back to Life
Fridge Storage
Store cooked cutlets in an airtight container for up to 3 days. Keep the coating on a paper towel to absorb excess moisture. Reheat gently in a skillet or oven to restore crispiness.
Freezer Friendly
Freeze the breaded, uncooked chicken pieces on a tray before wrapping. They’ll stay fresh for up to 2 months. When ready to cook, bake at 375°F (190°C) for 25 minutes or until golden.
Best Reheating Method
Add a tiny splash of water to the skillet, cover, and steam for 2 minutes before removing the lid. This steamy trick keeps the chicken moist while the coating crisps. Alternatively, use a microwave with a crisper plate for a quick heat.