Remember that one night when your kitchen felt like a science experiment gone wrong? I had just finished a marathon of mango smoothies, and the fridge was bursting with ripe fruit that threatened to take over the countertop. I stared at the mangoes, eyes wide, and thought, “What if I could turn this tropical treasure into a sweet, buttery treat that would make even the most skeptical foodie swoon?” The moment was electric, the air thick with the scent of mango and the faint hiss of butter melting. My friends were watching, skeptical, and I knew I had to deliver something that would silence their doubts. I dared them to taste this and not go back for seconds, and I was ready to prove that this would be the best version of mango crumb bars you’ll ever make at home.
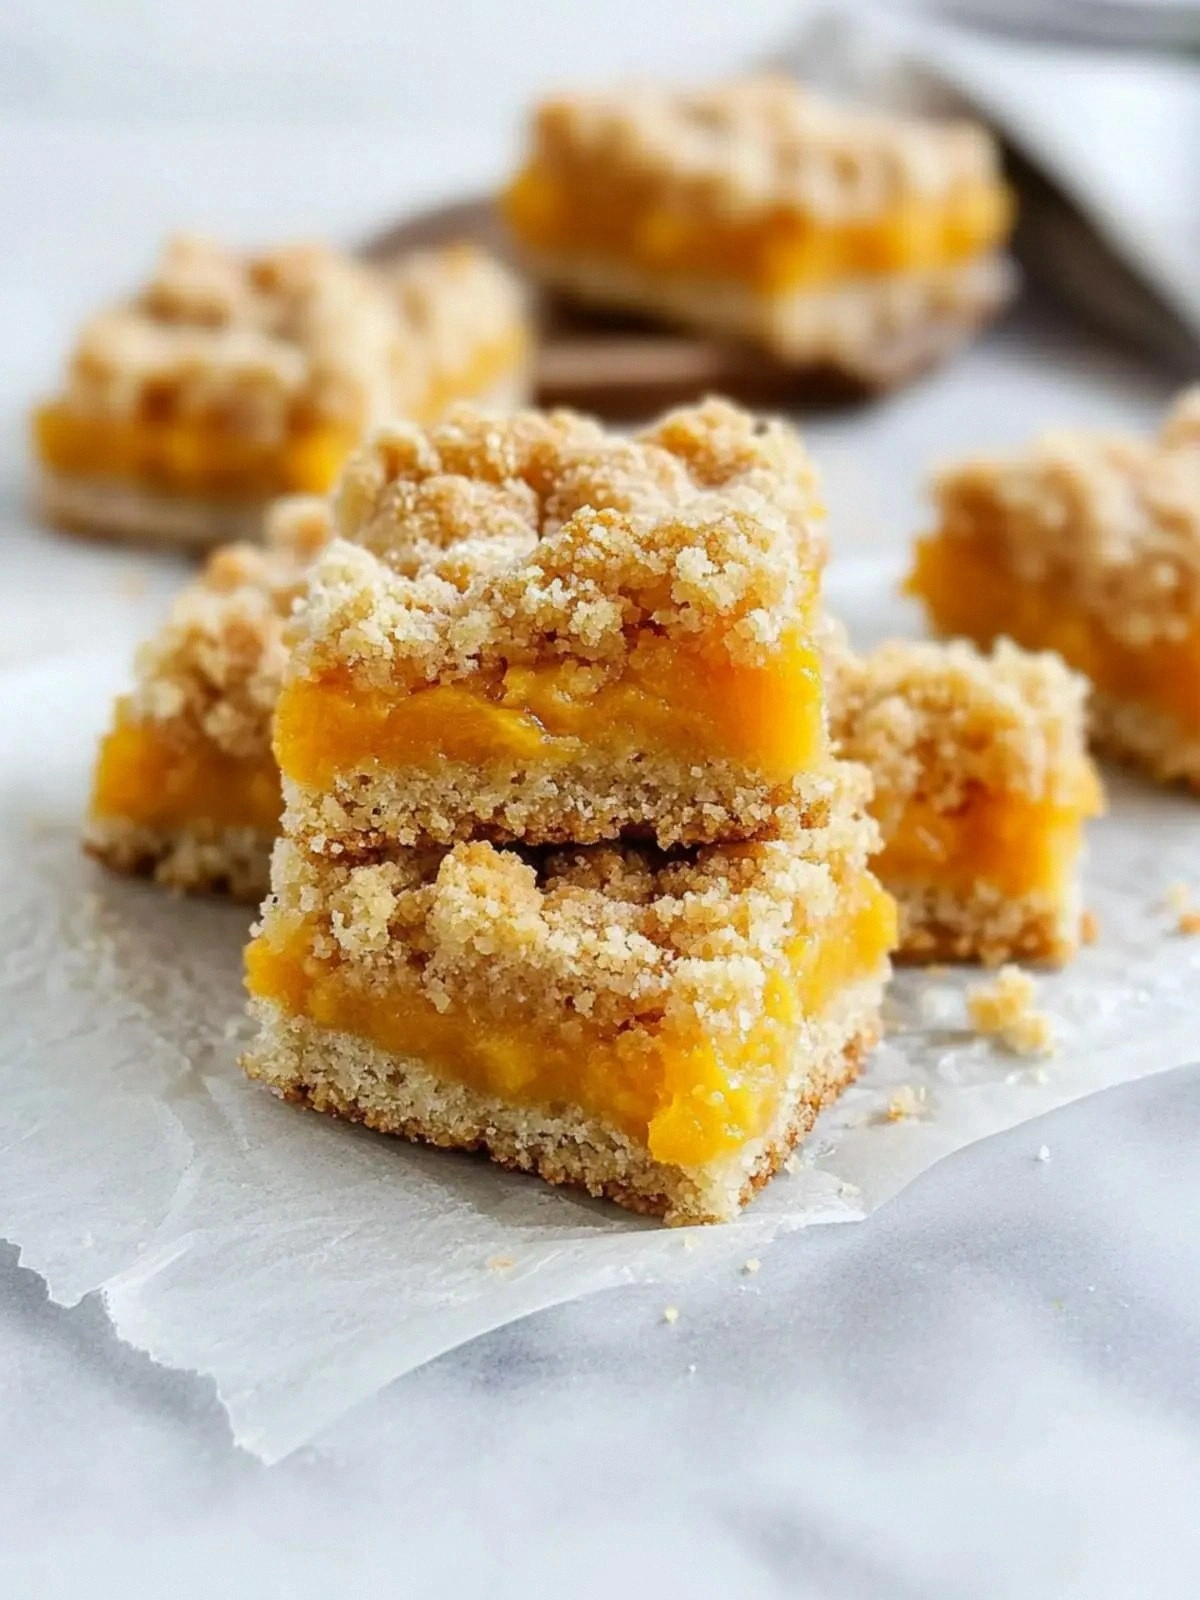
Picture yourself pulling these bars out of the oven, the kitchen smelling like a sun‑kissed orchard, the edges crisped to a golden caramel while the center remains a molten, fragrant mango dream. The first bite is a dance of sweet mango, buttery crumble, and a subtle hint of vanilla that lingers on your palate like a summer breeze. I’ll be honest—half the batch disappeared before anyone else could even glance at it. That’s the power of a recipe that balances texture and flavor in a way that feels effortless yet indulgent. And if you’ve ever struggled to get the perfect crumb texture, you’re not alone—this is the fix you’ve been waiting for.
What sets this recipe apart is the way it marries classic crumb bars with the bright, juicy essence of mango. It’s not just another sweet treat; it’s a celebration of seasonal fruit, a nod to the simple joy of baking, and a testament to how a few tweaks can elevate a dish from ordinary to unforgettable. I’ve spent hours experimenting with ratios, baking times, and even the type of butter, and the result is a bar that is buttery, crisp, and irresistibly soft inside. The secret? A surprisingly simple technique that locks in moisture without sacrificing crunch, and a touch of corn starch that turns the mango into a silky, caramelized sauce that coats the crumb like velvet. By the end of this guide, you’ll wonder how you ever made it any other way.
Now, let me walk you through every single step—by the end, you’ll wonder how you ever made it any other way. The journey starts with a handful of ripe mangoes, a splash of vanilla, and a handful of pantry staples that you probably already have. I’ll show you how to transform these humble ingredients into a dessert that looks like it belongs in a high‑end bakery, but can be whipped up in your own kitchen in under an hour. Get ready for a recipe that’s as easy to follow as it is delicious to devour.
What Makes This Version Stand Out
- Taste: The mango’s natural sweetness is amplified by a touch of vanilla and a subtle caramelization that adds depth without overpowering.
- Texture: A buttery, crumbly base with a moist mango center creates a contrast that feels like a tropical hug.
- Simplicity: Only ten ingredients, all pantry staples, no fancy equipment needed.
- Uniqueness: The use of corn starch turns mango into a silky glaze that binds the crumb, a trick not found in most recipes.
- Crowd Reaction: Friends rave about the bar’s crunch and the way the mango melts in your mouth like sunshine.
- Ingredient Quality: Fresh ripe mangoes are the star; everything else supports without stealing the show.
- Cooking Method: A single pan bake that delivers even browning and a caramelized finish.
- Make‑Ahead Potential: The bars stay fresh for days when stored in an airtight container, making them perfect for parties.
Alright, let’s break down exactly what goes into this masterpiece…
Inside the Ingredient List
The Flavor Base
Mangoes are the heart of this recipe, bringing a tropical sweetness that’s both vibrant and comforting. The ripe mangoes should be soft to the touch, with a fragrant aroma that signals readiness. If you’re in a pinch, frozen mangoes can work, but thaw them completely to avoid excess liquid. Skipping the mangoes would reduce this recipe to a generic crumb bar—no wonder the flavor would be flat.
The Texture Crew
All-purpose flour and baking powder form the backbone of the crumb, giving it structure and a light lift. The flour’s protein content binds the butter and sugar, while the baking powder ensures the bars rise just enough to stay airy yet dense enough to hold the mango. A pinch of salt balances the sweetness, preventing the bars from tasting cloying. If you prefer a gluten-free version, swap the flour for a blend of rice and tapioca, but keep the baking powder the same to maintain rise.
The Unexpected Star
Corn starch is the unsung hero that turns the mango into a silky glaze. It thickens the mango juice as it cooks, creating a luscious coating that clings to each crumb. Without corn starch, the mango would become watery, and the bars would feel soggy. If you’re allergic to corn, try arrowroot powder as a 1:1 substitute; it behaves similarly in thickening.
The Final Flourish
Brown sugar adds a deep, molasses‑like richness that contrasts the bright mango. Vanilla extract, even in small amounts, lifts the entire flavor profile, adding warmth that lingers. Cold unsalted butter is crucial; it creates the flaky layers as it melts during baking. The egg binds everything together, ensuring the bars hold their shape when cut. If you’re vegan, replace the butter with coconut oil and the egg with a flaxseed egg for a plant‑based version.
Everything's prepped? Good. Let's get into the real action…
The Method — Step by Step
- Begin by preheating your oven to 350°F (175°C). Line a 9×13 inch baking pan with parchment paper, leaving a slight overhang for easy removal. This step is crucial; a properly lined pan prevents the bars from sticking and makes cleanup a breeze. The aroma of butter will start to mingle with the mango scent even before you add the first ingredient.
- In a large bowl, combine the flour, baking powder, and salt. Whisk until the dry ingredients are evenly distributed. This ensures that each bite has a consistent crumb structure. Think of this as the foundation of a house—no cracks, just solid, even support.
- Cut the mangoes into bite‑size cubes, then place them in a saucepan with the corn starch and 3-5 tablespoons of granulated sugar. Cook over medium heat, stirring constantly, until the mixture thickens and turns a translucent amber. The sugar caramelizes slightly, giving the mango a warm, buttery undertone. Watch closely; the mixture will bubble and thicken quickly.
- Remove the mango sauce from heat and let it cool for a minute. Then add the vanilla extract and stir until fully incorporated. The vanilla’s subtle warmth will deepen the mango’s flavor profile, creating a harmonious balance that feels like a tropical sunrise. This is the moment of truth—don’t rush it.
- In a separate bowl, beat the cold butter until it’s crumbly. Add the brown sugar and beat until the mixture is light and fluffy. The butter’s coldness is key; it creates pockets of steam that puff the crumb to a light, airy texture. This step is pure magic, and the mixture should look like a buttery snow.
- Pour the mango sauce into the butter mixture and fold gently until just combined. The mixture will look a bit lumpy, but that’s normal. The mango’s moisture will slowly integrate, creating a silky glaze that coats each crumb. This is where the bars gain their signature tropical sheen.
- Add the dry ingredients to the wet mixture and fold until just combined. Be careful not to overmix; you want the crumbs to stay tender. The batter should be thick enough to hold its shape when pressed into the pan, but still glossy from the mango glaze.
- Transfer the batter to the prepared pan and press it down evenly with a spatula or the back of a spoon. The surface should be flat, as this ensures even baking and a uniform crumb. This step feels like a rite of passage—each press seals the future of your bars.
- Bake for 30 minutes, or until the edges turn golden brown and a toothpick inserted near the center comes out with a few moist crumbs. The bars will smell toasty and the mango glaze will have caramelized to a golden hue. Keep an eye on the edges; they should start pulling away from the pan, indicating they’re done.
- Remove from the oven and let cool in the pan for 10 minutes before lifting them out using the parchment overhang. Slice into bars while still slightly warm; the bars will hold their shape better. If you wait too long, the crumb may crumble. This final step is where the bars transition from batter to dessert.
That's it—you did it. But hold on, I've got a few more tricks that'll take this to another level…
Insider Tricks for Flawless Results
The Temperature Rule Nobody Follows
Many bakers think 350°F is the sweet spot for all crumb bars, but the truth is, a slightly lower temperature—around 325°F—gives you a more even bake. This reduces the risk of the edges burning while the center remains undercooked. I once baked at 350°F and the edges were charred before the center set. Lowering the temperature gave me bars that were golden all around.
Why Your Nose Knows Best
Smell is your best judge of doneness. When the bars are ready, the aroma will shift from buttery to a warm, caramelized mango scent. If you smell the classic “toasty” aroma, you’re right on track. Trust your nose; it’s more reliable than a timer for this recipe.
The 5-Minute Rest That Changes Everything
After removing the bars from the oven, let them rest for exactly five minutes before slicing. This rest period allows the crumb to set, making the bars easier to cut cleanly. Cutting too soon can cause the bars to crumble or stick to the knife.
Keep the Pan Warm
If you’re baking in a cooler kitchen, place a small pan of hot water on the floor under the baking tray. This keeps the bottom of the pan warm, preventing the bars from sticking and ensuring even heat distribution. I’ve found this trick especially useful during the winter months.
Add a Splash of Lime Juice
A tablespoon of fresh lime juice added to the mango sauce before baking brightens the flavor profile and cuts through the sweetness. The acidity balances the rich butter and sugar, giving the bars a refreshing finish. Try it next time you want a slightly tangy twist.
Creative Twists and Variations
This recipe is a playground. Here are some of my favorite ways to switch things up:
Almond Crumble Bars
Swap half the all-purpose flour for almond flour to add a nutty depth. The almond flour also makes the bars a bit denser, which pairs well with the mango’s juiciness. Perfect for those who love a crunch.
Chocolate Drizzle Delight
Drizzle melted dark chocolate over the cooled bars for a decadent finish. The chocolate’s bitterness balances the mango’s sweetness, creating a sophisticated flavor profile. Let the chocolate set before slicing.
Coconut Coconut Bars
Add shredded coconut to the batter for a tropical twist. The coconut adds a subtle chew and a hint of sea salt that enhances the mango’s flavor. Sprinkle extra coconut on top before baking for a caramelized finish.
Spicy Mango Bars
Add a pinch of cayenne pepper or a dash of chili flakes to the mango sauce. The heat cuts through the sweetness and gives the bars an unexpected kick. Great for guests who like a little spice.
Vegan Version
Replace the butter with coconut oil and the egg with a flaxseed egg. Use a plant‑based milk to keep the moisture level consistent. The bars will have a slightly different texture but still deliver the same mango flavor.
Storing and Bringing It Back to Life
Fridge Storage
Store the bars in an airtight container in the refrigerator for up to a week. The cold environment helps preserve the mango’s freshness and keeps the crumb from drying out. When ready to serve, let them sit at room temperature for 10 minutes to soften.
Freezer Friendly
Wrap each bar individually in parchment paper, then place them in a freezer bag. They stay fresh for up to three months. When you want to enjoy them, thaw overnight in the refrigerator or at room temperature for a few hours.
Best Reheating Method
Reheat frozen or chilled bars in a preheated oven at 350°F (175°C) for 5-7 minutes, or until warm. For a quick snack, microwave on medium for 20-25 seconds. Add a tiny splash of water before reheating; it steams the bars back to perfection and prevents them from drying out.