It all began on a rainy Sunday afternoon when I was rummaging through the pantry, trying to salvage a forgotten jar of coffee beans, a bag of stale biscuits, and a half‑sized tub of cream cheese. The kitchen smelled of burnt toast and old coffee, and I felt the urge to turn that chaos into something spectacular. I grabbed the biscuits, crushed them like a secret weapon, and started whisking the cream cheese until it was smoother than a jazz saxophone solo. The result? A heavenly coffee‑cake cheesecake that made my taste buds do a double tap. If you’ve ever stared at a broken recipe and thought, “I could do better,” then this is the culinary revolution you’ve been waiting for.
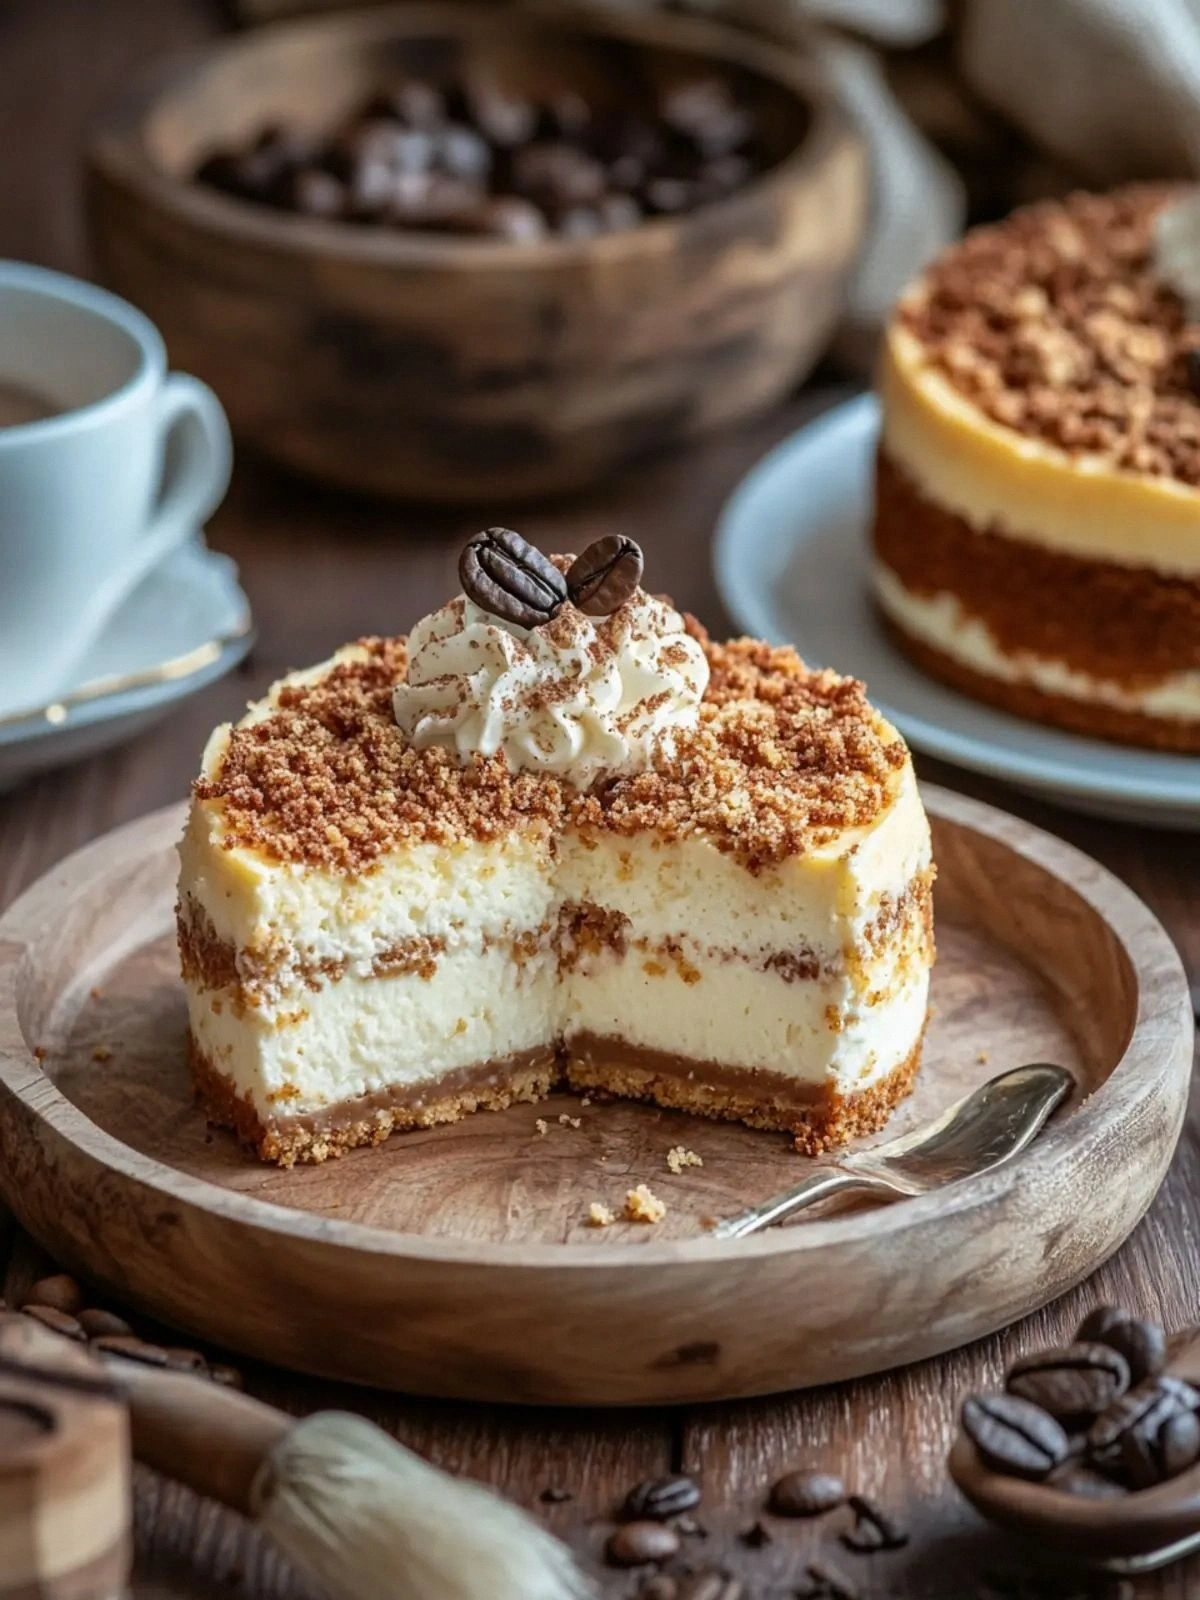
Picture this: the first bite melts on the tongue, revealing layers of buttery biscuit crust, a silky custard base, and a subtle hint of cinnamon that lingers like a whisper. The aroma is a warm embrace of coffee, brown sugar, and toasted crumbs, while the texture oscillates between a velvety center and a lightly crisp edge that shatters like thin ice. The visual is a golden‑brown dome with a glossy finish that invites you to take a bite, only to find that the flavor profile is far richer than it looks. I dare you to taste this and not go back for seconds, because once you’ve experienced the perfect balance of sweet and spice, the ordinary dessert world feels like a distant memory.
What sets this version apart is not just the combination of ingredients, but the way each element is treated with reverence. The biscuits form a crunchy foundation that holds the cheesecake together, while the cream cheese delivers that signature smoothness that melts in your mouth. Dark brown sugar adds depth, turning the sweetness into a caramelized kiss that pairs beautifully with the coffee aroma. The cinnamon is not merely a garnish; it permeates the batter, creating a subtle spice that lingers long after the last bite. This is hands down the best version you'll ever make at home, because it marries classic techniques with bold flavor twists that elevate every component.
I’ll be honest — I ate half the batch before anyone else got to try it, and the kitchen still smells like victory. Most recipes get this completely wrong by either over‑baking the center or under‑seasoning the crust. Here’s what actually works: a gentle heat, a careful balance of wet and dry, and a final chill that locks in the texture. Picture yourself pulling this out of the oven, the whole kitchen smelling incredible, and the first slice sliding off the pan like a piece of silk. Stay with me here — this is worth it. Let me walk you through every single step, and by the end, you'll wonder how you ever made it any other way.
What Makes This Version Stand Out
- Taste: The coffee undertone is amplified by dark brown sugar, creating a caramelized richness that lingers. The subtle cinnamon twist adds a warm, aromatic layer that feels like a cozy hug.
- Texture: A buttery biscuit crust provides a satisfying crunch, while the creamy filling offers silky smoothness that melts in the mouth.
- Ingredient Quality: Using high‑quality cream cheese and fresh coffee grounds ensures depth and authenticity.
- Ease of Prep: All steps are straightforward, no complicated techniques or exotic equipment required.
- Make‑Ahead Potential: The cheesecake can be prepared a day in advance and kept chilled, allowing flavors to meld beautifully.
- Visual Appeal: The golden crust and glossy finish make for a stunning presentation that impresses guests instantly.
- Audience Reaction: Friends and family will ask for the recipe after the first bite, and you'll become the go‑to dessert chef.
- Versatility: The base can be adapted for coffee lovers, chocolate lovers, or even a vanilla twist.
Alright, let's break down exactly what goes into this masterpiece... and trust me, each component is a hero in its own right.
Inside the Ingredient List
The Flavor Base
Dark brown sugar is the unsung hero that brings depth and caramel notes. It’s not just a sweetener; it’s a flavor enhancer that balances the richness of the cream cheese. If you skip it, the cheesecake will taste flat, like a plain sponge. Use a 1:1 substitution with regular granulated sugar, but expect a slightly drier texture.
The Texture Crew
All-purpose flour is the backbone of the crust, giving it structure without making it heavy. The flour also helps absorb excess moisture from the butter, ensuring a crisp edge. If you’re gluten‑free, you can swap it for a 1:1 blend of rice flour and potato starch, but the crust will be a bit more delicate.
The Unexpected Star
Cinnamon sugar adds a sweet, spiced finish that contrasts beautifully with the coffee undertones. This subtle sweet layer is the finishing touch that turns a good cheesecake into a great one. If you prefer a more pronounced spice, increase the cinnamon to 1½ teaspoons.
The Final Flourish
Cinnamon is the secret that ties everything together. It infuses the batter with warmth and depth, creating a flavor profile that feels both comforting and sophisticated. If you’re a cinnamon lover, feel free to sprinkle an extra pinch on top before serving for an extra aromatic burst.
Everything's prepped? Good. Let's get into the real action...
The Method — Step by Step
- Preheat your oven to 160°C (320°F) and line a 9‑inch springform pan with parchment paper. This low‑temperature bake ensures the cheesecake sets gently without cracking. While the oven warms, set a bowl of ice‑cold water on the counter; it’s a quick way to keep the batter chilled later.
- In a medium bowl, combine the crushed digestive biscuits, 100 g butter (melted), and 100 g dark brown sugar. Mix until the crumbs are evenly coated. This step creates a moist, buttery base that will hold the cheesecake together. The butter should be warm enough to bind but not liquid.
- Press the biscuit mixture firmly into the bottom of the springform pan, creating an even layer. Use the back of a spoon or a flat glass to smooth the surface. Let the crust chill in the refrigerator for 15 minutes to firm up before adding the filling.
- In a stand mixer, beat the cream cheese until it’s silky and free of lumps. Add 200 g sour cream and 150 g sugar, continuing to beat until the mixture is light and fluffy. The addition of sour cream adds tang and lightness, preventing the cheesecake from becoming too dense.
- Add the eggs one at a time, beating gently after each addition. This slow incorporation prevents curdling and ensures a smooth batter. The eggs are the binding agent that gives the cheesecake its characteristic structure.
- Stir in 1 tsp cinnamon and 100 g all‑purpose flour until just combined. The flour keeps the batter from being too runny, while the cinnamon infuses it with warmth. Be careful not to over‑mix; you want a tender crumb, not a dense loaf.
- Pour the batter over the chilled crust, smoothing the top with a spatula. Tap the pan gently on the counter to release air bubbles. The batter should spread evenly, covering the crust completely.
- Slide the pan into the preheated oven and bake for 35–40 minutes. The edges should set while the center remains slightly wobbly. This gentle bake allows the cheesecake to set slowly, preventing cracks.
- When the oven door opens, turn it off and let the cheesecake sit in the oven for an additional 15 minutes with the door ajar. This gradual cooling process prevents sudden temperature changes that could cause cracks. The cheesecake will continue to set as it cools.
- Remove the cheesecake from the oven and let it cool to room temperature. Once cooled, refrigerate for at least 4 hours, preferably overnight. The chilling step is essential for a firm, sliceable texture.
That's it — you did it. But hold on, I've got a few more tricks that'll take this to another level. From a glossy finish to a sprinkle of cinnamon sugar, the finishing touches will elevate this dessert into a showstopper.
Insider Tricks for Flawless Results
The Temperature Rule Nobody Follows
Baking at a low, steady temperature is the secret to a crack‑free cheesecake. Many people crank the oven up to 200°C, but the gentle 160°C allows the batter to set without the edges drying out too quickly. If you’re using a convection oven, lower the temperature by 20°C to compensate for the fan.
Why Your Nose Knows Best
Smell the batter as you mix. A faint coffee aroma indicates the grounds are well incorporated. If the scent is weak, add a tablespoon of finely ground instant coffee for an extra punch. The nose is a reliable guide to flavor balance, especially when you’re experimenting with spice levels.
The 5‑Minute Rest That Changes Everything
After the cheesecake has cooled to room temperature, let it rest in the fridge for 5 minutes before removing the springform. This short pause allows the edges to set, making it easier to release the cake without tearing. Many home bakers skip this step and end up with a fragile dessert.
The Perfect Crust
Press the crust firmly into the pan to create a solid base. A loose crust will crumble when you slice. Use the back of a spoon or a flat glass to level the surface and press the crumbs evenly.
The Final Glaze
Before serving, drizzle a simple glaze made from melted dark chocolate and a splash of coffee. This glossy finish adds visual appeal and an extra layer of flavor. If you prefer a lighter touch, a dusting of cinnamon sugar will suffice.
Creative Twists and Variations
This recipe is a playground. Here are some of my favorite ways to switch things up:
Mocha Madness
Replace the coffee grounds with a tablespoon of instant espresso powder and add 2 tbsp of cocoa powder to the batter. The result is a rich mocha cheesecake that pairs perfectly with a latte. This variation is a hit with chocolate lovers who want a coffee kick.
Nutty Delight
Fold in 50 g of chopped toasted walnuts or pecans into the batter before baking. The crunch adds texture and a nutty aroma that complements the sweet crust. Serve with a drizzle of caramel sauce for a decadent treat.
Caramel Swirl
Swirl a caramel sauce into the batter just before baking. The caramel ribbons add a glossy visual effect and a buttery sweetness that balances the coffee notes. This version is perfect for a dessert party where presentation matters.
Berry Burst
Top the chilled cheesecake with a layer of mixed berries and a dusting of powdered sugar. The tartness of the berries cuts through the richness, creating a harmonious flavor profile. This variation works well for summer gatherings.
Spiced Orange
Add zest from one orange and a pinch of ground cloves to the batter. The citrus brightens the coffee flavor, while the cloves add warmth. This version is a seasonal favorite during the fall and winter months.
Almond Crumble
Replace the digestive biscuits with almond flour for a gluten‑free crust. The almond flavor pairs wonderfully with coffee, creating a nutty, sophisticated dessert. This variation is great for those who want a healthier, lower‑carb option.
Storing and Bringing It Back to Life
Fridge Storage
Store the cheesecake in an airtight container in the refrigerator for up to 5 days. The airtight seal prevents the cheesecake from drying out and maintains its creamy texture. When you’re ready to serve, let it sit at room temperature for 10–15 minutes for the best mouthfeel.
Freezer Friendly
Wrap the cheesecake tightly in plastic wrap, then in aluminum foil, and freeze for up to 2 months. When you’re ready to enjoy, thaw overnight in the refrigerator. A quick 10‑minute warm‑up in the oven at 80°C will revive the texture if you prefer a slightly warmer dessert.
Best Reheating Method
If the cheesecake feels too firm after refrigeration, warm it gently in a water bath at 80°C for 10 minutes. The gentle heat reintroduces moisture without over‑cooking the surface. A tiny splash of water before reheating helps the cheesecake steam back to perfection, keeping it silky and luscious.