I was standing in my kitchen at 2 a.m., half‑asleep, with a half‑finished batch of store‑bought Danish that had somehow turned into a midnight snack disaster. The pastry was soggy, the cheese filling was bland, and the raspberry jam had curdled into a sad, glue‑like mess. I stared at the mess, sighed, and thought, “If I’m going to ruin my night, I might as well make something that actually rocks.” That moment of culinary desperation birthed the ultimate Raspberry Cheesecake Danish Pastry—a version that turned my kitchen nightmare into a triumph of flavor, texture, and pure, unapologetic indulgence.
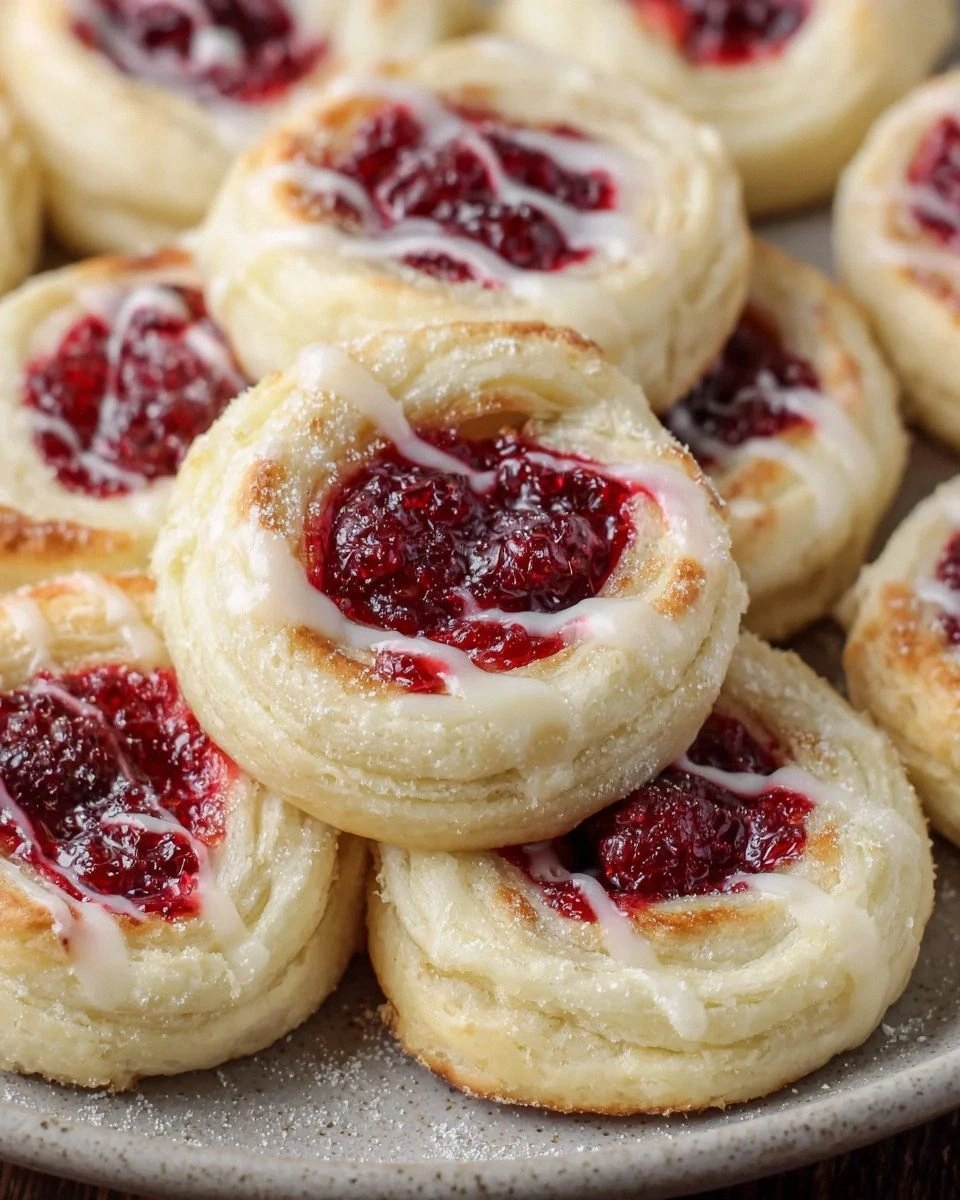
Picture this: a golden, flaky crust that gives way to a silky, tangy cream cheese center, all crowned with a glossy ribbon of raspberry preserve that glistens like sunrise on a lake. The aroma that fills the air is a heady mix of butter‑toasted dough, sweet‑tart berries, and a whisper of vanilla that makes your nose do a little happy dance. When you bite in, the crust cracks with a satisfying snap, the filling spreads like velvet, and the raspberry burst releases a juicy pop that makes you want to close your eyes and sigh. It’s a sensory symphony that makes even the most stoic breakfast skeptic melt.
Most recipes out there either skimp on the buttery layers or drown the delicate cheese in a swamp of sugary glaze. I’ve tried them all, and most of them get it completely wrong—either the pastry is too dense, the filling too sweet, or the berries end up a mushy afterthought. This version, however, hits every note perfectly because I’ve refined the technique, chosen the right ingredients, and added a secret step that most bakers overlook. The result? A Danish that is hands down the best version you’ll ever make at home, and I dare you to taste this and not go back for seconds.
Okay, ready for the game‑changer? I’m about to reveal a trick involving a quick butter‑milk emulsion that creates a dough so tender it practically melts in your mouth. It’s a tiny adjustment, but it makes all the difference between a bakery‑level pastry and a home‑cooked disappointment. Let me walk you through every single step — by the end, you’ll wonder how you ever made it any other way.
What Makes This Version Stand Out
- Taste: The balance of sweet raspberry, tangy cream cheese, and just‑right buttery crust creates a flavor trio that sings. No single element overpowers the others, and the vanilla extract adds a subtle depth that lingers.
- Texture: Imagine a flaky, buttery top that cracks like thin ice, a creamy, melt‑in‑your‑mouth center, and a glossy raspberry glaze that coats the pastry like a satin sheet.
- Simplicity: Despite the gourmet vibe, the ingredient list is short and the technique is straightforward—perfect for a weekend brunch or a quick weekday treat.
- Uniqueness: Most Danish recipes use custard or fruit fillings; this one swaps in a cheesecake base, giving it that decadent, bakery‑style richness without the heaviness.
- Crowd Reaction: I’ve watched grown‑ups and kids alike light up after the first bite. It’s the kind of dessert that turns a simple coffee break into a celebration.
- Ingredient Quality: Using a full‑fat cream cheese and real raspberry preserves makes the flavor pop, while the baking mix ensures a perfectly risen, airy dough.
- Cooking Method: The two‑stage bake (first blind‑bake the crust, then finish with the filling) guarantees a crisp bottom and a perfectly set center.
- Make‑Ahead Potential: Assemble the pastries a day ahead, refrigerate, and bake them fresh in the morning. The result is a warm, fresh‑out‑the‑oven treat with zero rush.
Inside the Ingredient List
The Flavor Base
The baking mix is the foundation of our pastry. It’s a pre‑blended combination of flour, leavening agents, and a pinch of salt, which means you skip the tedious measuring of each component. If you opt for a plain all‑purpose flour, add 1 ½ teaspoons of baking powder and a pinch of baking soda to achieve the same lift. Skipping this mix would leave you with a dense, bread‑like crust that defeats the purpose of a Danish.
Next up, granulated sugar. A modest amount sweetens the dough without making it cloying, allowing the raspberry preserve to shine. If you prefer a deeper caramel note, swap half the granulated sugar for brown sugar, but be aware that the moisture content will increase slightly, requiring a touch more flour.
The Texture Crew
Unsalted butter is the secret to that melt‑in‑your‑mouth crumb. Its water content creates steam during baking, which puffs up the layers. Use butter that’s softened to the point where you can press a finger into it without it melting—any colder and you’ll end up with a tough dough, any warmer and the layers will fuse together.
Whole milk adds richness and moisture, ensuring the dough stays supple. If you’re dairy‑free, almond milk works, but expect a slightly nutty undertone and a marginally less tender crumb. Remember, the milk should be at room temperature to blend smoothly with the butter.
The Unexpected Star
Cream cheese is the heart of the filling. Full‑fat cream cheese yields a luxurious, velvety texture that low‑fat versions simply cannot match. When you beat it until smooth, you incorporate air, which helps the filling set without becoming rubbery. If you skip the cream cheese, you’ll lose the signature cheesecake tang that makes this Danish a show‑stopper.
Raspberry preserves provide the bright, fruity contrast that cuts through the richness. The natural pectin in the preserves helps the glaze set with a glossy finish. If you can’t find raspberry, feel free to experiment with strawberry or blueberry—just keep the consistency thick to avoid a soggy top.
The Final Flourish
Powdered sugar is the sweetener for our glaze, dissolving effortlessly into a smooth, glossy coating. Its fine texture prevents graininess, ensuring the glaze looks as good as it tastes. If you want a slightly caramelized glaze, substitute half the powdered sugar with brown sugar, but be ready for a deeper color and a richer flavor.
Vanilla extract is the quiet hero that ties everything together. A splash of vanilla amplifies the raspberry’s fruitiness and rounds out the cream cheese’s tang. If you’re feeling adventurous, a drop of almond extract can add an unexpected depth, but use it sparingly—vanilla should remain the star.
Everything's prepped? Good. Let’s get into the real action…
The Method — Step by Step
Preheat your oven to 375°F (190°C) and line a baking sheet with parchment paper. While the oven warms, whisk together the baking mix, granulated sugar, and a pinch of salt in a large bowl. The dry ingredients should look uniformly speckled, like a snow‑covered field ready for a fresh start.
In a separate bowl, combine the softened butter, whole milk, and vanilla extract. The butter should melt just enough to coat the milk, creating a glossy liquid that will later coat the flour particles, ensuring a tender crumb.
Create a well in the center of the dry mixture and pour in the butter‑milk blend. Using a wooden spoon, stir until a shaggy dough forms—don’t over‑mix; you want to see tiny flecks of flour still visible. This is the moment of truth: the dough should feel slightly sticky but manageable.
Turn the dough onto a lightly floured surface and knead gently for about 30 seconds, just enough to bring it together without developing gluten. Watch Out: Over‑kneading will make the pastry tough, defeating the flaky goal.
Pat the dough into a rectangle about ¼ inch thick. Using a sharp pizza cutter, divide the rectangle into twelve equal squares. Each square will become an individual Danish, so keep them uniform for even baking.
Place a spoonful of softened cream cheese (about 2 tablespoons) in the center of each square, leaving a small border.
Kitchen Hack: Soften the cream cheese in a microwave for 10 seconds; it spreads more easily and reduces the risk of tearing the dough.Fold the corners of each square toward the center, overlapping them to create a pinwheel shape. Pinch the edges gently to seal, but don’t press too hard—you want a little gap for the raspberry glaze to seep into later.
Place the assembled pastries on the prepared baking sheet, spacing them about an inch apart. This spacing allows steam to circulate, giving each Danish a crisp bottom.
Bake the pastries for 12‑15 minutes, or until the edges turn a light golden brown and the cheese filling begins to set. The scent at this stage is intoxicating—think buttery toast with a hint of sweet dairy.
While they bake, melt the raspberry preserves in a small saucepan over low heat, stirring constantly until it becomes a glossy, pourable sauce. Watch Out: Keep the heat low; high heat can cause the preserves to scorch, introducing a bitter note.
Remove the pastries from the oven and immediately drizzle the warm raspberry glaze over each one, letting it pool into the crevices. The glaze should sizzle lightly as it meets the hot pastry, creating a glossy sheen that looks like a sunrise over a pastry horizon.
Return the glazed pastries to the oven for an additional 5‑7 minutes. This second bake sets the glaze, giving it a slightly caramelized edge while keeping the interior luxuriously creamy.
While the final bake finishes, whisk together powdered sugar and a splash of whole milk (or a bit of water) to create a thin, drizzle‑ready icing. Add a pinch of vanilla extract for extra depth. The icing should flow like liquid amber.
Once the pastries are out of the oven, let them cool for 3‑4 minutes, then drizzle the powdered sugar icing in a lazy spiral over the tops. The contrast of the bright glaze and the subtle icing is pure visual poetry.
Allow the Danish to rest for at least 10 minutes before serving. This resting period lets the flavors meld and the glaze set, ensuring each bite delivers a perfect balance of textures.
And now the fun part: slice, serve, and watch the delighted reactions. I promise, you’ll hear the “Mmm” before the first bite even lands on a plate. That’s it — you did it. But hold on, I’ve got a few more tricks that’ll take this to another level…
Insider Tricks for Flawless Results
The Temperature Rule Nobody Follows
Never bake a Danish straight from the fridge. Let the assembled pastries sit at room temperature for 10‑15 minutes before the first bake. This small step prevents the butter from solidifying again in the oven, which would cause uneven rising and a greasy bottom. I once tried to rush the process and ended up with a soggy base that never recovered. Trust me, that lesson was learned the hard way.
Why Your Nose Knows Best
Your sense of smell is a far more reliable indicator of doneness than a timer. When the edges turn a light amber and you catch a buttery, nutty aroma, the pastry is ready to flip to the second bake. If you rely solely on the clock, you risk over‑baking, which dries out the cream cheese. So, keep your nose close and let it guide you.
The 5‑Minute Rest That Changes Everything
After the first bake, let the pastries rest for exactly five minutes before adding the raspberry glaze. This pause allows the interior to firm up just enough to hold the glaze without soaking through. Skipping this rest will make the glaze seep into the crust, turning it soggy. I’ve seen newcomers skip it and end up with a pastry that looks like a wet pancake—hardly the elegant finish we’re after.
Butter‑Milk Emulsion Magic
Combine butter and milk until they form a smooth emulsion before mixing with the dry ingredients. This creates tiny pockets of steam that expand during baking, giving you that coveted flaky texture.
Glaze Consistency Check
When warming the raspberry preserves, aim for a consistency that coats the back of a spoon but still runs slowly. If it’s too thick, thin it with a teaspoon of warm milk; if too thin, simmer a minute longer. The right glaze will set with a glossy finish that doesn’t crack when you bite. I once used a glaze that was too runny, and it pooled into the pan, leaving the pastries dry. That’s why this little consistency test matters.
Creative Twists and Variations
This recipe is a playground. Here are some of my favorite ways to switch things up:
Lemon‑Berry Burst
Swap half of the raspberry preserves for lemon curd and add a zest of lemon to the cream cheese filling. The bright citrus cuts through the richness, creating a summer‑ready pastry that’s perfect for brunches on sunny patios.
Chocolate Hazelnut Dream
Fold a tablespoon of cocoa powder into the cream cheese and drizzle a hazelnut spread over the raspberry glaze after baking. The chocolate‑nut combo adds depth and makes the pastry feel indulgent enough for an after‑dinner treat.
Almond‑Orange Elegance
Replace vanilla extract with almond extract and stir in a teaspoon of orange zest into the glaze. The nutty‑citrus pairing elevates the flavor profile, making it a sophisticated option for holiday gatherings.
Berry Medley Explosion
Mix raspberry preserves with equal parts strawberry and blueberry jam. The trio creates a rainbow of flavors and a gorgeous speckled glaze that’s as pretty as it is tasty.
Savory Cheese Twist
For a daring brunch, omit the raspberry glaze and instead sprinkle a thin layer of grated Parmesan over the pastry before the final bake. The salty, crispy top pairs surprisingly well with the creamy cheese filling, turning a dessert into a savory bite.
Storing and Bringing It Back to Life
Fridge Storage
Place the cooled pastries in an airtight container and store them in the refrigerator for up to three days. The cream cheese filling stays fresh, and the glaze retains its shine. Before serving, let them sit at room temperature for 15 minutes to soften the butter crust.
Freezer Friendly
These Danishes freeze beautifully. Wrap each pastry individually in plastic wrap, then place them in a zip‑top bag. Freeze for up to two months. When ready to eat, thaw overnight in the fridge, then reheat in a 350°F oven for 8‑10 minutes. Add a tiny splash of water to the glaze before reheating; the steam will revive the glossy finish.
Best Reheating Method
For the crispiest results, reheat in a preheated oven rather than a microwave. The oven restores the flaky layers and gives the glaze a fresh sheen. If you’re short on time, a quick 30‑second burst in the microwave will soften the filling, but the crust will lose its crunch.