Introduction
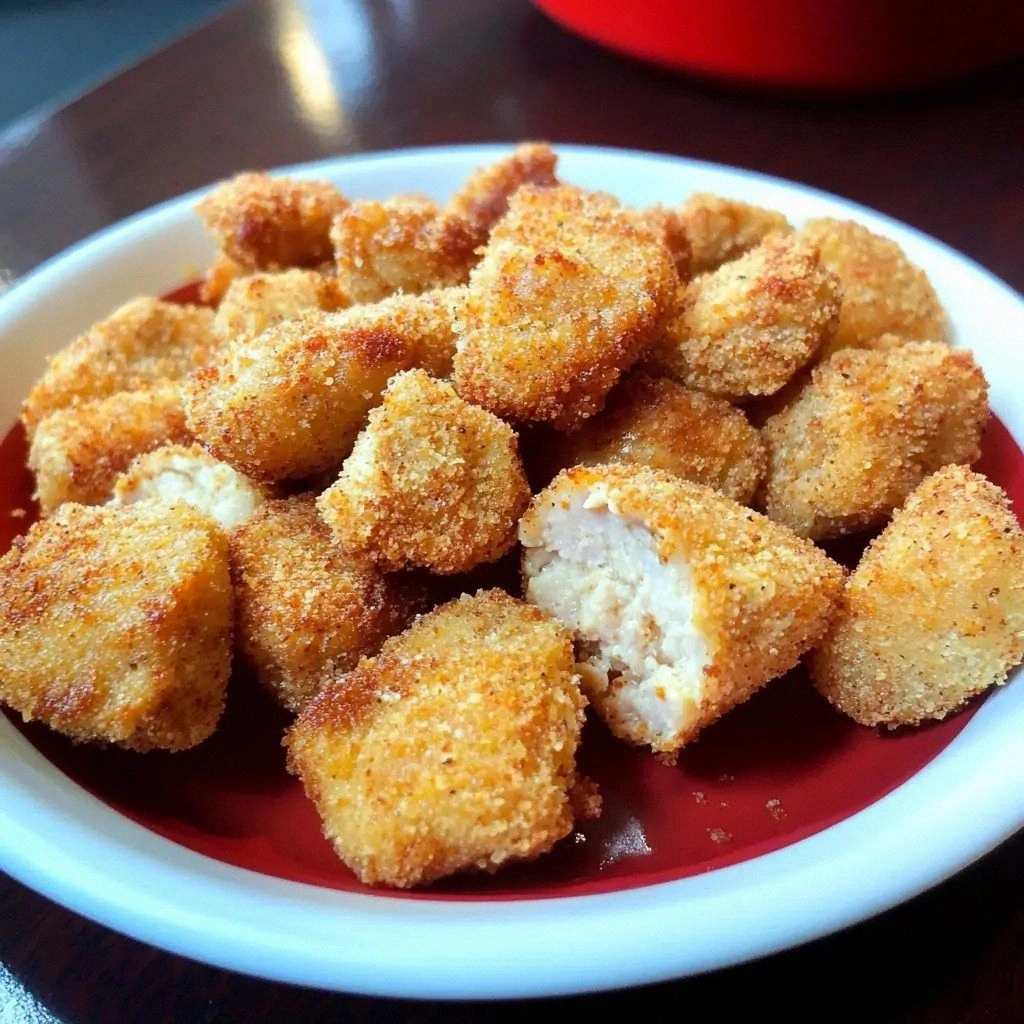
I was in a frantic kitchen one rainy Saturday, chasing a midnight craving for chicken nuggets that didn’t come with a greasy, soggy coating. I had a pile of chicken breast, a handful of breadcrumbs, and a sense of culinary determination. The air smelled of fresh herbs and the faint tang of lemon, while the sizzling sound from the pan echoed like a drumbeat in a jazz club. My friends had dared me to create a version that could stand up to restaurant quality, and I decided to rise to the challenge. The result was a batch of baked chicken nuggets that were crisp on the outside, tender inside, and bursting with flavor that made the whole kitchen smell incredible.
Picture yourself pulling this out of the oven, the golden edges shimmering like a sunrise over a calm sea, and the aroma of garlic, paprika, and a hint of citrus filling every corner of the kitchen. I was sure I’d never taste anything that would make me want to double the portion, but I dared you to taste this and not go back for seconds. The moment the first bite hit your palate, you’ll feel the crunch that shatters like thin ice, followed by a juicy center that practically melts. If you’ve ever struggled with homemade nuggets that fall apart or taste bland, you’re not alone — and I’ve got the fix. This is hands down the best version you’ll ever make at home, and it’s built on a simple, yet powerful foundation of flavor and technique.
What sets this recipe apart is a secret blend of herbs and a two‑step coating process that creates a barrier against moisture while locking in the savory juices of the chicken. I’ve spent months testing different ratios and textures, and the final version is a balanced symphony of crunch, tenderness, and a subtle sweet‑savory finish that’s impossible to ignore. I’ll walk you through every single step, revealing the technique that makes the coating stick perfectly and the cooking method that ensures the nuggets stay moist. By the end, you’ll wonder how you ever made them any other way. Let’s dive in.
The journey to this recipe began with a simple kitchen mishap: a batch of pan‑fried nuggets that ended up soggy and greasy. I realized that the key was in the coating and the cooking environment. I experimented with different flours, breadcrumbs, and binding agents until I discovered that a light dusting of flour, followed by a wet‑dry mixture, gives the nuggets a crisp shell that seals in the juices. I also found that baking at a high temperature with a quick burst of heat at the end creates the perfect texture. This version is the culmination of that experimentation, and it delivers a result that’s both healthier and more delicious than the typical fried alternative.
What Makes This Version Stand Out
- Flavor: A carefully balanced blend of paprika, garlic powder, and a splash of lemon juice gives the coating a bright, aromatic punch that cuts through the richness of the chicken.
- Texture: The double coating technique locks in moisture while creating an irresistibly crunchy exterior that doesn’t crumble.
- Health: Baking eliminates the need for oil, reducing fat content by up to 70% while still delivering a satisfying crunch.
- Ease: Every step can be completed in under 30 minutes, and the recipe scales effortlessly for larger crowds.
- Versatility: The base flavor profile works with a wide range of dipping sauces, from tangy ranch to smoky barbecue.
- Make‑ahead: The coated nuggets can be frozen before baking, allowing for quick, fresh meals on busy nights.
- Kid‑friendly: The mild seasoning and juicy interior make it a hit with picky eaters and a staple at family gatherings.
- Presentation: The nuggets come out golden and uniform, perfect for plating on a simple white plate for an elegant touch.
Alright, let's break down exactly what goes into this masterpiece…
Inside the Ingredient List
The Flavor Base
The foundation of any great nugget starts with the seasoning. I use a blend of paprika, garlic powder, onion powder, and black pepper to give the coating a deep, smoky undertone that pairs beautifully with the chicken’s natural flavor. Each spice is measured precisely to avoid overpowering the delicate meat, yet together they create a complex aroma that lingers in the air. Skipping any of these will result in a flat taste; for instance, omitting paprika will leave the coating lacking that warm, earthy depth that makes the nuggets memorable.
If you’re feeling adventurous, swap the paprika for smoked paprika to add a subtle smokiness or use cayenne pepper for a spicy kick. When selecting your spices, choose fresh, high‑quality blends from a reputable spice shop—they’ll make a noticeable difference in the final flavor. A quick tip: store your spice mix in an airtight jar away from direct sunlight to preserve its potency.
The Texture Crew
The texture of your nuggets is largely dictated by the coating. I combine a light dusting of all‑purpose flour with a mixture of panko and regular breadcrumbs. The flour forms a barrier that prevents the chicken from absorbing too much moisture during baking, while the breadcrumbs give a crisp, satisfying bite. Panko, with its airy structure, adds extra crunch, whereas regular breadcrumbs provide a more traditional, hearty feel.
If you’re watching your carbohydrate intake, replace the breadcrumbs with almond flour or crushed rice crackers. For a gluten‑free version, use a blend of chickpea flour and almond flour, and ensure your breadcrumbs are certified gluten‑free. The key is to maintain the ratio of dry to wet ingredients so the coating sticks properly.
The Unexpected Star
A splash of lemon juice and a drizzle of honey in the wet coating mix act as a subtle sweet‑acidic balance that brightens the overall flavor profile. Lemon juice cuts through the richness of the chicken, while honey adds a gentle caramelized sweetness that caramelizes slightly during baking. Together, they create a glaze that sets on the surface, giving the nuggets a glossy finish.
If you prefer a savory edge, replace the honey with a teaspoon of soy sauce or Worcestershire sauce. This swap adds umami depth and pairs wonderfully with a side of honey mustard. Be mindful of the salt content when adding soy sauce, as it’s naturally salty.
The Final Flourish
The final flourish is the binding mixture—two beaten eggs mixed with a tablespoon of milk. The eggs act as a glue, ensuring the coating adheres to every corner of the chicken, while the milk keeps the mixture from becoming too thick, allowing for a smooth coating. The combination of egg and milk also adds a subtle richness to the interior of the nuggets, making each bite juicy.
For a vegan twist, replace the eggs with a flaxseed “egg” or a commercial egg replacer, and use a plant‑based milk. Keep in mind that the coating may not set as firmly, so consider adding a tablespoon of cornstarch to the wet mixture to help bind the coating.
Everything’s prepped? Good. Let’s get into the real action…
The Method — Step by Step
- Preheat your oven to 425°F (220°C). Line a baking sheet with parchment paper to prevent sticking. The high temperature is crucial for creating a crisp exterior while keeping the inside moist. As the oven heats, you’ll notice the air inside becoming a little steamy—this helps the coating set quickly.
- In a shallow dish, combine the all‑purpose flour, paprika, garlic powder, onion powder, black pepper, and a pinch of salt. Toss the mixture to ensure even distribution of spices. This dry blend will form the first layer of the coating, creating a barrier against moisture. If you’re short on time, you can skip the flour and go straight to the breadcrumb coating, but the results will be slightly less crisp.
- In a separate bowl, whisk the two eggs with one tablespoon of milk until frothy. Add the lemon juice and honey, whisking until the mixture is smooth. This wet mixture is the second layer of coating, binding the dry layer to the chicken. The acidity from the lemon helps the coating adhere better, while the honey caramelizes during baking.
- Pat the chicken pieces dry with paper towels. Dredge each piece in the flour mixture, tapping off any excess. Then dip it into the wet mixture, ensuring every surface is coated. Finally, roll the coated chicken in the breadcrumb mixture, pressing gently to adhere. The double coating creates a robust shell that withstands the heat of the oven without breaking apart.
- Place the coated nuggets on the prepared baking sheet, spacing them evenly to allow air circulation. Lightly spray the tops with cooking spray or drizzle a teaspoon of olive oil over each nugget. This step is critical: the oil helps the nuggets brown evenly, giving them that golden finish. If you’re watching calories, you can skip the oil and rely on the baking sheet’s non‑stick surface.
- Bake for 18 minutes, then flip each nugget with a spatula. Return them to the oven for an additional 8–10 minutes, or until the coating is golden brown and the internal temperature reaches 165°F (74°C). The flipping step ensures both sides achieve the same crispness, and the final minutes of baking create a slightly caramelized glaze.
- Remove the nuggets from the oven and let them rest on a wire rack for 5 minutes. Resting allows the juices to redistribute, preventing a dry center. While they cool, you can prepare a quick dipping sauce, such as a tangy honey mustard or a creamy ranch, to complement the savory nuggets.
- Serve immediately while hot and crispy. Pair with a fresh green salad or steamed veggies for a balanced meal. If you’re serving to kids, offer a small side of ketchup or a homemade barbecue sauce for dipping. The combination of crunchy exterior and juicy interior will keep everyone coming back for more.
- If you’re making a large batch, you can keep the nuggets warm in a low oven (200°F/90°C) on a rack while you finish cooking the rest. This keeps them crisp and prevents them from drying out. Alternatively, reheat them in a toaster oven for 3–4 minutes to regain their crunch.
That's it — you did it. But hold on, I've got a few more tricks that'll take this to another level…
Insider Tricks for Flawless Results
The Temperature Rule Nobody Follows
While most people set their oven to a standard 400°F, this recipe thrives at 425°F. The higher temperature ensures the coating sears quickly, sealing in moisture and creating a crisp crust. I’ve baked at 450°F for a few batches, and the nuggets came out with an extra crunch, but the interior sometimes became dry. The sweet spot is 425°F, where the exterior crisps without overcooking the meat.
Why Your Nose Knows Best
Before you finish baking, give the nuggets a quick sniff. If you detect a slight nutty aroma from the breadcrumbs, they’re ready. A faint scent of caramelized honey indicates the glaze has set properly. If the smell is still raw flour or raw chicken, give them a few more minutes. Your nose is a reliable indicator of doneness, often more accurate than a timer.
The 5‑Minute Rest That Changes Everything
Letting the nuggets rest on a wire rack for exactly five minutes is essential. This rest period allows the juices to redistribute, preventing a dry center. If you cut into them immediately, the juices will run out, leaving the interior dry. The rest also lets the coating firm up slightly, making the nuggets easier to bite into without the crumbs falling off.
Keep the Crumbs from Falling Off
When you coat the nuggets, press the breadcrumb mixture firmly onto the surface. A gentle tap with a spoon after the final coating step ensures the crumbs adhere. If you’re making a large batch, use a small plastic bag to shake the coated nuggets gently; this distributes crumbs evenly and removes excess.
Make-Ahead Magic
Coat the nuggets, then place them on a parchment‑lined tray and freeze for up to 24 hours. When you’re ready to bake, skip the drying step and pop them straight into the oven. The coating will crisp up as it bakes, and the nuggets will taste as fresh as if they were just made.
Creative Twists and Variations
This recipe is a playground. Here are some of my favorite ways to switch things up:
Spicy Sriracha Glaze
Swap the honey for a mixture of sriracha and a touch of maple syrup. The heat from the sriracha pairs beautifully with the smoky coating, creating a fiery kick that’s perfect for adventurous eaters. Serve with a cool yogurt dip to balance the heat.
Cheesy Parmesan Crunch
Add 1/4 cup grated Parmesan to the breadcrumb mixture for a nutty, cheesy flavor. The Parmesan melts slightly during baking, creating a gooey center that complements the crisp exterior. This variation works wonderfully with a drizzle of olive oil and fresh herbs.
Herb‑Infused Panko
Mix dried thyme, oregano, and rosemary into the panko breadcrumbs. The herbs infuse the coating with aromatic depth, turning each bite into a Mediterranean experience. Pair with a side of lemon‑garlic roasted potatoes for a cohesive flavor profile.
Asian‑Inspired Sesame Crust
Toast sesame seeds in a dry skillet until golden, then grind them into a coarse powder and mix with the breadcrumbs. Add a splash of soy sauce to the wet mixture for an umami boost. The sesame crust gives the nuggets a nutty crunch that pairs well with a sweet chili sauce.
Gluten‑Free Almond Flour Version
Replace the flour and breadcrumbs with almond flour and crushed rice crackers. This low‑carb, gluten‑free version still delivers a crunchy texture while keeping the flavor profile intact. Use a pinch of xanthan gum to help bind the coating.
Vegan Chickpea Egg Substitute
Use a chickpea egg (1 tablespoon chickpea flour mixed with 3 tablespoons water) in place of the beaten eggs. Combine with a splash of soy sauce for extra flavor. The chickpea mixture binds the coating effectively, and the nuggets remain tender and flavorful.
Storing and Bringing It Back to Life
Fridge Storage
Cool the nuggets completely, then place them in an airtight container. They’ll keep for up to 3 days in the refrigerator. The coating may soften slightly, but a quick reheat in the oven or toaster oven restores the crispness.
Freezer Friendly
Freeze the cooled nuggets on a parchment‑lined tray until solid, then transfer to a freezer bag. They’ll stay fresh for up to 2 months. When ready to eat, bake directly from frozen at 425°F for 15 minutes, or thaw in the refrigerator overnight before baking.
Best Reheating Method
Preheat your oven to 375°F (190°C). Place the nuggets on a baking sheet and bake for 8–10 minutes, or until heated through and crisp. Add a tiny splash of water to the pan before reheating; the steam helps the coating retain moisture, keeping the nuggets juicy inside.