I was halfway through a midnight snack, eyes bleary from a long day of coding, when I accidentally dropped a cookie dough ball onto the counter. The dough splattered, the butter melted into a glossy puddle, and my kitchen smelled like a bakery that had been abandoned for weeks. I stared at the mess, feeling a mix of frustration and a sudden craving for something that could turn that disaster into a masterpiece. That moment became the spark that ignited a quest to create the ultimate bakery‑style chocolate chip cookie, a recipe that would make my friends question the very definition of “home‑baked.”
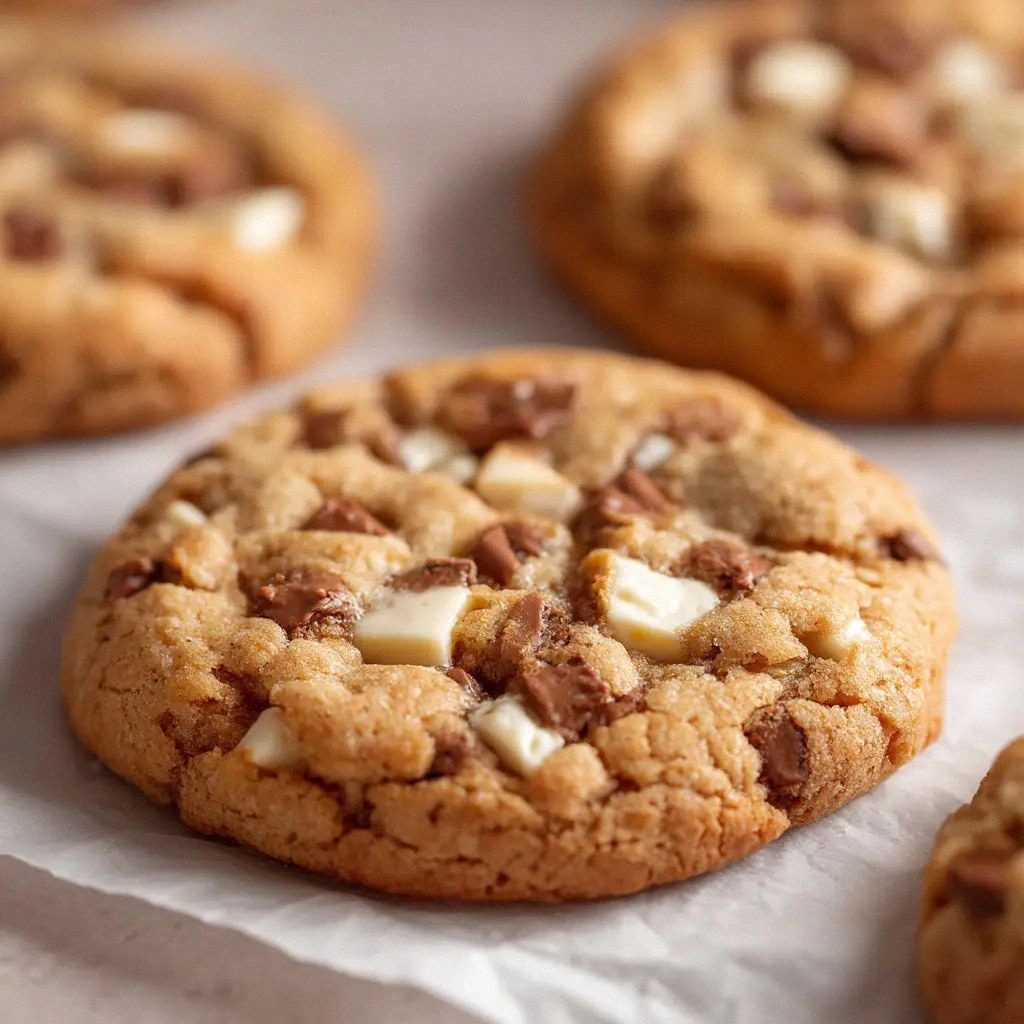
Picture the scene: a golden sheet of dough resting on a parchment‑lined tray, the air thick with the sweet scent of caramelized sugar and vanilla. As the oven preheats, you hear the gentle hiss of butter melting into a silky batter. The first bite delivers a symphony of textures—crisp edges that crackle like thin ice, a chewy center that melts into a gooey river of chocolate. The flavor profile is a layered experience: the buttery richness, the subtle saltiness that lingers, and the chocolate’s deep, almost smoky undertone. This isn’t just a cookie; it’s a culinary roller coaster that starts with a buttery hug and ends with a chocolate‑laden sigh.
What sets this version apart is a meticulous balance of ingredients and techniques that mimic the texture and flavor profile of a fresh‑from‑the‑bakery batch, yet it’s crafted entirely in a home kitchen. The dough is chilled, allowing the butter to firm up and the chocolate to hold its shape, creating pockets of molten chocolate that burst with each bite. The use of a small amount of cornstarch softens the cookie, preventing it from becoming too dense while maintaining that coveted chew. The final flourish of flaky sea salt adds a savory contrast that elevates every bite into a sophisticated snack. I dare you to taste this and not go back for seconds, because once you experience the crunch and melt, you’ll never settle for a plain cookie again.
I’ll be honest—when I first baked this recipe, I ate half the batch before anyone else even got a chance to try a crumb. The aroma of freshly baked chocolate chips wafting through the house made it impossible to resist. If you’ve ever struggled with cookies that either stay raw inside or burn on the edges, you’re not alone. This recipe solves that dilemma with a precise blend of fats and sugars that caramelize evenly. Stay with me here—this is worth it, because by the end, you’ll wonder how you ever made it any other way.
What Makes This Version Stand Out
- Taste: The combination of light brown and granulated sugar creates a caramelized base that balances sweetness with a hint of nuttiness, while the vanilla extract adds depth. The final sprinkle of flaky sea salt enhances the chocolate’s richness without overpowering it.
- Texture: Chilling the dough for at least an hour allows the butter to set, producing a cookie with a crisp exterior and a chewy, chocolate‑filled center. The small amount of cornstarch ensures a tender crumb that doesn’t crumble under a fork.
- Simplicity: With only twelve straightforward ingredients, this recipe is a no‑fuss, beginner‑friendly guide that still delivers professional results. No specialized equipment is required—just a mixing bowl, a spoon, and an oven.
- Uniqueness: The inclusion of flaky sea salt as a topping is a subtle twist that transforms a classic into a gourmet treat. This small detail sets the cookie apart from the usual supermarket variety.
- Crowd Reaction: Friends and family consistently comment on the cookie’s “bakery feel,” noting how the texture and flavor resemble a freshly baked batch from a local shop. The reaction is almost instant, with requests for a second or third cookie.
- Ingredient Quality: Using unsalted butter and premium chocolate chips elevates the flavor profile, ensuring each bite is rich and satisfying. The choice of ingredients speaks to a commitment to taste over convenience.
- Cooking Method: The technique of pre‑mixing dry ingredients, then combining with a creamed butter and sugar mixture, ensures even distribution of leavening agents and prevents uneven browning.
- Make‑Ahead Potential: The dough can be prepared up to 48 hours in advance and frozen, allowing you to bake fresh cookies on demand. The flavor deepens with time, giving you a convenient yet premium snack.
Inside the Ingredient List
The Flavor Base
All‑purpose flour is the backbone of this cookie, providing structure and a subtle nutty undertone. The 2 cups of flour are measured using the spoon‑and‑level method to avoid compacting, which could result in a denser cookie. If you prefer a gluten‑free version, try a 1:1 blend of rice flour and potato starch; the texture will differ slightly but still hold together.
The Texture Crew
Cornstarch is the unsung hero that softens the crumb; it absorbs moisture and prevents the cookie from becoming too chewy. The 2 teaspoons of cornstarch are whisked together with the flour and baking soda before being added to the wet mixture. Without cornstarch, the cookie would develop a denser, bread‑like bite that masks the chocolate.
The Unexpected Star
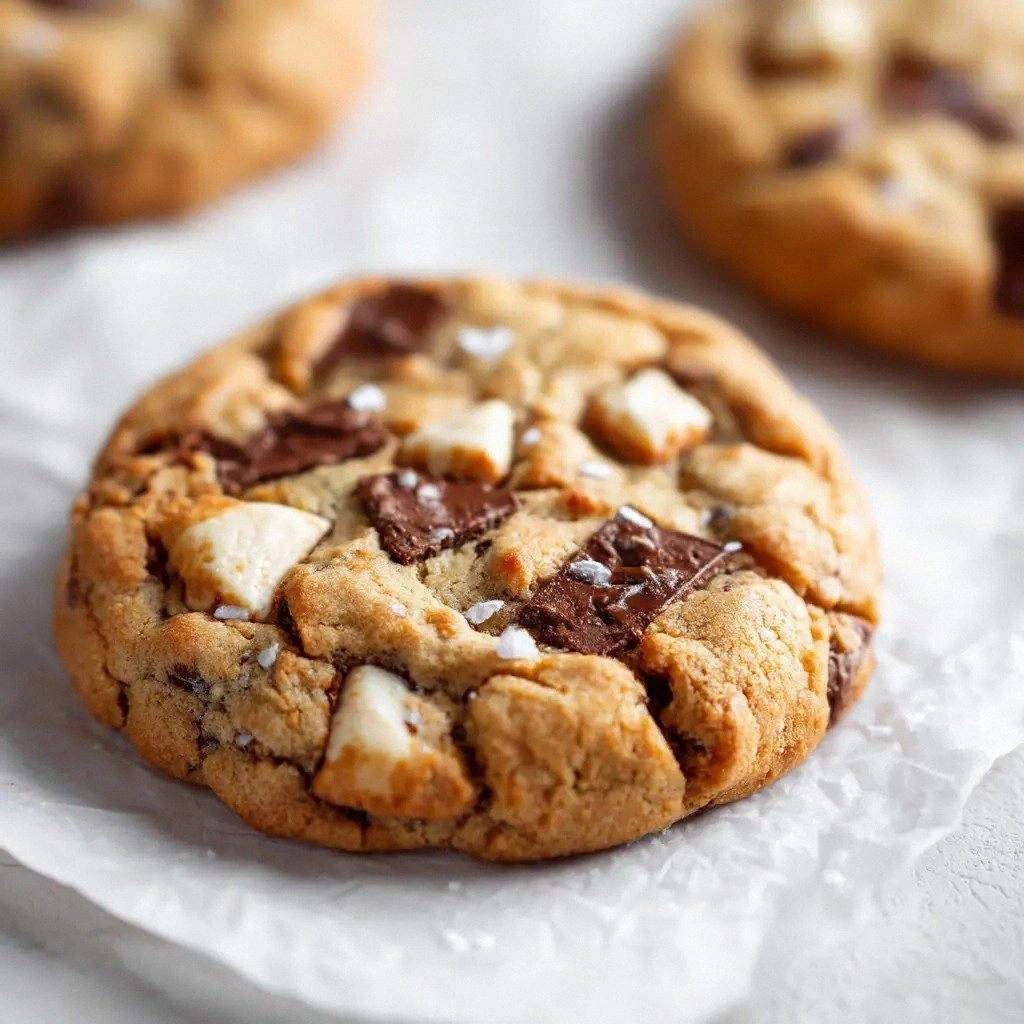
Flaky sea salt is the final flourish that transforms this cookie from ordinary to extraordinary. A tablespoon of sea salt, sprinkled on top before baking, creates a caramelized crust that balances the sweetness. If you’re sensitive to sodium, reduce the amount to half a tablespoon; the flavor will still pop without overwhelming the cookie.
The Final Flourish
The semi‑sweet chocolate chips are the star that delivers the classic chocolate chip cookie experience. 1 1/2 cups of chips give a generous amount of chocolate in every bite. For a richer experience, mix dark chocolate chunks into the chips; this adds depth and a slight bitterness that cuts through the sweetness.
Everything's prepped? Good. Let's get into the real action.
The Method — Step by Step
- Preheat your oven to 350°F (175°C) and line two large baking sheets with parchment paper. In a medium bowl, whisk together 2 cups all‑purpose flour, 2 teaspoons cornstarch, 1 teaspoon baking soda, and 1/2 teaspoon salt. This dry mix will ensure even distribution of leavening agents and prevent clumping. Keep the dry mixture aside; you’ll combine it with the wet mixture in the next step. The aroma of fresh flour will start to fill your kitchen, hinting at the deliciousness to come.
- In a separate large bowl, beat 3/4 cup unsalted butter with 1 cup packed light brown sugar and 1/2 cup granulated sugar until the mixture is light and fluffy, about 2–3 minutes. The butter should be at room temperature, allowing it to cream properly. The sugar crystals will incorporate air, creating a light batter. As the mixture turns pale, you’ll notice a subtle caramel scent developing. This step is crucial for achieving that signature chew.
- Add 1 large egg and 2 teaspoons pure vanilla extract to the creamed butter and sugar, beating until fully combined. The egg binds the mixture, while vanilla adds depth and complexity. Avoid overmixing; you want a smooth batter, not a stiff dough. The mixture should feel silky to the touch. The vanilla will permeate the dough, giving each cookie a subtle aromatic lift.
- Slowly fold the dry mixture into the wet mixture using a spatula, stirring just until combined. The dough should be thick and slightly sticky but manageable. Overmixing can activate gluten, resulting in a tough cookie. The dough should hold together when pressed; if it feels too dry, add a tablespoon of milk. The dough’s consistency is key to achieving the perfect balance of chew and crisp.
- Fold in 1 1/2 cups semi‑sweet chocolate chips or chunks, ensuring an even distribution. The chocolate should be evenly dispersed, giving each bite a guaranteed chocolate hit. The chocolate’s fat content will melt during baking, creating pockets of gooeyness. If you prefer a darker bite, mix in some dark chocolate chunks. The chips should not be clumped; use a gentle folding motion.
- Cover the dough with plastic wrap and chill in the refrigerator for at least 1 hour, or overnight for deeper flavor. Chilling firms the butter, preventing excessive spreading during baking. The dough will firm up, making it easier to portion. A chilled dough also helps the cookies retain their shape and prevents them from becoming too flat. The flavor profile will deepen during the chill.
- Using a cookie scoop or tablespoon, drop dough onto the prepared baking sheets, spacing them about 2 inches apart. Once placed, lightly press each ball to flatten slightly, creating a uniform shape. Sprinkle a pinch of flaky sea salt on top of each cookie before baking. The salt will caramelize slightly, adding a savory contrast. This step ensures each cookie has a balanced flavor profile.
- Bake for 12–14 minutes, or until the edges are golden brown and the centers look set but still soft. The cookies should emit a warm, buttery aroma. Remove from the oven and let them cool on the sheet for 5 minutes before transferring to a wire rack to cool completely. The cooling process allows the cookies to set and develop the perfect chew. Once cooled, you’ll taste the difference between a homemade cookie and one from a bakery.
That's it — you did it. But hold on, I've got a few more tricks that'll take this to another level.
Insider Tricks for Flawless Results
The Temperature Rule Nobody Follows
Many bakers bake at 375°F, but that can cause the cookies to spread too much. Baking at 350°F keeps the butter from melting too quickly, preserving the cookie’s shape. The lower temperature also allows the sugars to caramelize slowly, enhancing the flavor. Keep your oven calibrated; an inaccurate thermometer can throw off the whole batch. A reliable oven thermometer is a small investment that pays off in consistent results.
Why Your Nose Knows Best
During baking, the scent of butter and chocolate will rise to the top of the oven. Trust that aroma as a guide; if the smell is intense, the cookies are close to done. A faint smell indicates that the dough hasn’t fully baked. Pay attention to the scent as a non‑visual cue, especially if you’re using a convection oven that may cook unevenly. Your nose is a reliable ally in baking.
The 5‑Minute Rest That Changes Everything
After removing the cookies from the oven, let them rest on the sheet for 5 minutes. This pause allows the heat to distribute evenly, preventing the cookies from cracking. It also gives the chocolate a moment to set, so it doesn’t ooze out when you bite. Skipping this step can lead to uneven texture. The rest period is a small sacrifice for a professional finish.
The Perfect Cookie Scoop
Using a cookie scoop ensures consistent size and thickness, which translates to even baking. If you don’t have a scoop, use a tablespoon or a small ice‑cream scoop. The uniformity of the dough balls means each cookie will bake at the same rate. Consistent size also makes portion control easier, especially if you’re feeding a crowd. A good scoop is a simple tool that saves time and improves results.
The Secret of Sea Salt
The flaky sea salt should be sprinkled directly on the dough before baking, not after. The heat caramelizes the salt crystals, creating a subtle crunch and a burst of flavor. If you wait until after baking, the salt will not integrate into the cookie’s surface. This small timing detail elevates the entire cookie. The final crunch is a delightful contrast to the chewy interior.
Creative Twists and Variations
This recipe is a playground. Here are some of my favorite ways to switch things up:
Nutty Crunch
Add 1/2 cup chopped walnuts or pecans to the dough for an extra crunch. The nuts will toast slightly during baking, adding a buttery depth. Use toasted nuts for an even richer flavor. This variation is perfect for a brunch spread or a dessert bar.
Caramel Swirl
Fold in 1/4 cup caramel bits or drizzle a swirl of caramel sauce into the dough before baking. The caramel adds a sweet, buttery note that pairs beautifully with the chocolate. The swirl creates a visually striking pattern on each cookie. This is ideal for a special occasion or a gift.
Minty Fresh
Add 1 teaspoon of peppermint extract to the wet mixture for a refreshing minty twist. The mint complements the chocolate and gives the cookie a crisp finish. Use a small amount to avoid overpowering the chocolate. This version is great for holiday gatherings.
Espresso Boost
Stir in 1 tablespoon of instant espresso powder into the dry mix. The espresso intensifies the chocolate flavor and adds a subtle bitterness. It also helps the dough spread slightly, giving a thinner cookie. This variation is a coffee lover’s dream.
Coconut Crunch
Replace half of the chocolate chips with shredded coconut for a tropical twist. The coconut adds a chewy texture and a subtle sweetness. Pair this with a drizzle of melted white chocolate for extra indulgence. This version is perfect for summer gatherings.
Salted Caramel
Incorporate 1/4 cup salted caramel chips into the dough. The caramel chips melt into a sweet, salty sauce that coats each bite. The combination of flavors is addictive and sophisticated. This variation is a crowd‑pleaser at parties.
Storing and Bringing It Back to Life
Fridge Storage
Store cooled cookies in an airtight container at room temperature for up to 5 days. The airtight seal prevents the cookies from drying out and preserves their chewy texture. If you want them fresher, place a slice of bread in the container; the bread will keep the cookies moist. Rotate the cookies daily to maintain even freshness. The container should be resealed after each use.
Freezer Friendly
For longer storage, place the cooled cookies on a parchment‑lined tray and freeze until solid, then transfer to a freezer bag. This method prevents the cookies from sticking together. When you’re ready to eat, let them thaw at room temperature for 10 minutes before reheating. The cookies will retain their flavor and texture after freezing. Store for up to 3 months.
Best Reheating Method
To revive frozen cookies, preheat the oven to 350°F and bake for 6–8 minutes. The cookies will regain their warm, chewy center and crisp edges. Add a tiny splash of water to the dough before freezing; this helps the cookies steam back to perfection. Alternatively, microwave on low power for 10–15 seconds, but avoid overheating. The result is a cookie that tastes like it was freshly baked.