I was staring at the pantry, feeling like a culinary detective, when my friend dared me to make the ultimate almond joy bite. I’d spent the afternoon chasing that sweet, coconut‑and‑almond combo that pops up in every candy aisle, and I was determined to beat the store‑made version. The challenge? Keep it indulgent yet light, and make it so good that the first bite will have you shouting, “I dare you to taste this and not go back for seconds.” The kitchen lights were dim, the timer was set, and the air smelled faintly of toasted coconut, already promising a sensory adventure. The stakes were high, but so was my appetite for culinary glory. And that’s how the recipe that follows was born.
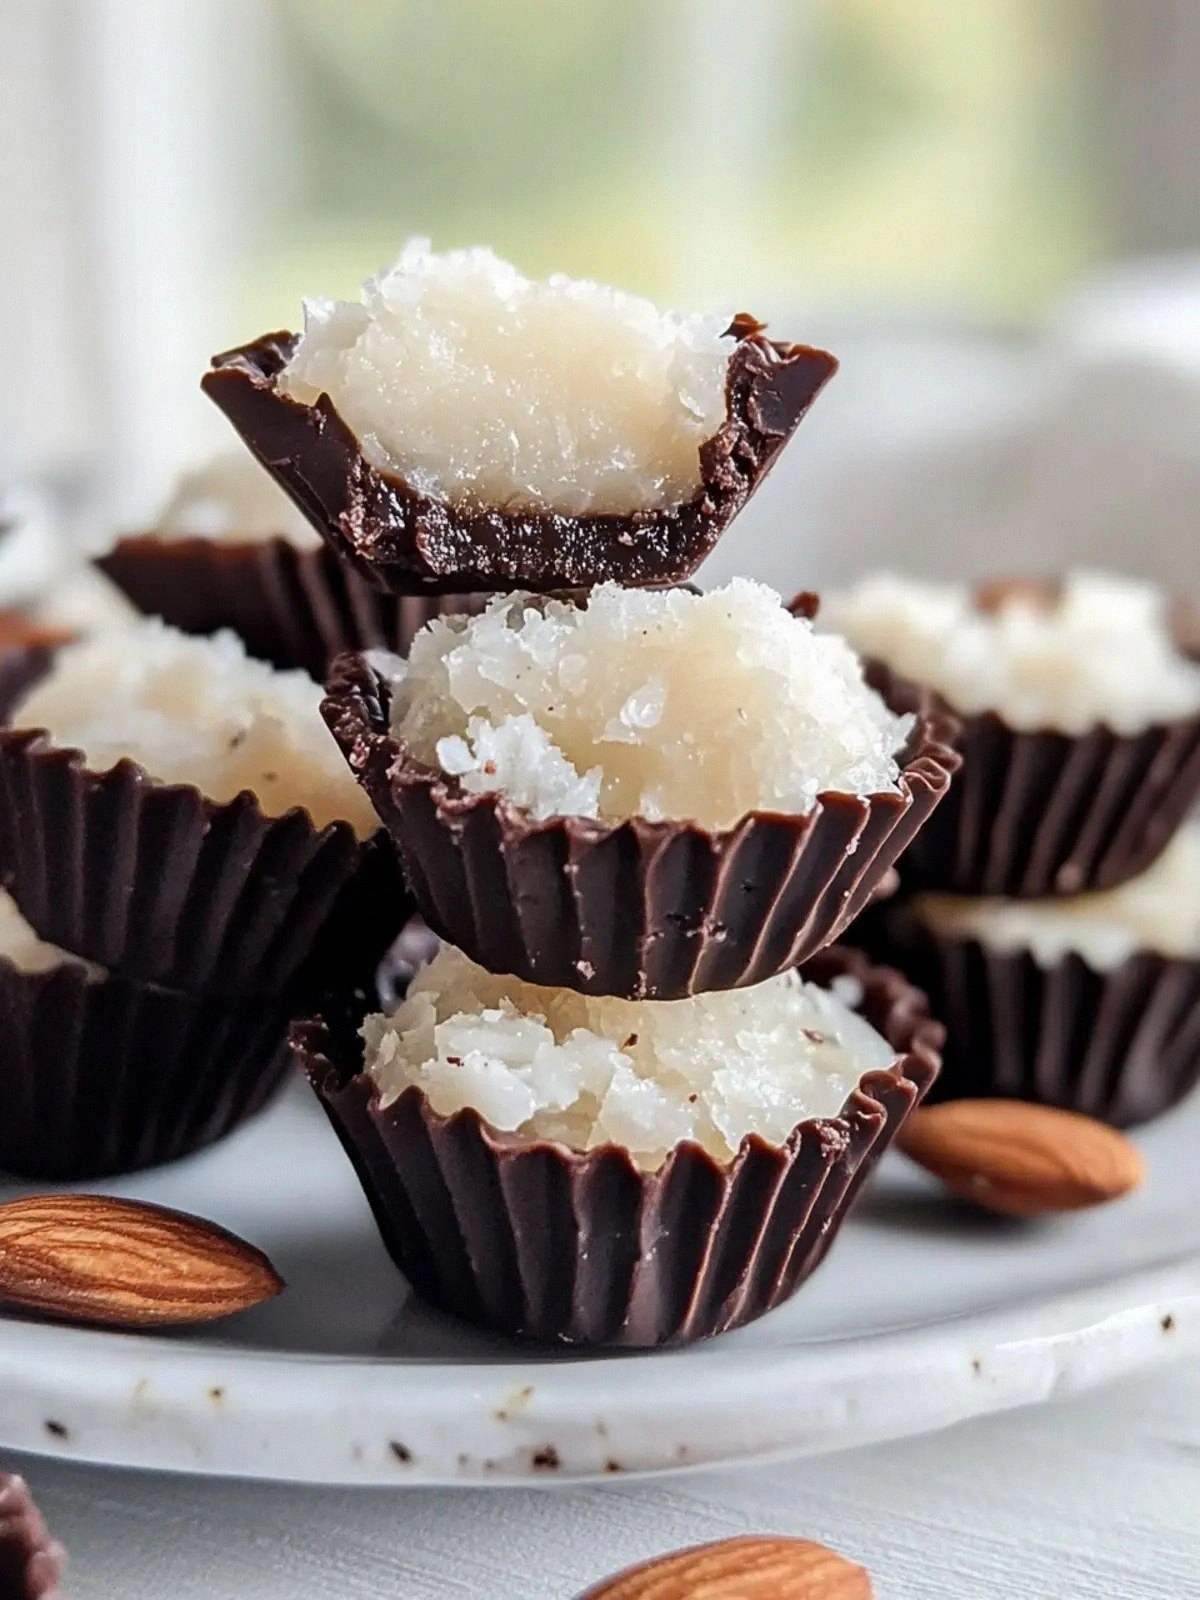
Picture yourself pulling this out of the pan, the whole kitchen smelling incredible, and the first bite releasing a burst of sweet maple glaze, crunchy almonds, and velvety chocolate that clings to the coconut like a silky blanket. The sound of the chocolate melting into the coconut is a gentle hiss, almost like a sigh of relief after a long day. The texture is a paradoxical dance: a crisp exterior that shatters like thin ice, a chewy coconut core that gives way to a smooth chocolate coating. The taste is a layered symphony—sweet, nutty, and slightly smoky from the toasted coconut. The aroma lingers, coaxing you to reach for more, and the visual appeal is a glossy, golden crown atop a golden base. That moment when you bite is pure, unadulterated bliss.
What sets this version apart is the secret maple‑coconut glaze that coats every bite like a velvet ribbon. It balances the coconut’s natural sweetness with a hint of caramelized maple, creating a harmony that elevates the flavor profile beyond ordinary. The almonds are toasted to a golden perfection, adding a subtle nutty crunch that contrasts beautifully with the silky chocolate. The chocolate chips are semi‑sweet, providing a mellow, not overly sweet finish that lets the other flavors shine. The recipe is simple, requiring just five ingredients, yet the result is complex and satisfying. It’s a recipe that’s both a showstopper for parties and a comforting treat for solo snacking.
I’ll be honest—once I made a batch, I ate half before anyone else got to try it. The secret? A quick step of whisking maple syrup with powdered sugar until it’s a smooth, glossy glaze that coats the coconut before the chocolate sets. Most recipes get this completely wrong, either over‑sweetening or under‑coating, but the trick here is the ratio and the timing. If you add the glaze too early, the coconut will absorb too much syrup and become soggy; too late, and the chocolate will not stick. The next part of the recipe is where the real magic happens: combining the glaze, coconut, and almonds, then letting the chocolate melt just enough to coat without dripping. This is the moment of truth, and if you stay with me here, it’s worth it.
What Makes This Version Stand Out
- Flavor: The maple glaze gives a caramelized depth that elevates the classic almond‑coconut flavor. It’s not just sweet; it’s balanced, with a subtle hint of vanilla that rounds out the taste.
- Texture: The toasted almonds provide a satisfying crunch that contrasts with the chewy coconut and smooth chocolate. Each bite delivers a layered mouthfeel that keeps you coming back.
- Simplicity: With only five ingredients, the recipe is a breeze to assemble, making it a go‑to for busy evenings or last‑minute parties.
- Uniqueness: The maple glaze is an unexpected star that sets this recipe apart from typical almond joy treats. It’s a game‑changer that adds depth and shine.
- Crowd Reaction: Friends rave about the glossy finish and the perfect balance of sweet and nutty. They often ask for the recipe after tasting.
- Ingredient Quality: Using high‑quality semi‑sweet chocolate and fresh whole almonds ensures the best flavor profile and mouthfeel.
Alright, let's break down exactly what goes into this masterpiece. The following highlight box shares a kitchen hack that will save you time and keep your ingredients fresh.
Inside the Ingredient List
The Flavor Base
The sweetened coconut flakes form the backbone of the bite, offering a chewy texture that holds the glaze and chocolate together. Sweetened coconut adds a subtle caramel flavor that pairs beautifully with maple. If you’re looking for a lower sugar option, try unsweetened coconut and increase the maple syrup slightly to compensate. Using fresh coconut flakes rather than dried ones gives a moister bite and a fresher aroma. This ingredient is the first to taste your care in the process; skip it, and the bite loses its signature coconut bite.
The Texture Crew
Whole almonds are the crunchy hero of these bites. They provide a satisfying snap that contrasts with the smooth chocolate coating. Toasting the almonds before adding them brings out a nutty aroma and enhances their flavor. If you’re short on almonds, chopped pistachios or walnuts can add a different crunch, but the classic almond flavor remains the most beloved. Remember, the almonds must be whole; chopped pieces will melt into the chocolate and lose that essential crunch.
The Unexpected Star
Maple syrup is the secret weapon that ties everything together. It creates a glossy glaze that coats the coconut, giving each bite a shiny, irresistible finish. The syrup also balances the sweetness of the powdered sugar, preventing the treats from becoming cloyingly sweet. A splash of vanilla extract adds depth and aroma, but it’s optional if you want a pure maple taste. If you can’t find pure maple syrup, a high‑quality light corn syrup works as a close substitute, though the flavor profile will shift slightly.
The Final Flourish
Semi‑sweet chocolate chips melt into a silky coating that sets into a glossy finish. The chocolate’s slight bitterness counteracts the maple’s sweetness, creating a well‑rounded flavor. Use high‑quality chocolate chips to avoid a bitter aftertaste. If you prefer a richer chocolate, opt for dark chocolate chips; the bitterness will be more pronounced but still harmonious. The chocolate is the final touch that makes these bites feel like a decadent dessert while staying light.
Everything's prepped? Good. Let's get into the real action and watch these bites come together.
The Method — Step by Step
- In a small saucepan, combine the maple syrup and powdered sugar over low heat. Stir constantly until the mixture becomes glossy and the sugar dissolves completely. The mixture should not bubble; a gentle simmer is all it needs. Once smooth, remove from heat and let it cool slightly. This glaze will coat the coconut and almonds, so keep it at a manageable temperature.
- While the glaze cools, toast the whole almonds in a dry skillet over medium heat for about 3 minutes, shaking the pan occasionally. The almonds should turn golden and emit a nutty aroma. Let them cool on a parchment sheet; this prevents them from becoming soggy later. The toasted almonds will add a crunchy texture that contrasts with the chewy coconut.
- In a large bowl, combine the sweetened coconut flakes, cooled almonds, and the maple glaze. Toss gently until the coconut and almonds are evenly coated. The mixture should look like a well‑mixed, slightly sticky dough. Be careful not to overmix; you want the glaze to cling to each piece, not dissolve into a paste.
- Line a baking sheet with parchment paper. Using a tablespoon, scoop the coconut‑almond mixture and roll it into bite‑sized balls, placing them on the sheet. The balls should be about 1.5 inches in diameter. This size ensures each bite has a balanced ratio of coconut, almond, and chocolate.
- Melt the semi‑sweet chocolate chips in a microwave-safe bowl in 30‑second increments, stirring after each, until completely smooth. The chocolate should be fluid but not runny; it should coat the bites without dripping excessively. If the chocolate thickens too much, add a teaspoon of neutral oil to thin it out.
- Dip each coconut‑almond ball into the melted chocolate, using a fork to lift and let the excess drip back into the bowl. Place the coated balls back on the parchment sheet. The chocolate should set quickly; if it begins to harden, you can give them a gentle shake to keep the coating even.
- Allow the chocolate to set at room temperature for 10 minutes, then transfer the baking sheet to the refrigerator for an additional 20 minutes. The chocolate should be firm yet still slightly pliable, giving the bites a satisfying snap when bitten.
- Once set, remove the bites from the fridge and let them sit at room temperature for 5 minutes before serving. The chocolate will soften slightly, making the bite easier to chew. Store any leftovers in an airtight container at room temperature for up to a week.
That's it — you did it. But hold on, I've got a few more tricks that'll take this to another level. These insider tips will help you avoid common pitfalls and elevate the flavor profile even further.
Insider Tricks for Flawless Results
The Temperature Rule Nobody Follows
Chocolate can be temperamental; the key is to keep it just below 88°F (31°C) for semi‑sweet chocolate. This temperature ensures a glossy finish and a satisfying snap. If you’re not a temperature‑meter user, let the chocolate cool for a few minutes after microwaving, then test with a finger. The chocolate should feel smooth to the touch without being too soft. This trick guarantees a professional look and feel.
Why Your Nose Knows Best
Smell is your best ally when checking the glaze. A slightly caramelized aroma indicates that the maple syrup has integrated well with the powdered sugar. If it smells too sweet or raw, give it a few more minutes to simmer. The scent will change as the sugar dissolves and the glaze thickens. Trust your nose; it will guide you to the perfect glaze consistency.
The 5-Minute Rest That Changes Everything
After dipping the bites in chocolate, let them rest for exactly 5 minutes before refrigerating. This brief pause allows the chocolate to set slightly, reducing the chance of drips when you transfer them to the fridge. It also lets the glaze settle, ensuring a uniform coating. Skipping this step can lead to uneven chocolate layers and a less polished look.
Use a Silicone Mat for Easy Cleanup
A silicone baking mat keeps the chocolate from sticking to the parchment, making cleanup a breeze. It also provides a non‑stick surface that ensures the bites stay in place while the chocolate sets. If you don’t have a silicone mat, double‑layer parchment paper and lightly oil the top layer to mimic the same effect.
Keep the Chocolate Cool but Not Frozen
If you store the chocolate‑coated bites in a very cold environment, the chocolate can become brittle. Aim for a fridge temperature of 35-40°F (1-4°C). This keeps the chocolate firm yet pliable, giving the bites a delightful snap without being too hard to bite. Adjust your fridge settings if you find the chocolate too soft or too brittle.
Creative Twists and Variations
This recipe is a playground. Here are some of my favorite ways to switch things up: the variations below will surprise your taste buds and keep your guests guessing.
Chocolate‑Covered Peanut Butter Bites
Swap the almonds for creamy peanut butter chips and add a pinch of sea salt. The salty‑sweet combo creates a new flavor dimension. The peanut butter gives a smoother texture that melts in the mouth. This variation is perfect for peanut lovers and adds a protein boost.
Dark Chocolate & Sea Salt Delight
Use dark chocolate chips instead of semi‑sweet to introduce a richer, slightly bitter note. Finish each bite with a dusting of flaky sea salt. The contrast between the dark chocolate’s depth and the salty finish is addictive. This version is ideal for a sophisticated snack or a dessert that feels indulgent.
Matcha Coconut Crunch
Add a tablespoon of matcha powder to the glaze for a subtle earthy flavor. The green tea undertone pairs beautifully with the coconut and chocolate. The color contrast also makes the bites visually striking. This twist is great for those who love a hint of green tea.
Spiced Maple Bites
Introduce a pinch of cinnamon and a dash of cayenne to the maple glaze for a warm, spicy kick. The heat balances the sweetness, creating a complex flavor profile. This variation is especially delightful during the fall and winter months.
Almond Butter & Coconut Fusion
Replace whole almonds with almond butter for a creamier texture. Stir the almond butter into the glaze to create a silky coating. The result is a bite that melts instantly, combining the nutty flavor of almond butter with the sweet coconut base. This version is great for a quick, decadent snack.
Orange Zest Surprise
Grate a teaspoon of orange zest into the glaze for a bright citrus note. The zest adds a refreshing lift that cuts through the sweetness. The aroma is invigorating, and the flavor is a delightful contrast. This twist works wonderfully during spring and summer.
These variations keep the core of the recipe intact while offering fresh takes that suit any mood or occasion. Feel free to experiment with spices, nuts, or chocolate types to create your own signature almond joy bite.
Storing and Bringing It Back to Life
Fridge Storage
Store the bites in an airtight container at room temperature for up to a week. Keep them in a cool, dry place away from direct sunlight. The chocolate will stay firm, and the coconut will remain chewy. If you notice the chocolate softening, place the container in the fridge for a few hours.
Freezer Friendly
For longer storage, freeze the bites in a single layer on a parchment sheet, then transfer them to a freezer bag. They’ll keep well for up to three months. When ready to serve, let them thaw at room temperature for 10 minutes. The texture will be slightly softer but still delicious.
Best Reheating Method
To revive a frozen bite, microwave on low for 10-15 seconds, then let it sit for a minute. Add a splash of water to the bowl when melting the chocolate to create steam, which keeps the chocolate silky. If you’re reheating fresh bites, a quick dip in warm water for 5 seconds will soften the chocolate and make it easier to bite. These methods keep the chocolate glossy and the coconut chewy.