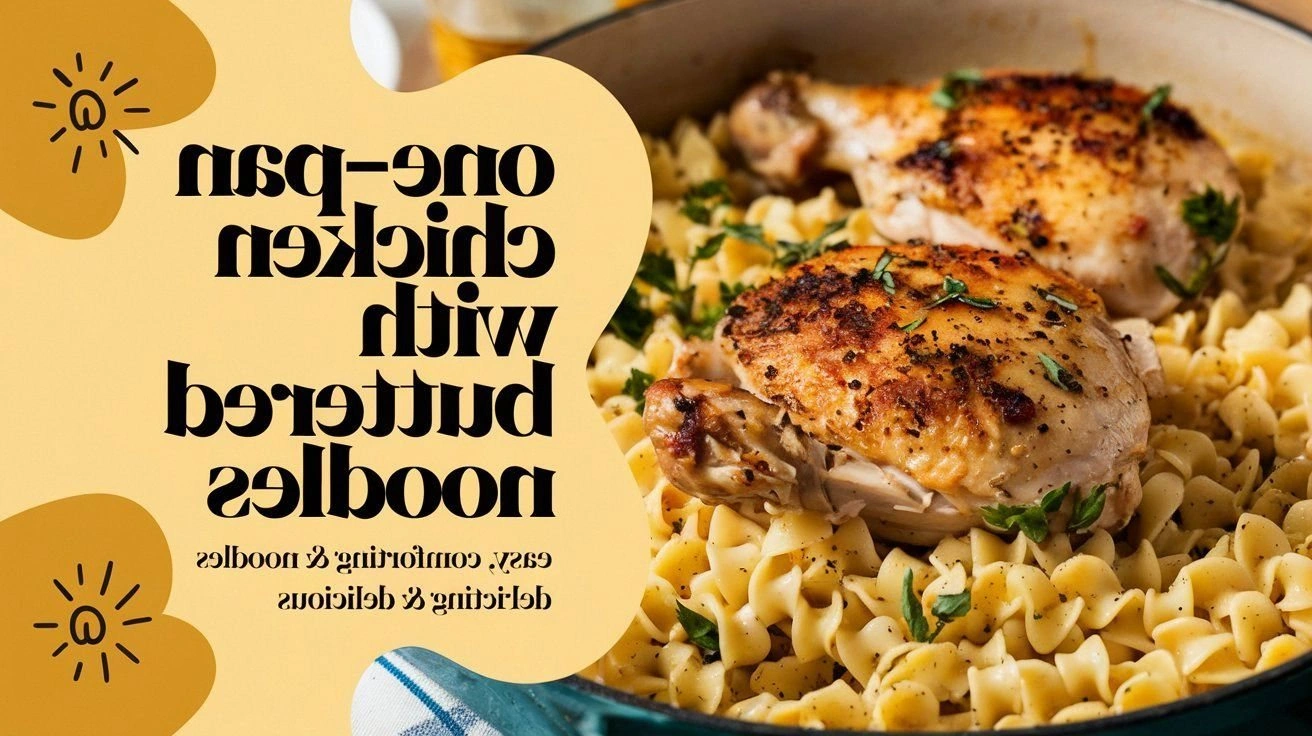
Introduction
Picture this: it’s a rainy Thursday evening, the fridge is a barren wasteland, and you’re staring at a lonely chicken breast that feels as bland as a beige wall. You’ve tried every quick fix—one pan, one pot, one pan of chicken with buttered noodles—and each time the result was either too dry or too soggy. I was in that exact spot, clutching a recipe that promised comfort but delivered disappointment. That night, I decided to flip the script and create a version that would make even the most skeptical taste buds do a double take.
As I whisked the butter into a hot pan, the kitchen filled with a buttery aroma that made my mouth water before the first bite even touched my tongue. The sound of sizzling garlic and onions was like a tiny orchestra, each bubble a note of anticipation. When the chicken finally browned, the golden crust crackled like crisp paper, and the steam carried the scent of fresh herbs that promised depth. The noodles, soaked in a velvety sauce, glistened under the kitchen lights, each strand coated with a glossy, cheese-laden sheen that looked as good as it tasted.
What makes this version stand out? It’s the deliberate layering of textures and flavors that turns a simple one-pan meal into an unforgettable dinner. I’ve taken the classic comfort dish and injected a touch of culinary science—precise temperatures, balanced acidity, and the right amount of butter—to create a sauce that coats the pasta like velvet and a chicken that stays juicy without drying out. I dare you to taste this and not go back for seconds; the first bite will have you reaching for the second, and the third will leave you wondering how you ever cooked without this method.
Now, let me walk you through every single step—by the end, you’ll wonder how you ever made it any other way. The secret lies in the timing, the order of ingredients, and a few tricks that only a seasoned cook would know. Get ready to elevate your weeknight dinner game, because this is hands down the best version you’ll ever make at home.
What Makes This Version Stand Out
- Flavor Depth: By layering aromatics—garlic, onion, thyme, oregano, and smoked paprika—before introducing the chicken, the sauce develops a complex profile that balances savory, smoky, and herbal notes. This depth transforms a simple dish into a culinary revelation.
- Texture Balance: The combination of a crispy chicken exterior with a silky, cheesy sauce and al dente noodles creates a harmony that satisfies every bite. Each element complements the others without competing.
- One-Pan Simplicity: The entire meal cooks in a single pan, reducing cleanup to a single dish while maintaining a sophisticated flavor profile. This is ideal for busy nights and for those who hate washing many pots.
- Ingredient Quality: Using high‑grade butter, fresh herbs, and aged Parmesan elevates the dish beyond the average take‑away. The quality of each component is the backbone of the final taste.
- Crowd Appeal: Whether you’re feeding a family or entertaining guests, this dish is a crowd‑pleaser. The comforting, buttery sauce and tender chicken are universally loved.
- Make‑Ahead Potential: The dish can be prepared ahead of time and reheated without losing flavor, making it a perfect option for meal‑prep enthusiasts.
- Versatility: The base can be adapted for different proteins or dietary preferences—swap chicken for shrimp, use gluten‑free noodles, or replace dairy with a plant‑based alternative.
Alright, let’s break down exactly what goes into this masterpiece…
Inside the Ingredient List
The Flavor Base
Olive Oil: A neutral oil that helps the butter melt evenly and prevents scorching. It also carries the aromatics’ flavors without overpowering them. If you’re watching sodium, use a light, unseasoned olive oil.
Garlic: Fresh garlic provides a sharp, pungent kick that mellows into sweetness once sautéed. Mince finely to release maximum flavor. If you’re allergic, substitute with 1 teaspoon of garlic powder, but the freshness will be lost.
Onion: Diced onions add a subtle sweetness and body to the sauce. Cook until translucent to draw out their natural sugars, creating a caramelized base that enriches the dish. A pinch of salt during sautéing helps break down the onion’s fibers.
The Texture Crew
Chicken Thighs (or Breasts): Chicken thighs are chosen for their higher fat content, which keeps the meat juicy and flavorful. If you prefer leaner meat, use breasts but reduce cooking time to avoid drying out. For a budget option, thighs are more affordable and forgiving.
Flour: A light dusting of flour creates a subtle roux that thickens the sauce. Use all‑purpose flour for best results; gluten‑free flour can be substituted if needed. Sprinkle evenly to avoid clumps.
The Unexpected Star
Heavy Cream: The cream gives the sauce its luxurious mouthfeel and balances the acidity of the broth. Use full‑fat cream for richness; low‑fat will result in a thinner sauce.
Chicken Broth: The broth provides depth and helps the sauce stay light. Opt for low‑sodium broth to control salt levels; homemade broth adds an extra layer of flavor.
The Final Flourish
Parmesan Cheese: Freshly grated Parmesan contributes a nutty, umami punch that elevates the entire dish. Grated on demand ensures maximum flavor; pre‑grated cheese can lose sharpness.
Dried Herbs (Thyme, Oregano): These herbs bring earthy tones that complement the chicken’s natural flavor. Use dried herbs for convenience, but fresh herbs will provide a brighter finish.
Smoked Paprika: A half teaspoon of smoked paprika adds a subtle smokiness that mimics grilled flavors. If you prefer a milder taste, reduce to 1/4 teaspoon.
Everything's prepped? Good. Let's get into the real action…
The Method — Step by Step
- Prep the Chicken: Pat the chicken thighs dry with paper towels. Season both sides generously with salt, pepper, and half of the dried thyme. Let them sit at room temperature for 10 minutes; this helps them cook evenly.
- Heat the Pan: Place a large, heavy skillet over medium‑high heat. Add the olive oil and let it shimmer. Then slide in the chicken thighs, skin‑side down if using skin‑on thighs. Sear for 5–6 minutes until golden brown and the skin is crisp. Flip and sear the other side for 4 minutes. Remove from the pan and set aside.
- Sauté Aromatics: In the same pan, reduce heat to medium and add the butter. Once melted, toss in the minced garlic and diced onion. Cook, stirring frequently, until the onions become translucent and the garlic is fragrant—about 3 minutes. The butter should turn a golden‑brown hue, signaling that the flavor base is ready.
- Build the Sauce: Sprinkle the flour over the aromatics and stir constantly for 1 minute to form a roux. This will thicken the sauce and eliminate any raw flour taste. Gradually whisk in the heavy cream and chicken broth, ensuring a smooth consistency. Bring to a gentle simmer; the sauce should thicken slightly and coat the back of a spoon.
- Add the Chicken: Return the seared chicken to the pan, nestling it into the sauce. Reduce the heat to low, cover, and let the chicken simmer for 12–15 minutes, or until it reaches an internal temperature of 165°F (74°C). The sauce will deepen in color and flavor during this time.
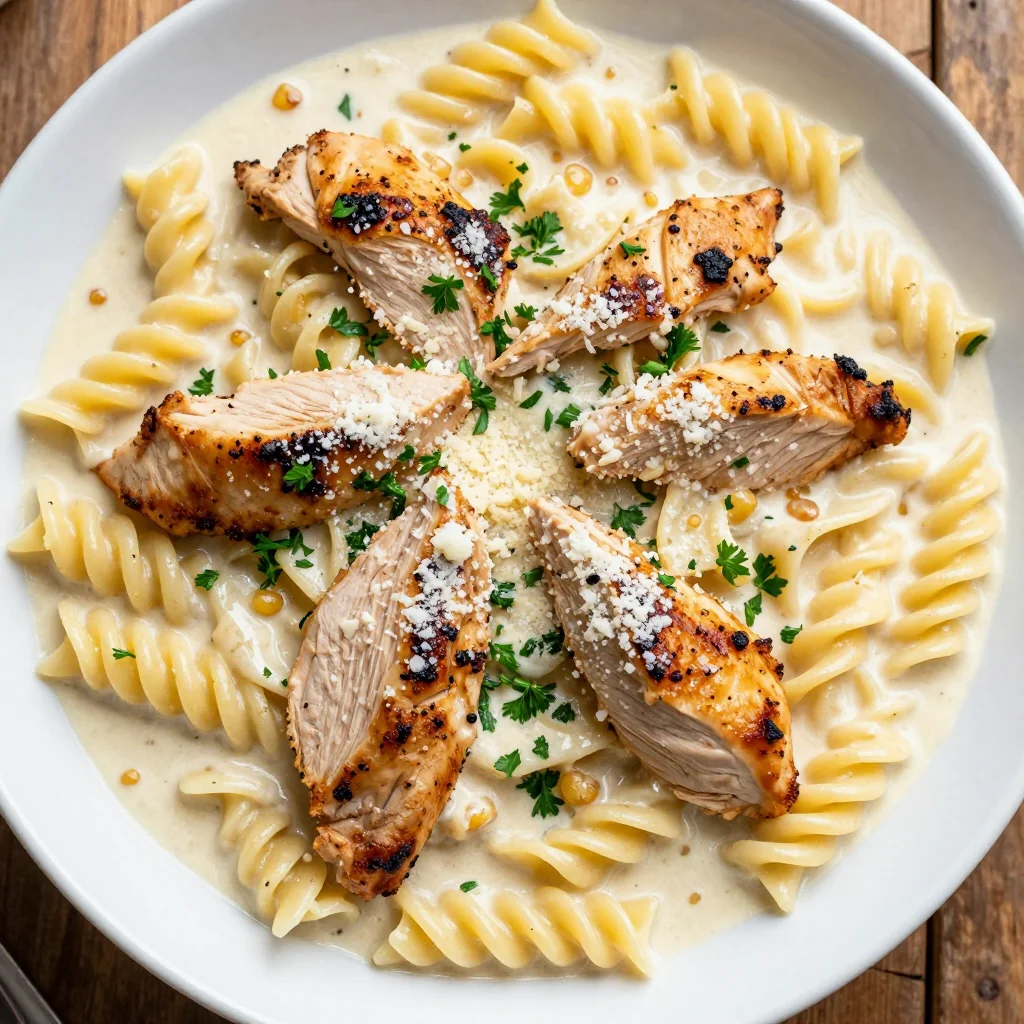
- Stir in Noodles: Add the cooked noodles to the pan, tossing them gently so they coat with the sauce. Sprinkle the grated Parmesan over the top and stir until the cheese melts, creating a silky, cohesive coating. This step is where the dish truly becomes a one‑pan masterpiece.
- Finish with Herbs: Sprinkle the remaining thyme, oregano, and smoked paprika over the dish. Stir to distribute the flavors evenly. The herbs will brighten the dish and add a fragrant finish.
- Garnish and Serve: Sprinkle chopped fresh parsley over the top for a pop of color and freshness. Serve hot straight from the pan, letting each spoonful carry the buttery, cheesy sauce and tender chicken. This is the moment of truth—taste the harmony and let the flavors unfold.
That's it — you did it. But hold on, I've got a few more tricks that'll take this to another level…
Insider Tricks for Flawless Results
The Temperature Rule Nobody Follows
Many cooks start cooking the chicken at high heat and then immediately switch to low. This creates uneven doneness and can leave the inside undercooked. Instead, start with medium‑high to get a good sear, then lower to medium‑low for the simmering phase. This controlled heat ensures the chicken stays juicy and the sauce develops depth without burning.
Why Your Nose Knows Best
Before you even taste the dish, the aroma will give you a hint of whether you’re on the right track. A nutty, buttery scent indicates the sauce is rich; a sharp, burnt smell signals you’ve over‑cooked the butter. Trust your nose; it’s a reliable guide to flavor development.
The 5-Minute Rest That Changes Everything
Once the chicken is removed from the pan, let it rest for five minutes. This allows the juices to redistribute, keeping the meat moist. If you cut into it immediately, the juices will escape, leaving the chicken dry.
Layering the Cheese
Instead of adding all the Parmesan at once, sprinkle a portion after the noodles are in and the rest at the end. This creates a layered cheese profile that intensifies flavor and gives the sauce a more complex texture.
Using Fresh Herbs vs. Dried
Fresh herbs add brightness, but dried herbs are more potent for long simmering. If you prefer a fresher finish, add half the herbs at the beginning and the rest at the end. This balances depth with aroma.
Stirring Technique
When adding the noodles, stir gently in a circular motion to coat each strand without breaking them. This ensures even distribution of sauce and prevents clumping.
Creative Twists and Variations
This recipe is a playground. Here are some of my favorite ways to switch things up:
Spicy Cajun Chicken
Swap the dried thyme and oregano for Cajun seasoning and add a pinch of cayenne pepper. The result is a smoky, spicy version that pairs wonderfully with a side of cornbread.
Vegetarian Mushroom Version
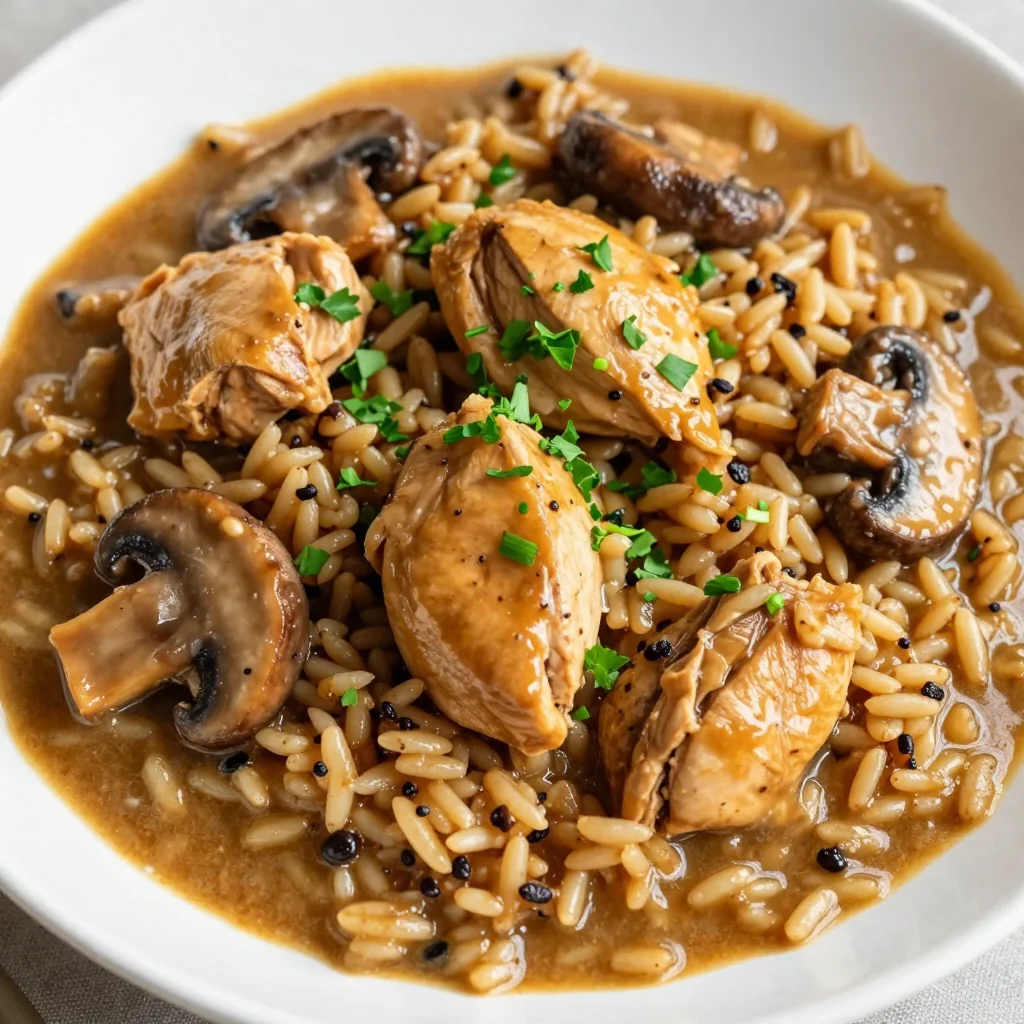
> Replace the chicken with sliced portobello mushrooms. Sauté them until browned and tender, then follow the same sauce steps. The mushrooms absorb the buttery sauce, creating a hearty, meat‑free dish.Gluten-Free Pasta
Use gluten‑free spaghetti or rice noodles to accommodate dietary restrictions. The sauce’s thickness will cling beautifully to the noodles, maintaining the dish’s integrity.
Low‑Fat Lightened Up
Use half‑fat butter and skim milk instead of heavy cream. The sauce will be lighter but still creamy. Add a splash of lemon juice at the end to brighten the flavor profile.
Herb‑Infused Chicken
Marinate the chicken in a mixture of olive oil, lemon zest, rosemary, and garlic for 30 minutes before cooking. This adds a fragrant, zesty layer of flavor that complements the buttery sauce.
Breakfast Breakfast Variation
Serve the dish over sautéed spinach and top with a poached egg. The runny yolk will mingle with the sauce, creating a rich, breakfast‑style meal.
Storing and Bringing It Back to Life
Fridge Storage
Cool the dish completely before transferring it to an airtight container. Store in the refrigerator for up to 3 days. The sauce may thicken slightly; reheat gently on the stove while adding a splash of milk to restore creaminess.
Freezer Friendly
Divide the dish into portions and place in freezer‑safe containers or zip‑top bags. Freeze for up to 2 months. Thaw overnight in the fridge and reheat as described above. The noodles may soften, but the flavor remains intact.
Best Reheating Method
Reheat over low heat, stirring frequently. Add a tiny splash of water or broth to keep the sauce moist. Finish with a sprinkle of fresh parsley for a fresh finish.